Slack
Chatlas, the Voice Atlas chatbot, can easily be integrated for you and your Atlas users on the business communication and collaboration platform, Slack. For this integration it is important that you have Admin privileges in your Slack Workspace.
Activate the Slack Integration in your Voice Atlas Account
Go to the Voice Atlas Web App.
Introduce your email and password into the form.
Click “OPEN” on the Atlas for which you would like to enable a chatbot.
Click the “Integrations” tab.
Under Slack click “OPEN”.
Click the “TOGGLE” in the top, right hand-corner to activate the integration.
Create your Voice Atlas Chatbot Slack App for use in Workspace
For this integration, you must have Administrative privileges in your Slack Workspace in order to create a Slack Application. After you have activated the Slack Integration in your Voice Atlas account, keep the Voice Atlas Slack Integration window open while you create your Slack App and add your app details.
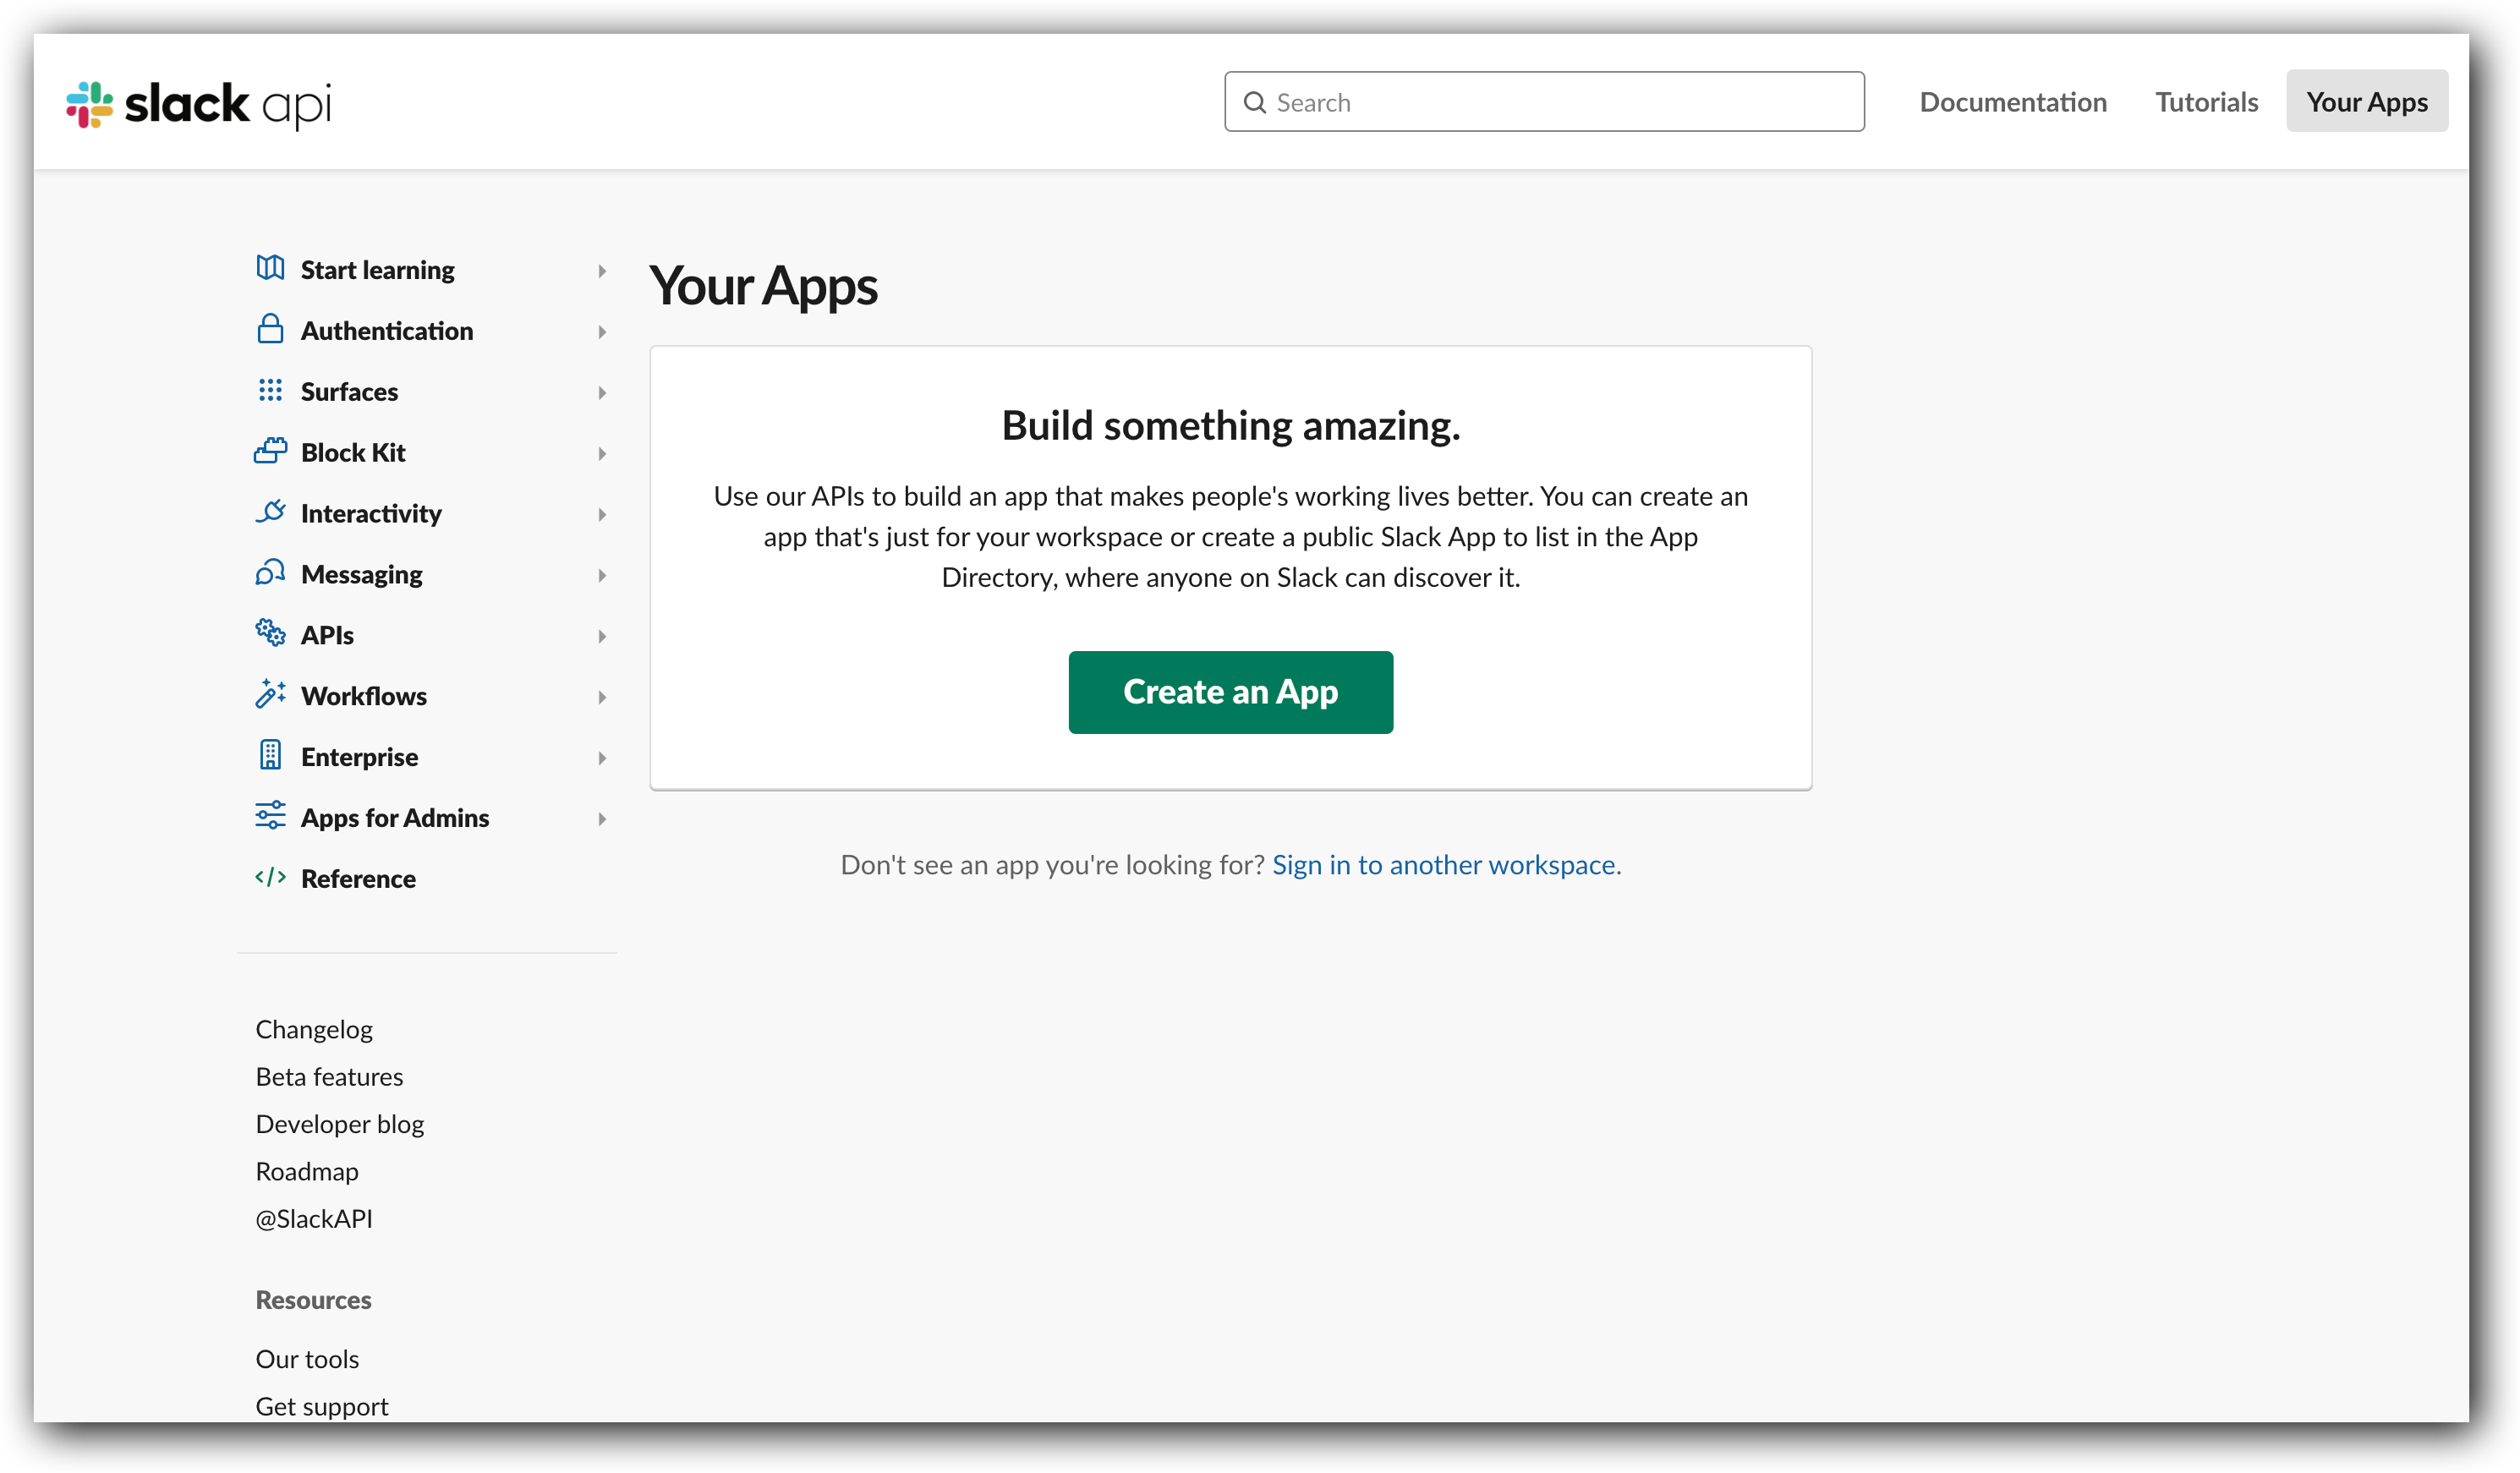
Step 1: After activating the Slack integration in your Voice Atlas account, continue under "Integration" where you will click on Slack Apps to create your Voice Atlas chatbot in your Slack application.
Step 2: Click on "Create an App" and choose to create an app from scratch.
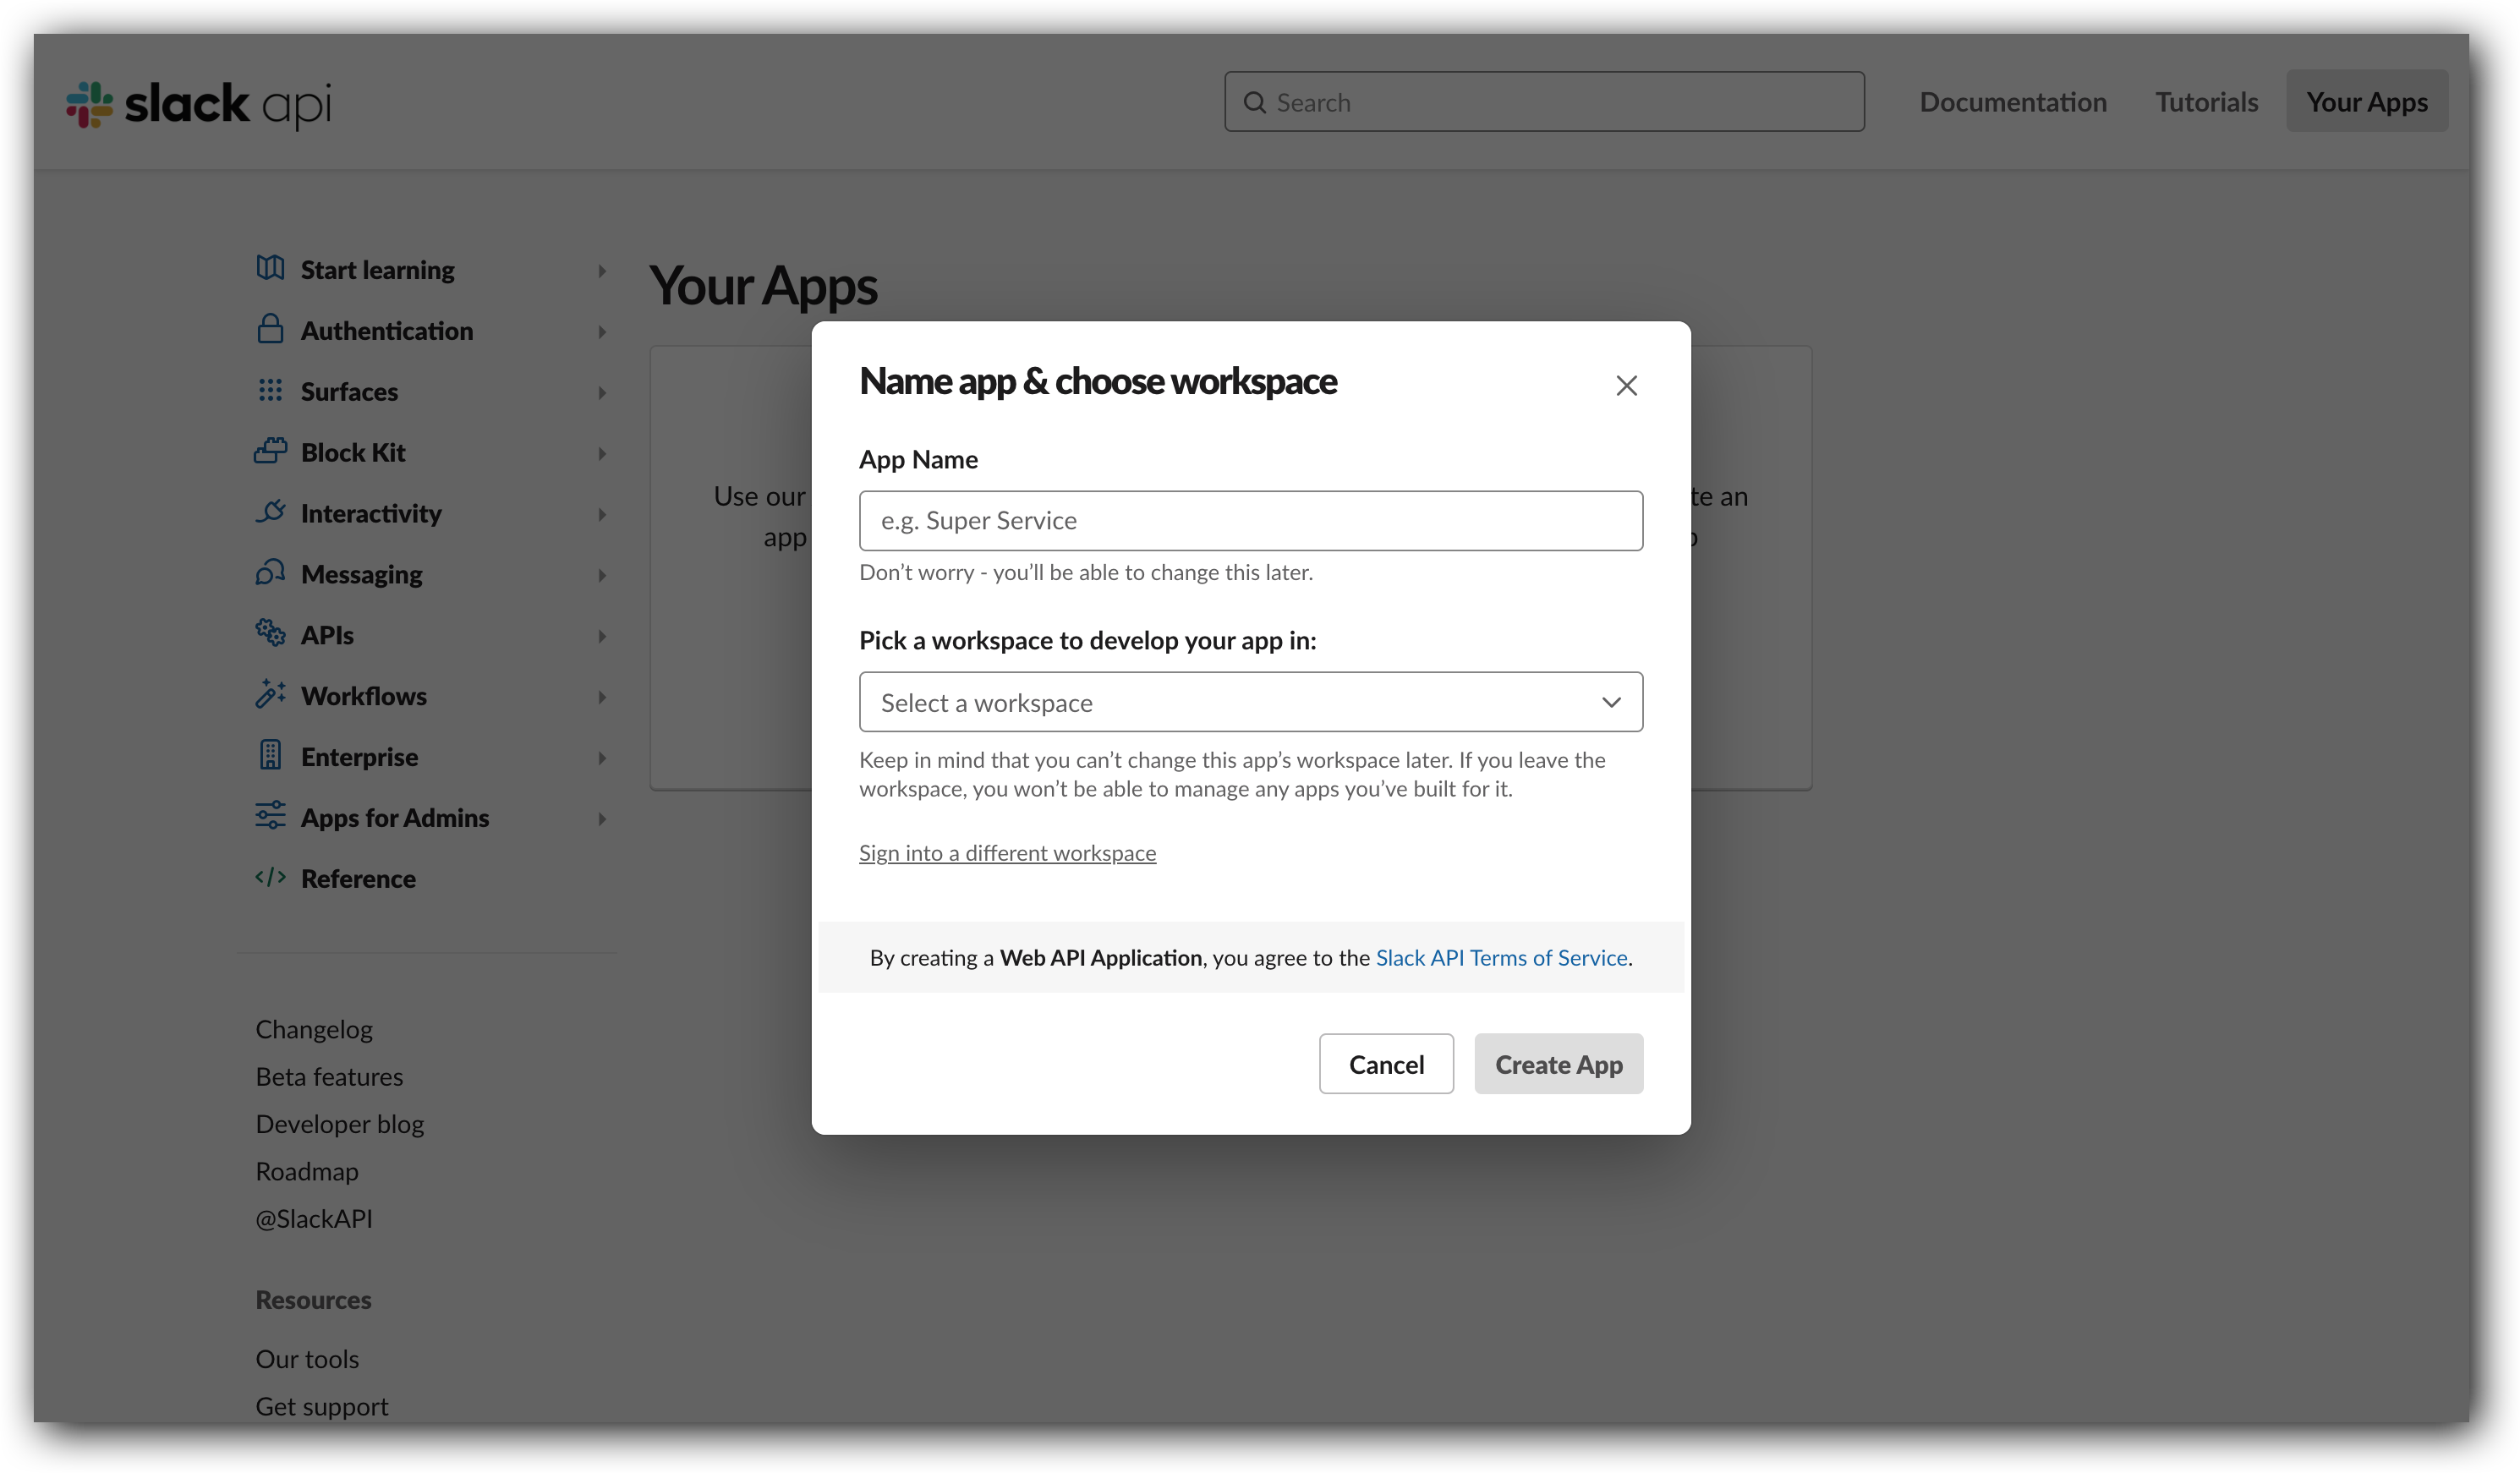
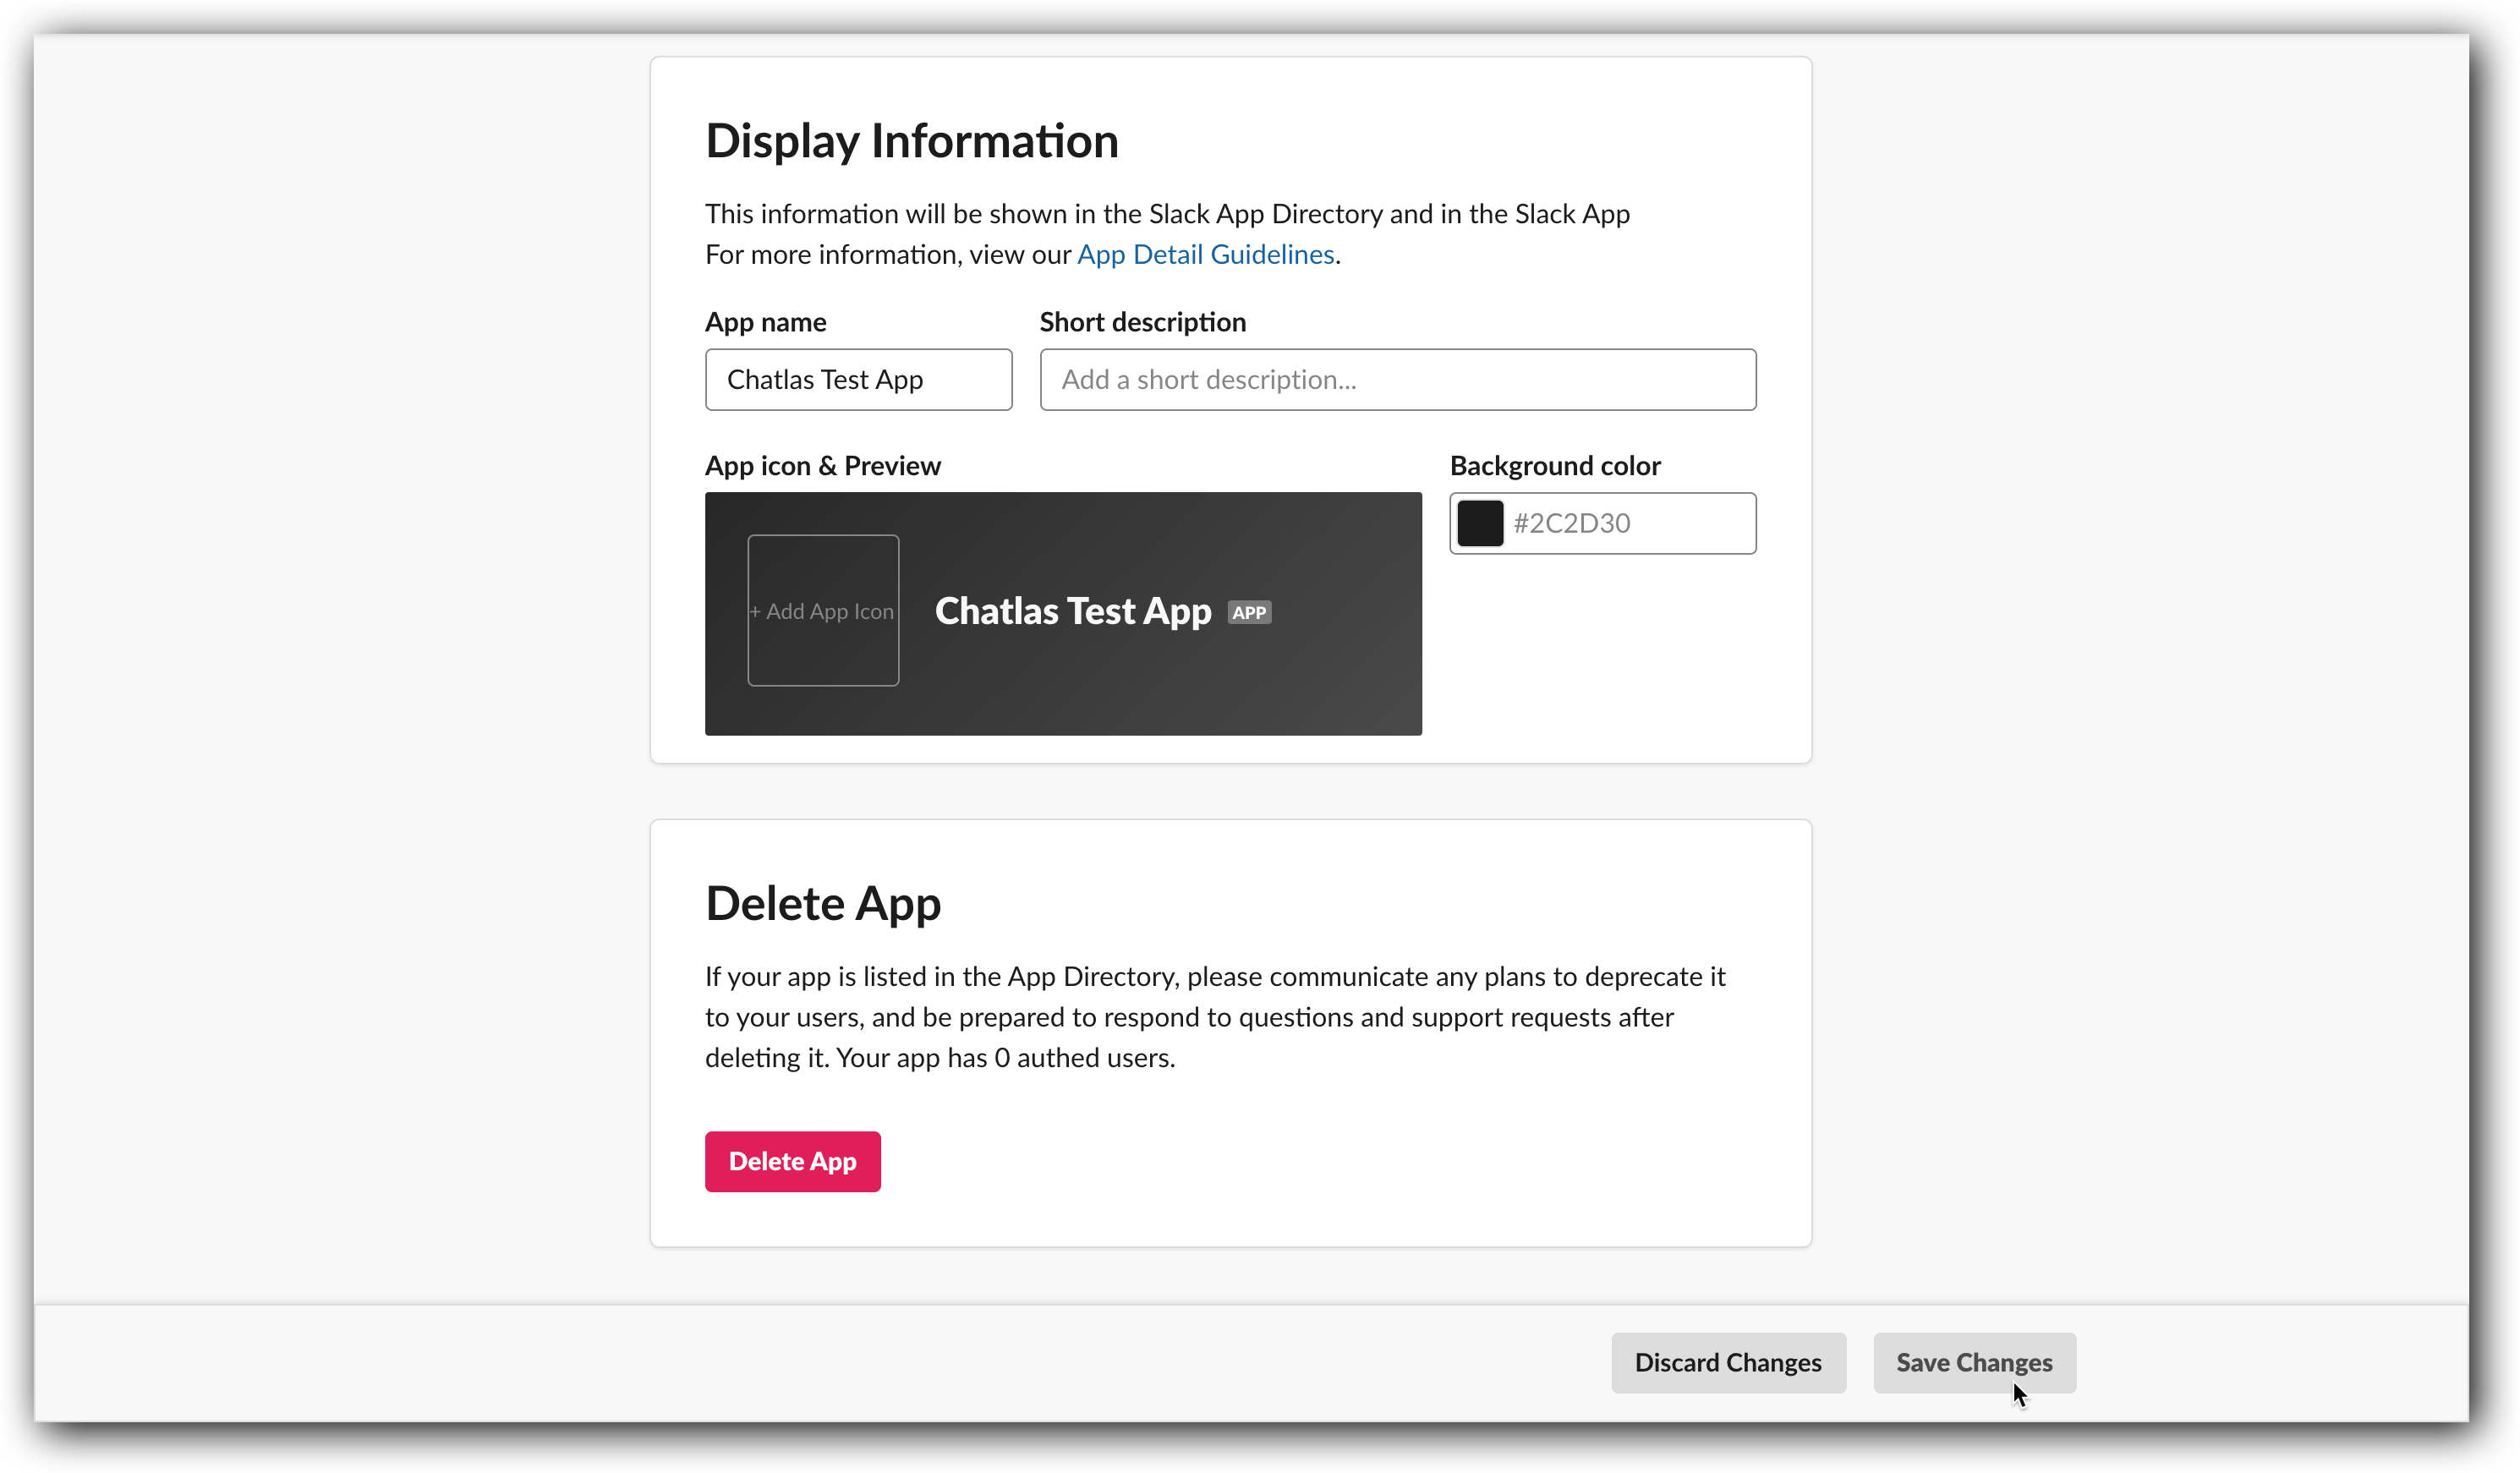
Step 3: Insert an “App Name” and then select from the “Development Slack Workspace” drop-down menu choose the Workspace where you want your app to be available. When finished click "Create App" to continue.
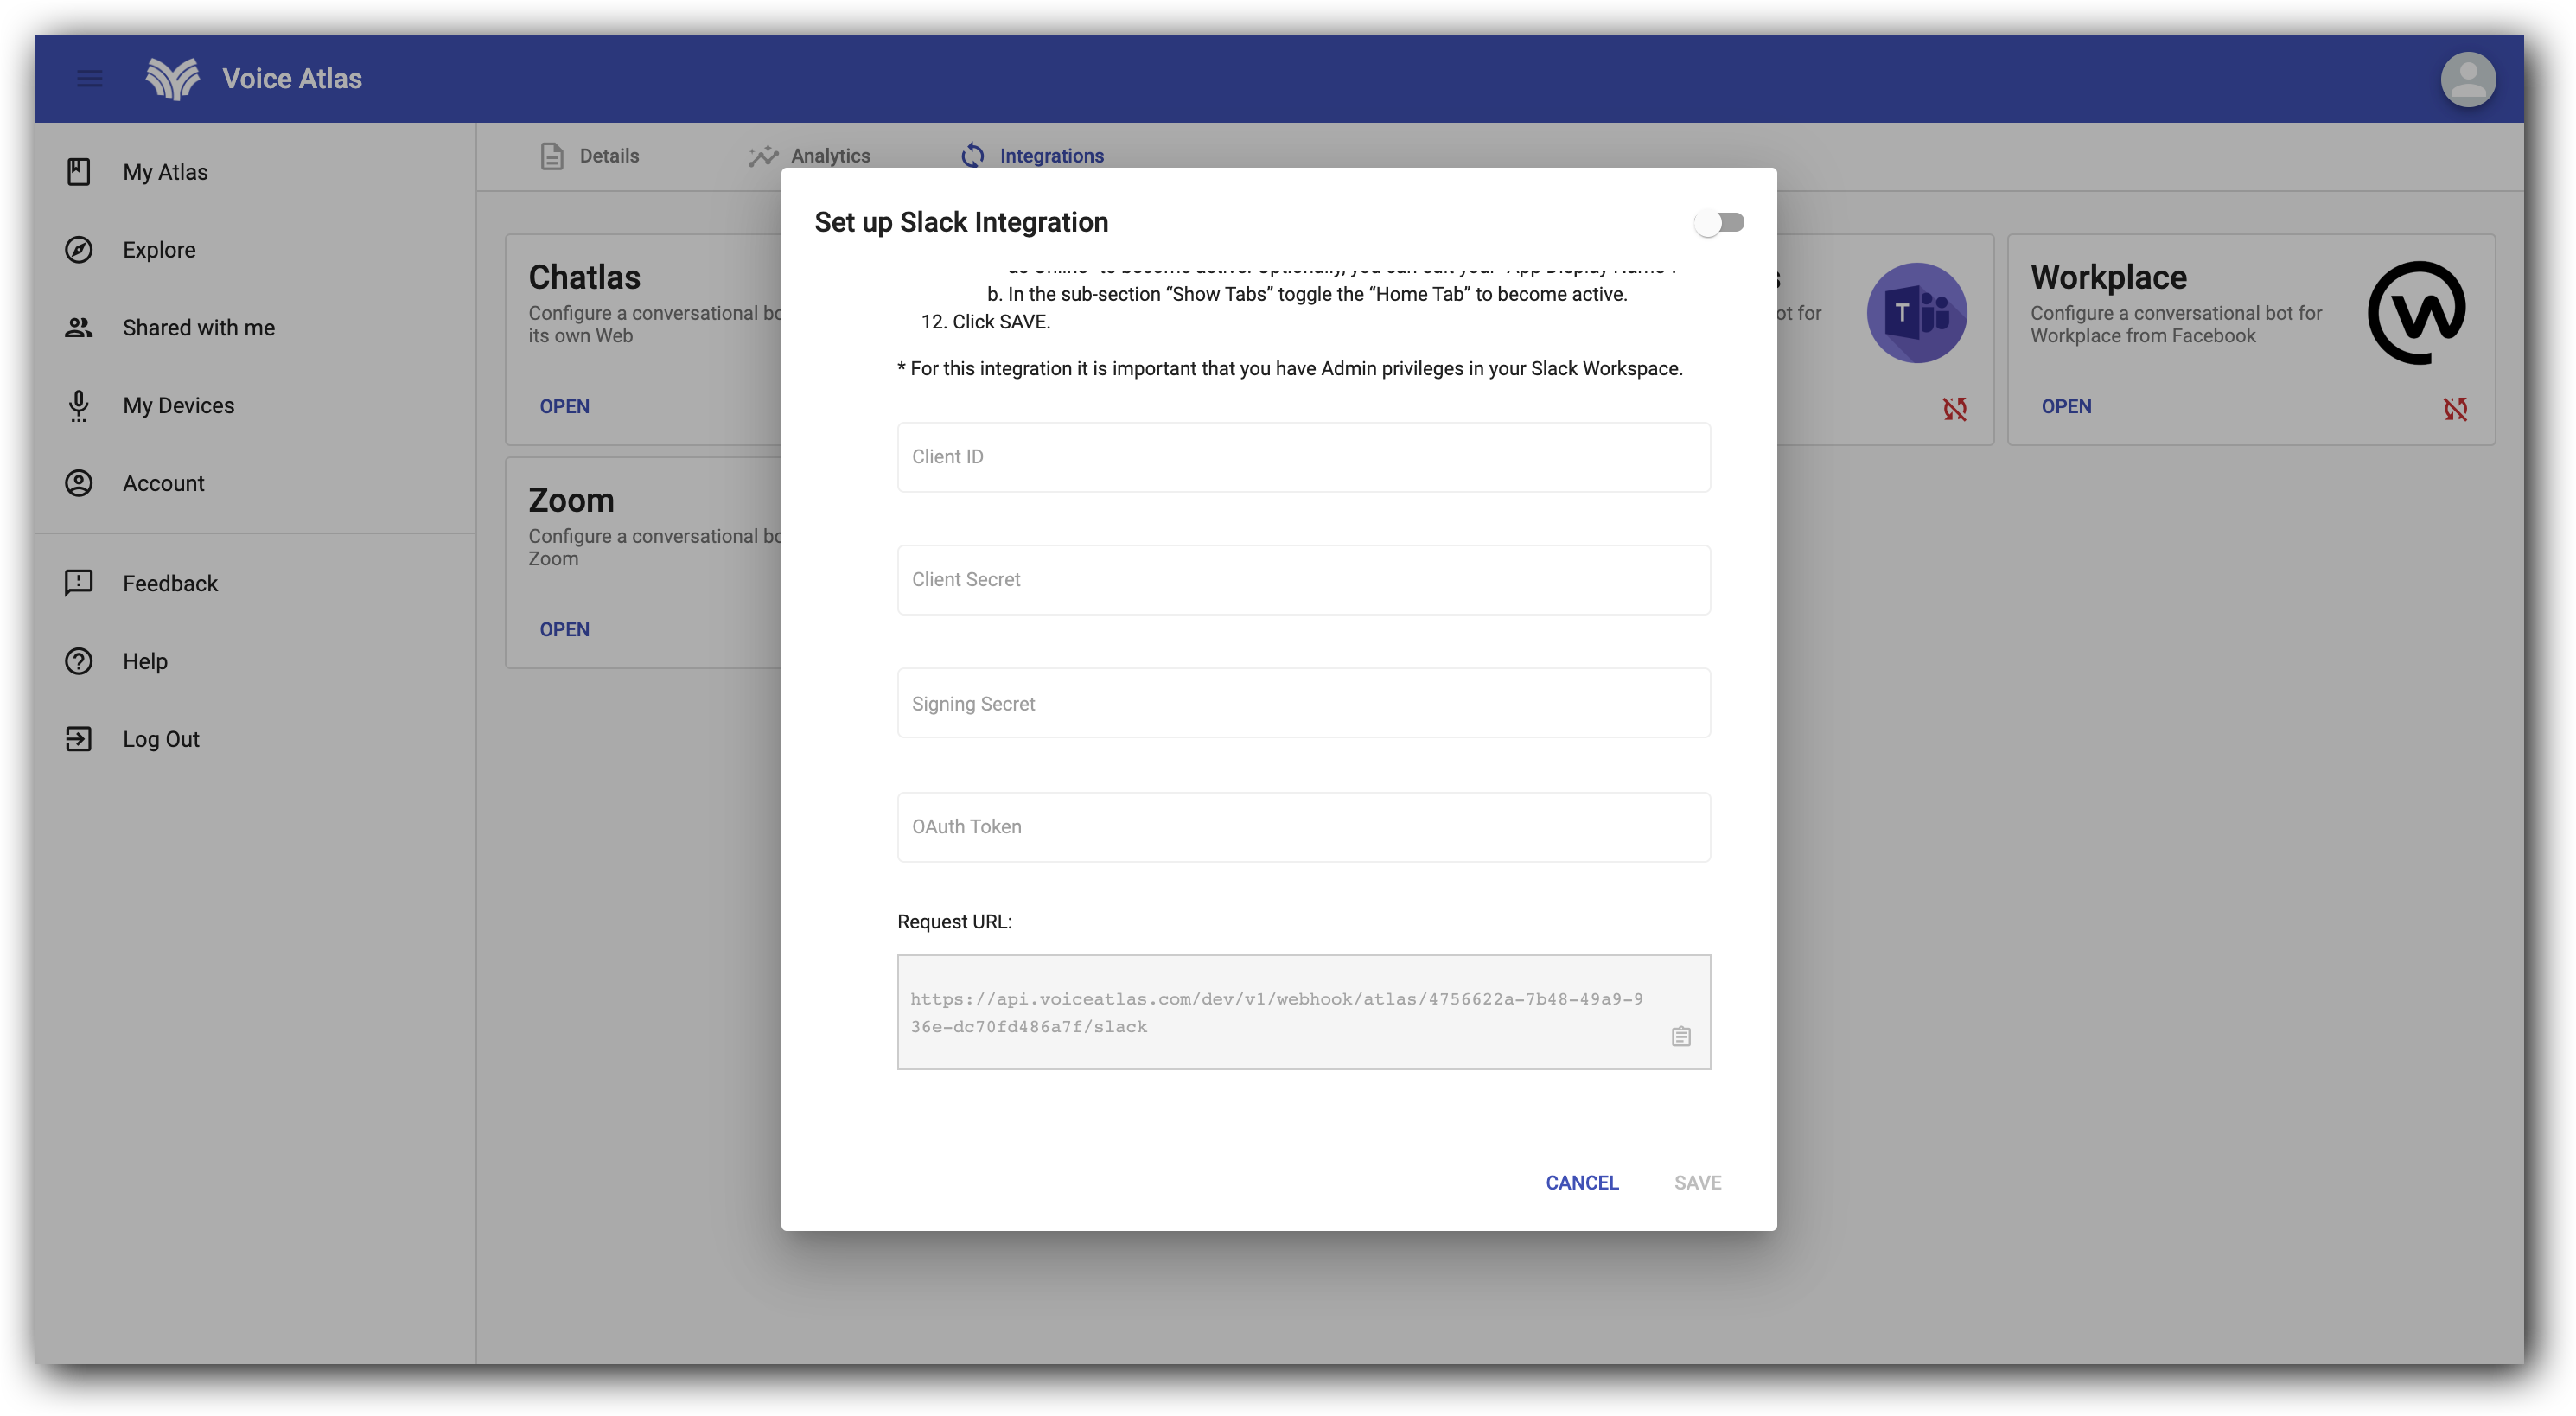
Step 4: Begin in the "Basic Information" section under "Settings" and scroll down to the "App Credentials".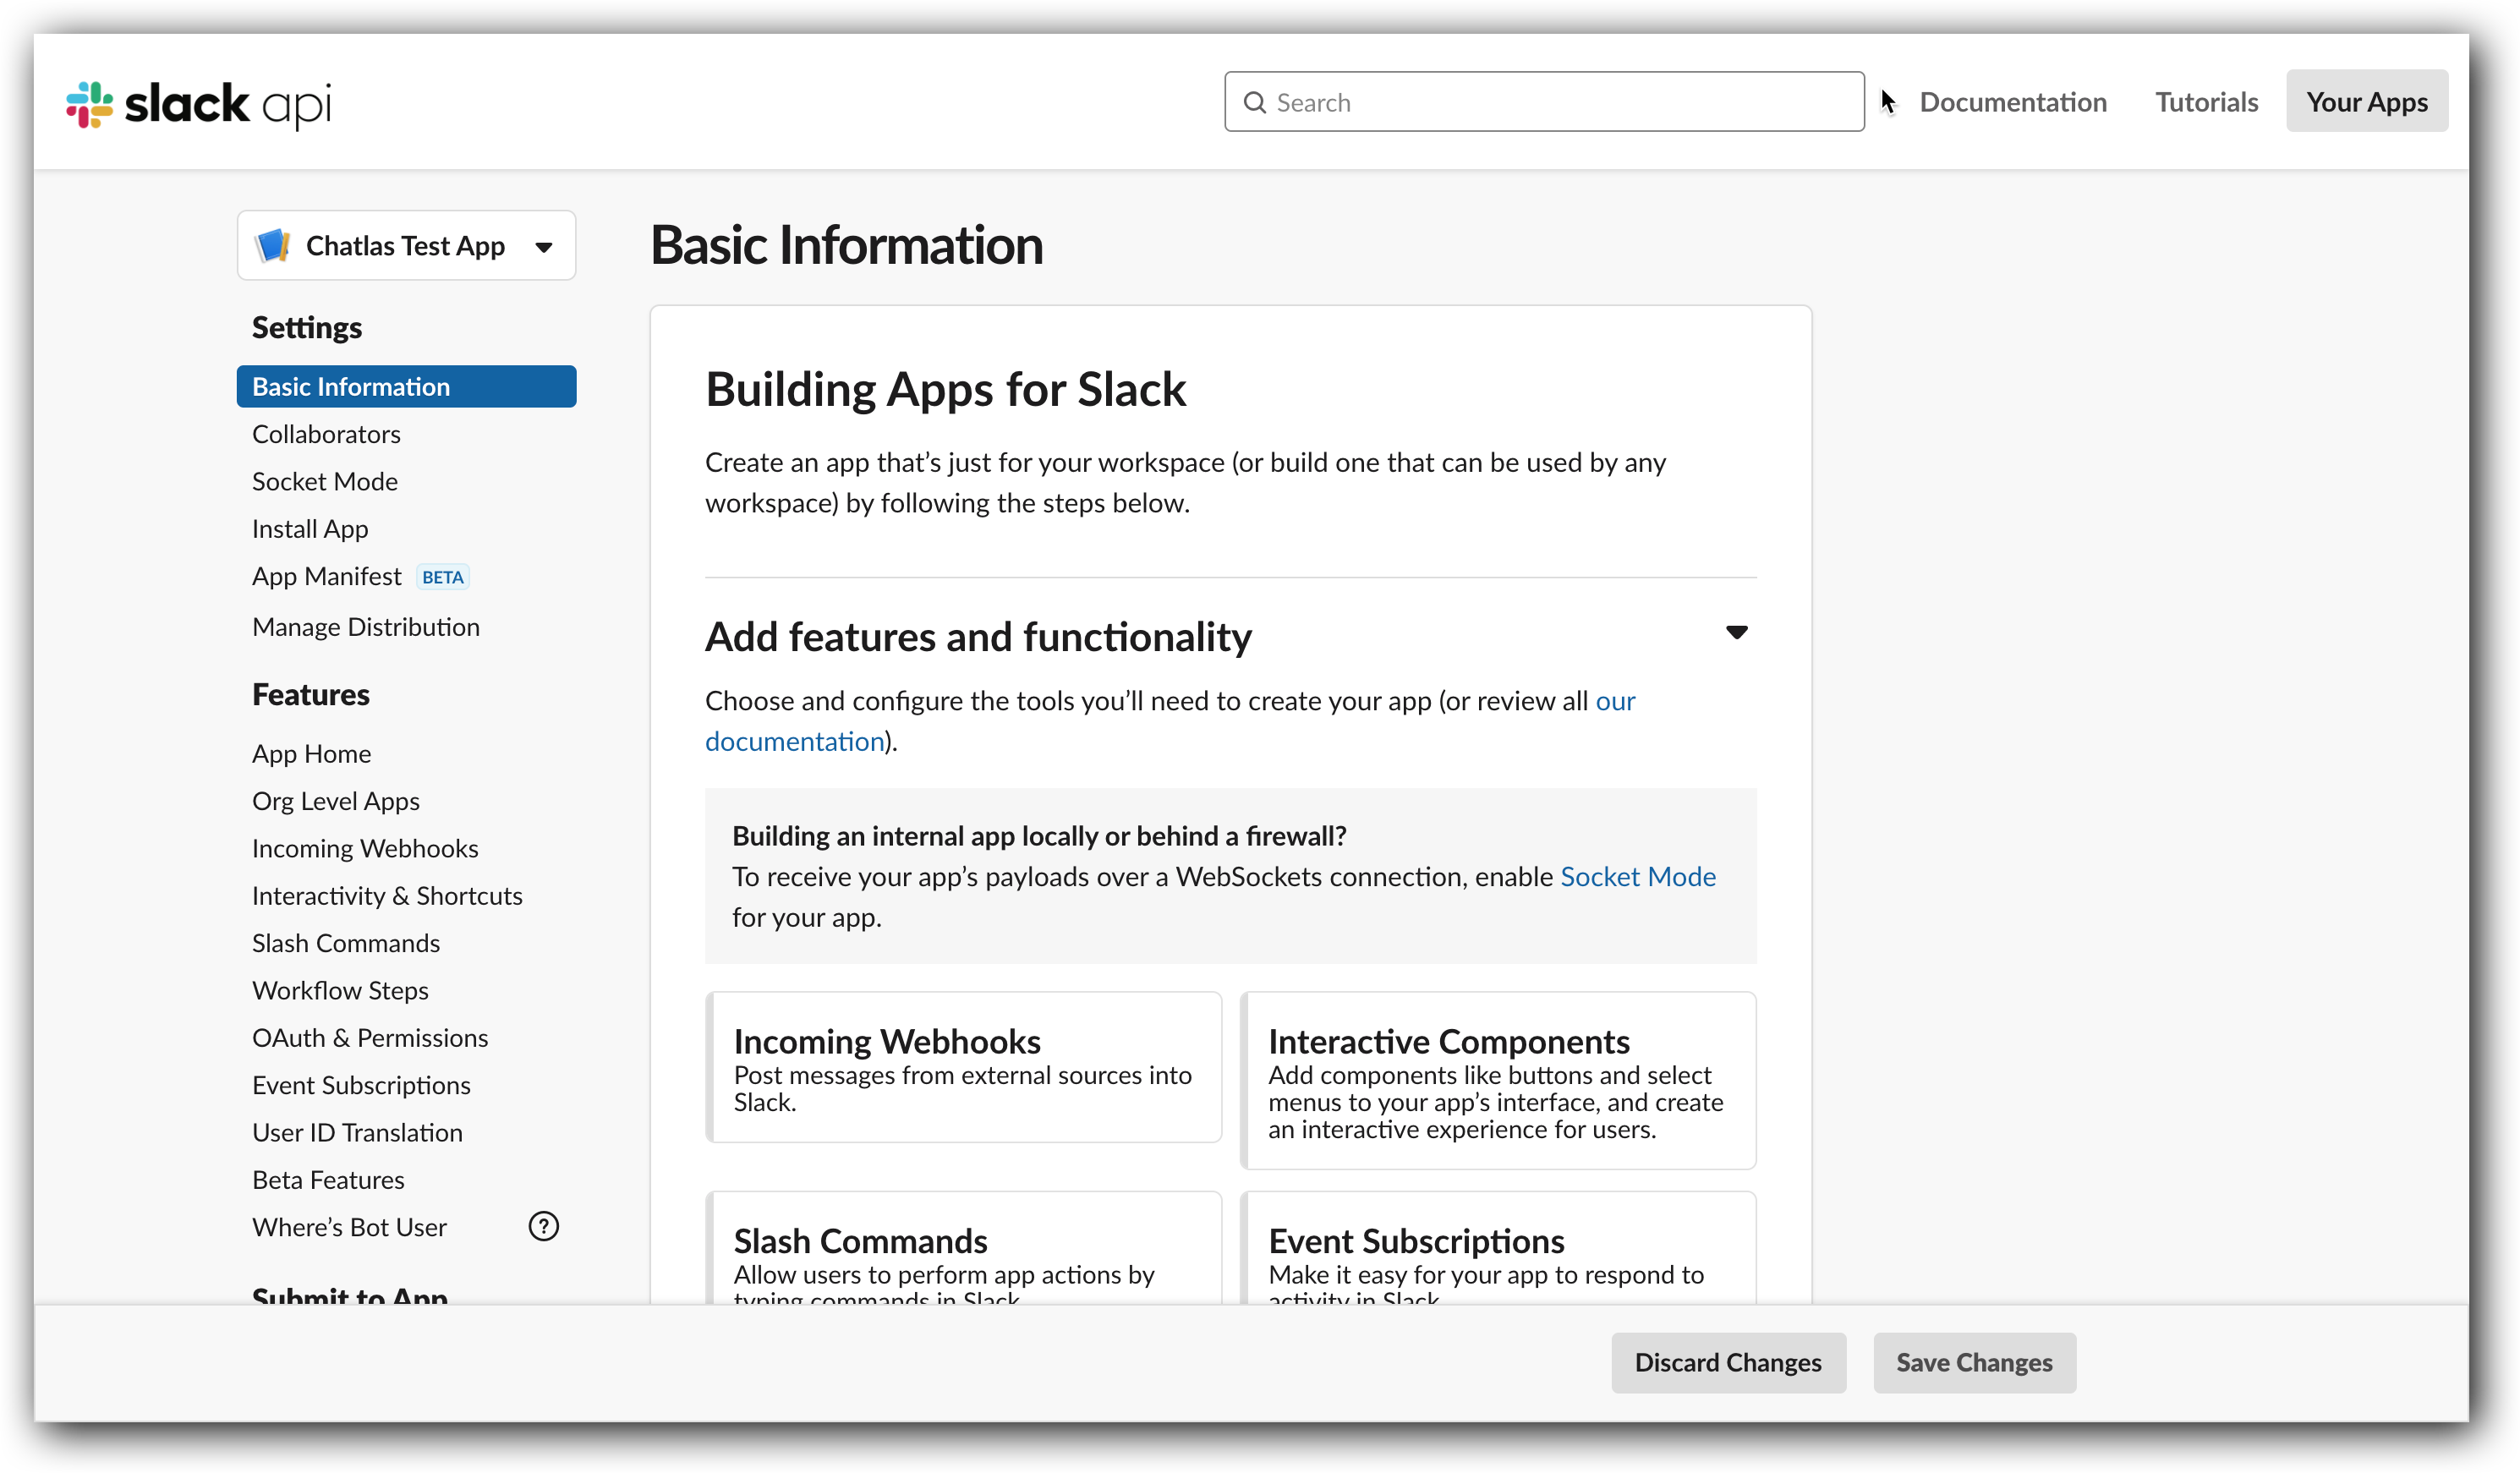
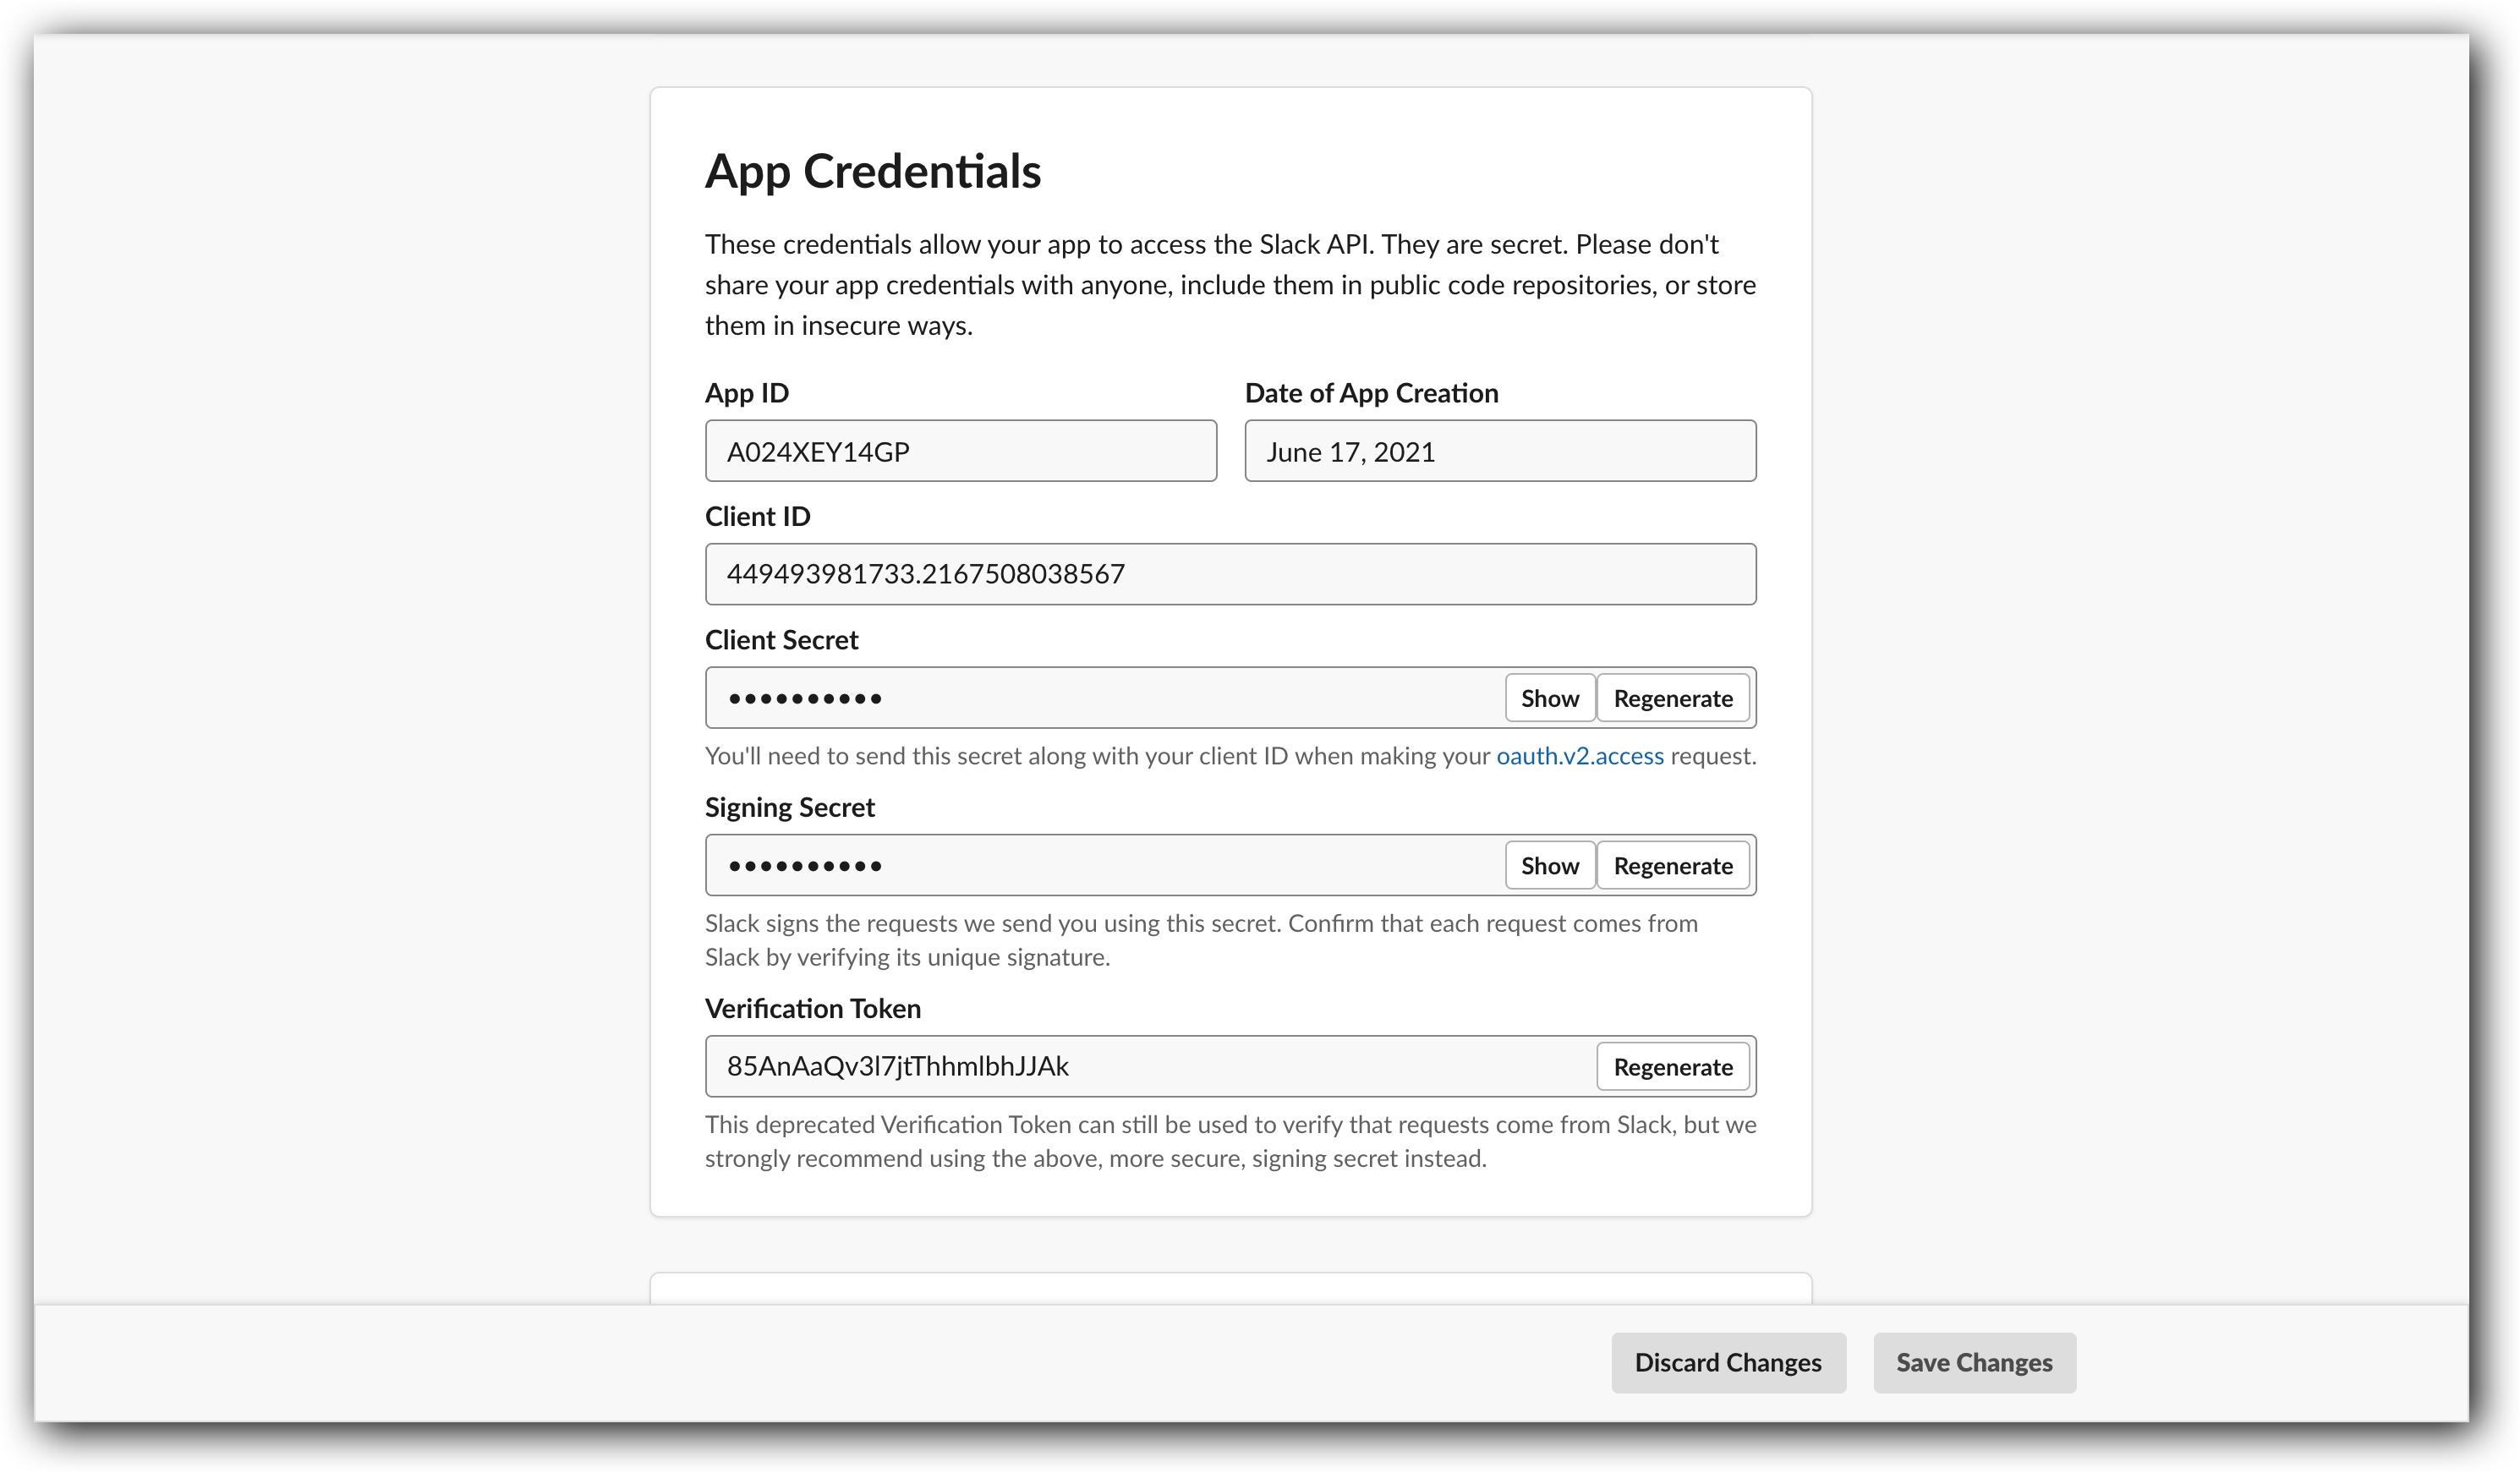
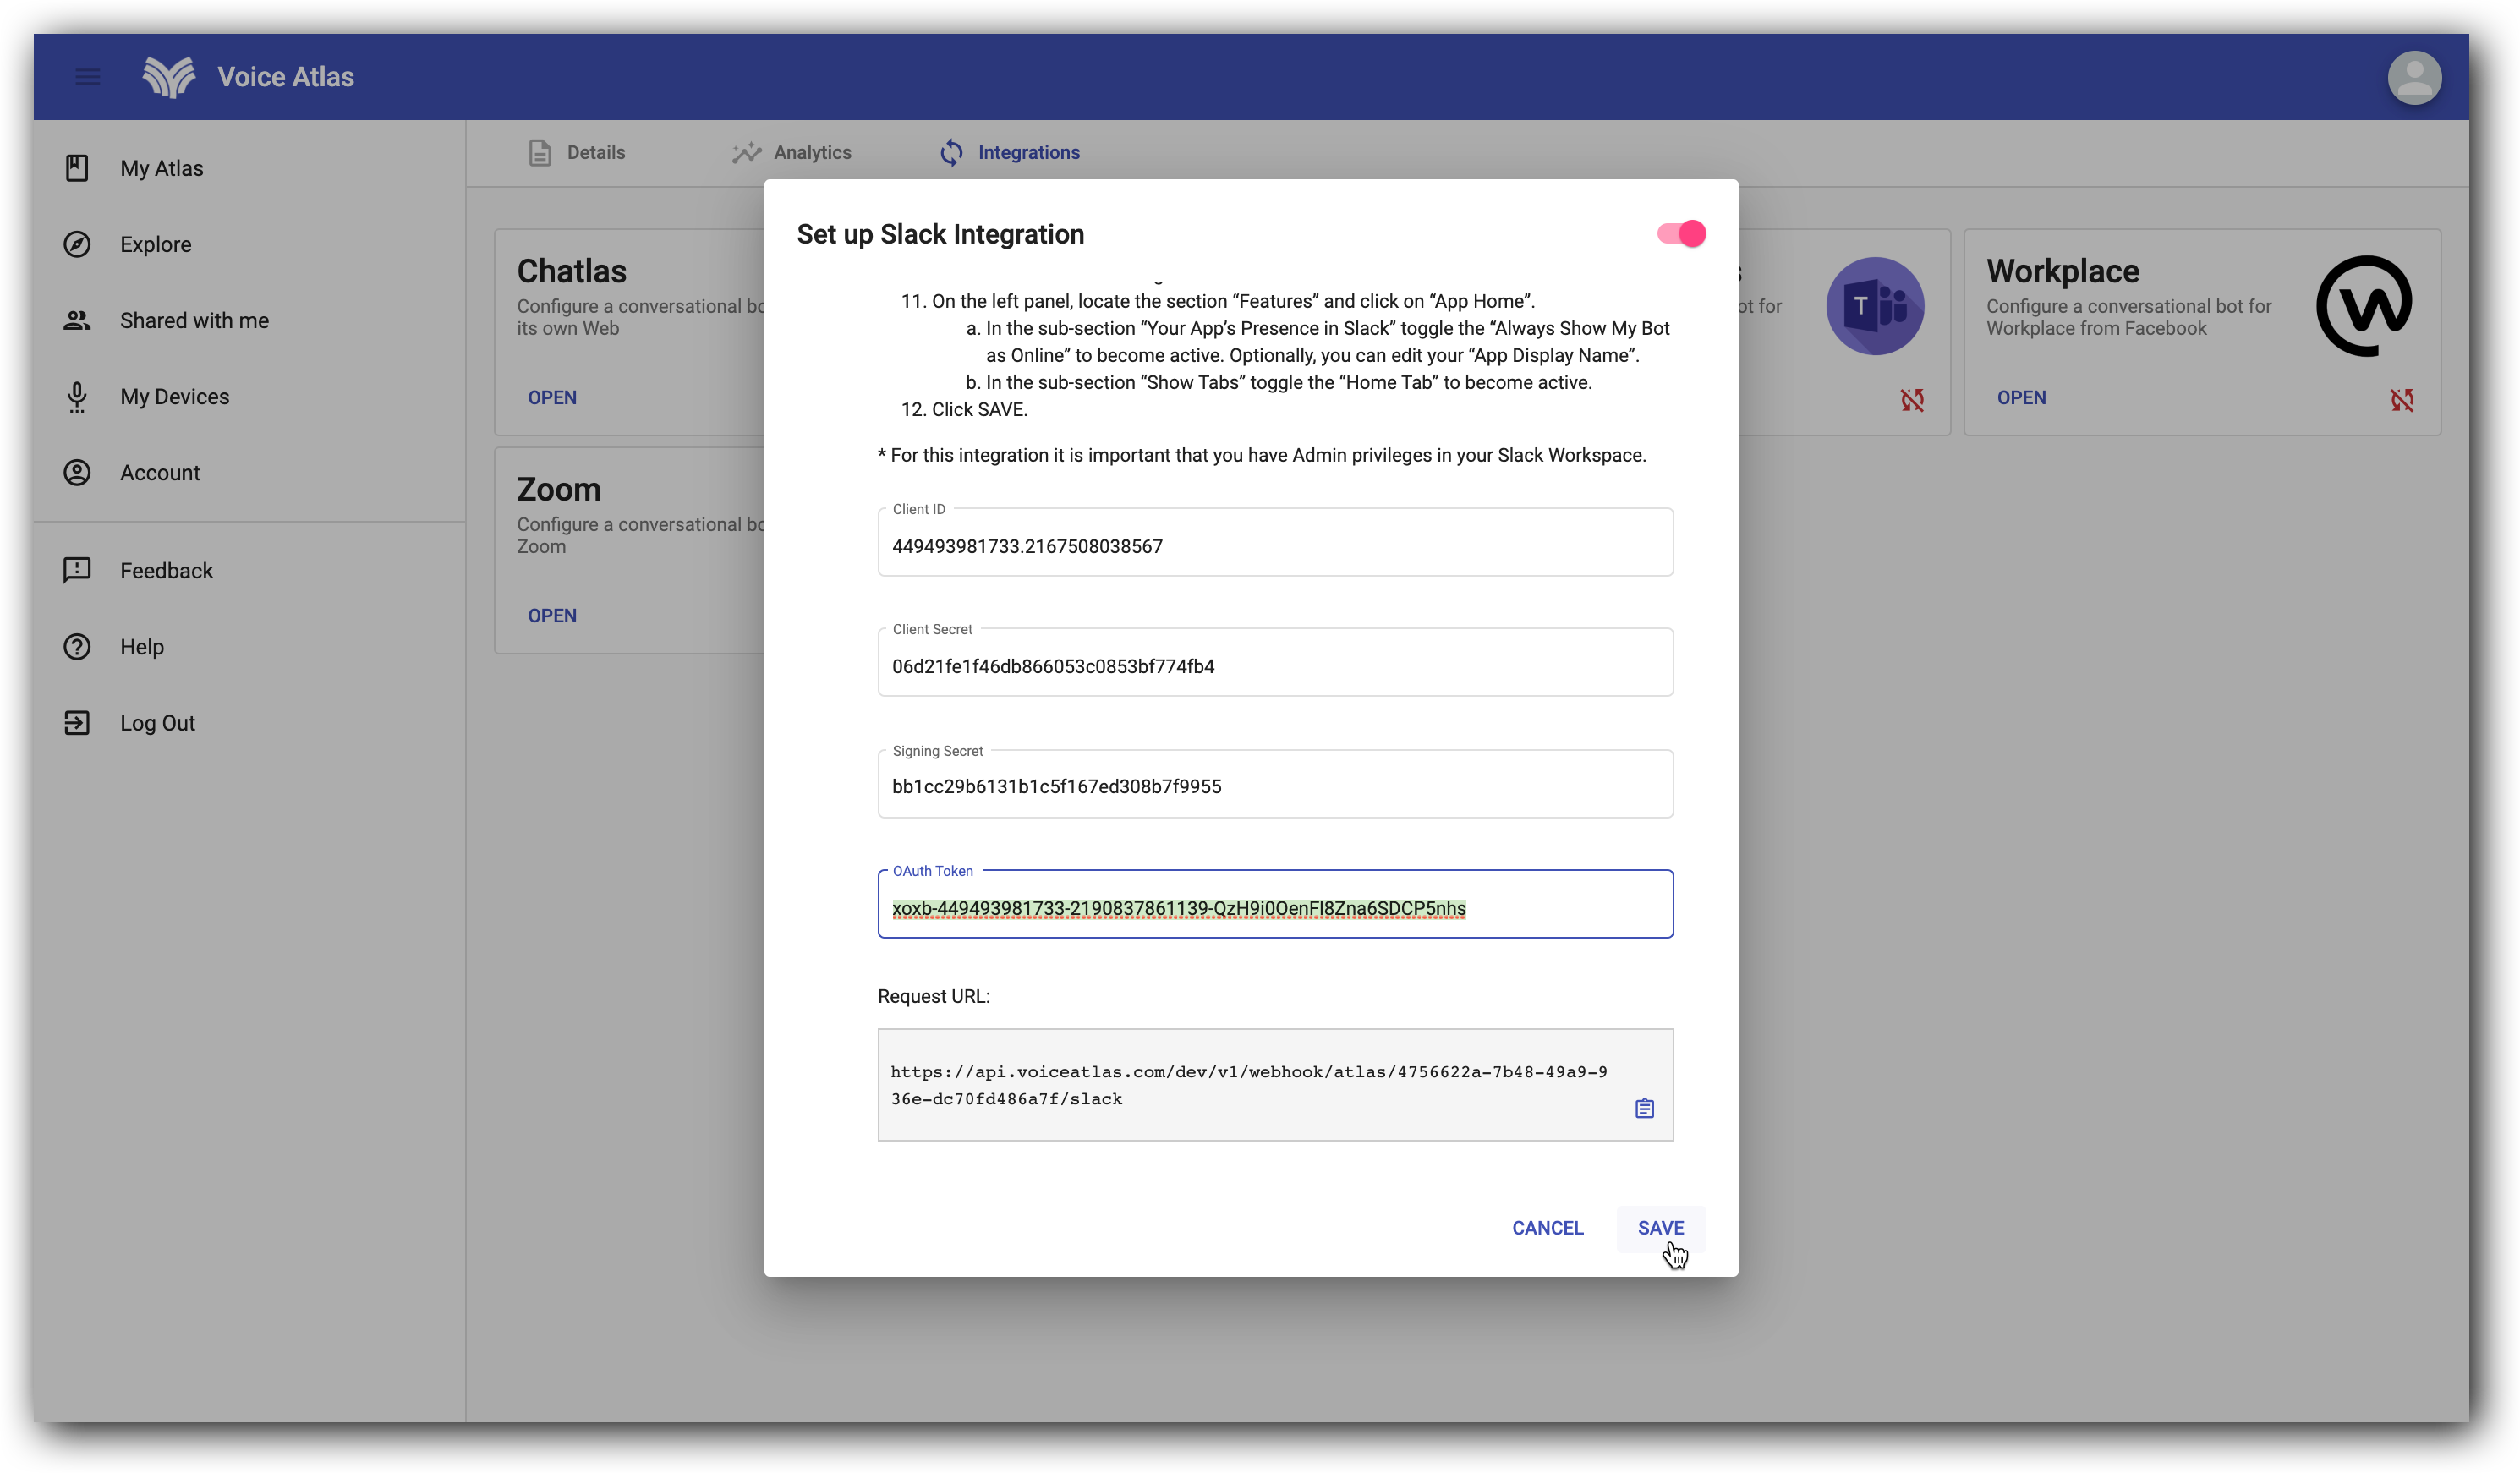
From the section “App Credentials”, first copy the “Client ID” then paste it under the "Integrations" section of the Voice Atlas Slack Integration set-up; then repeat this process by copying the “Client Secret” and the “Signing Secret”.
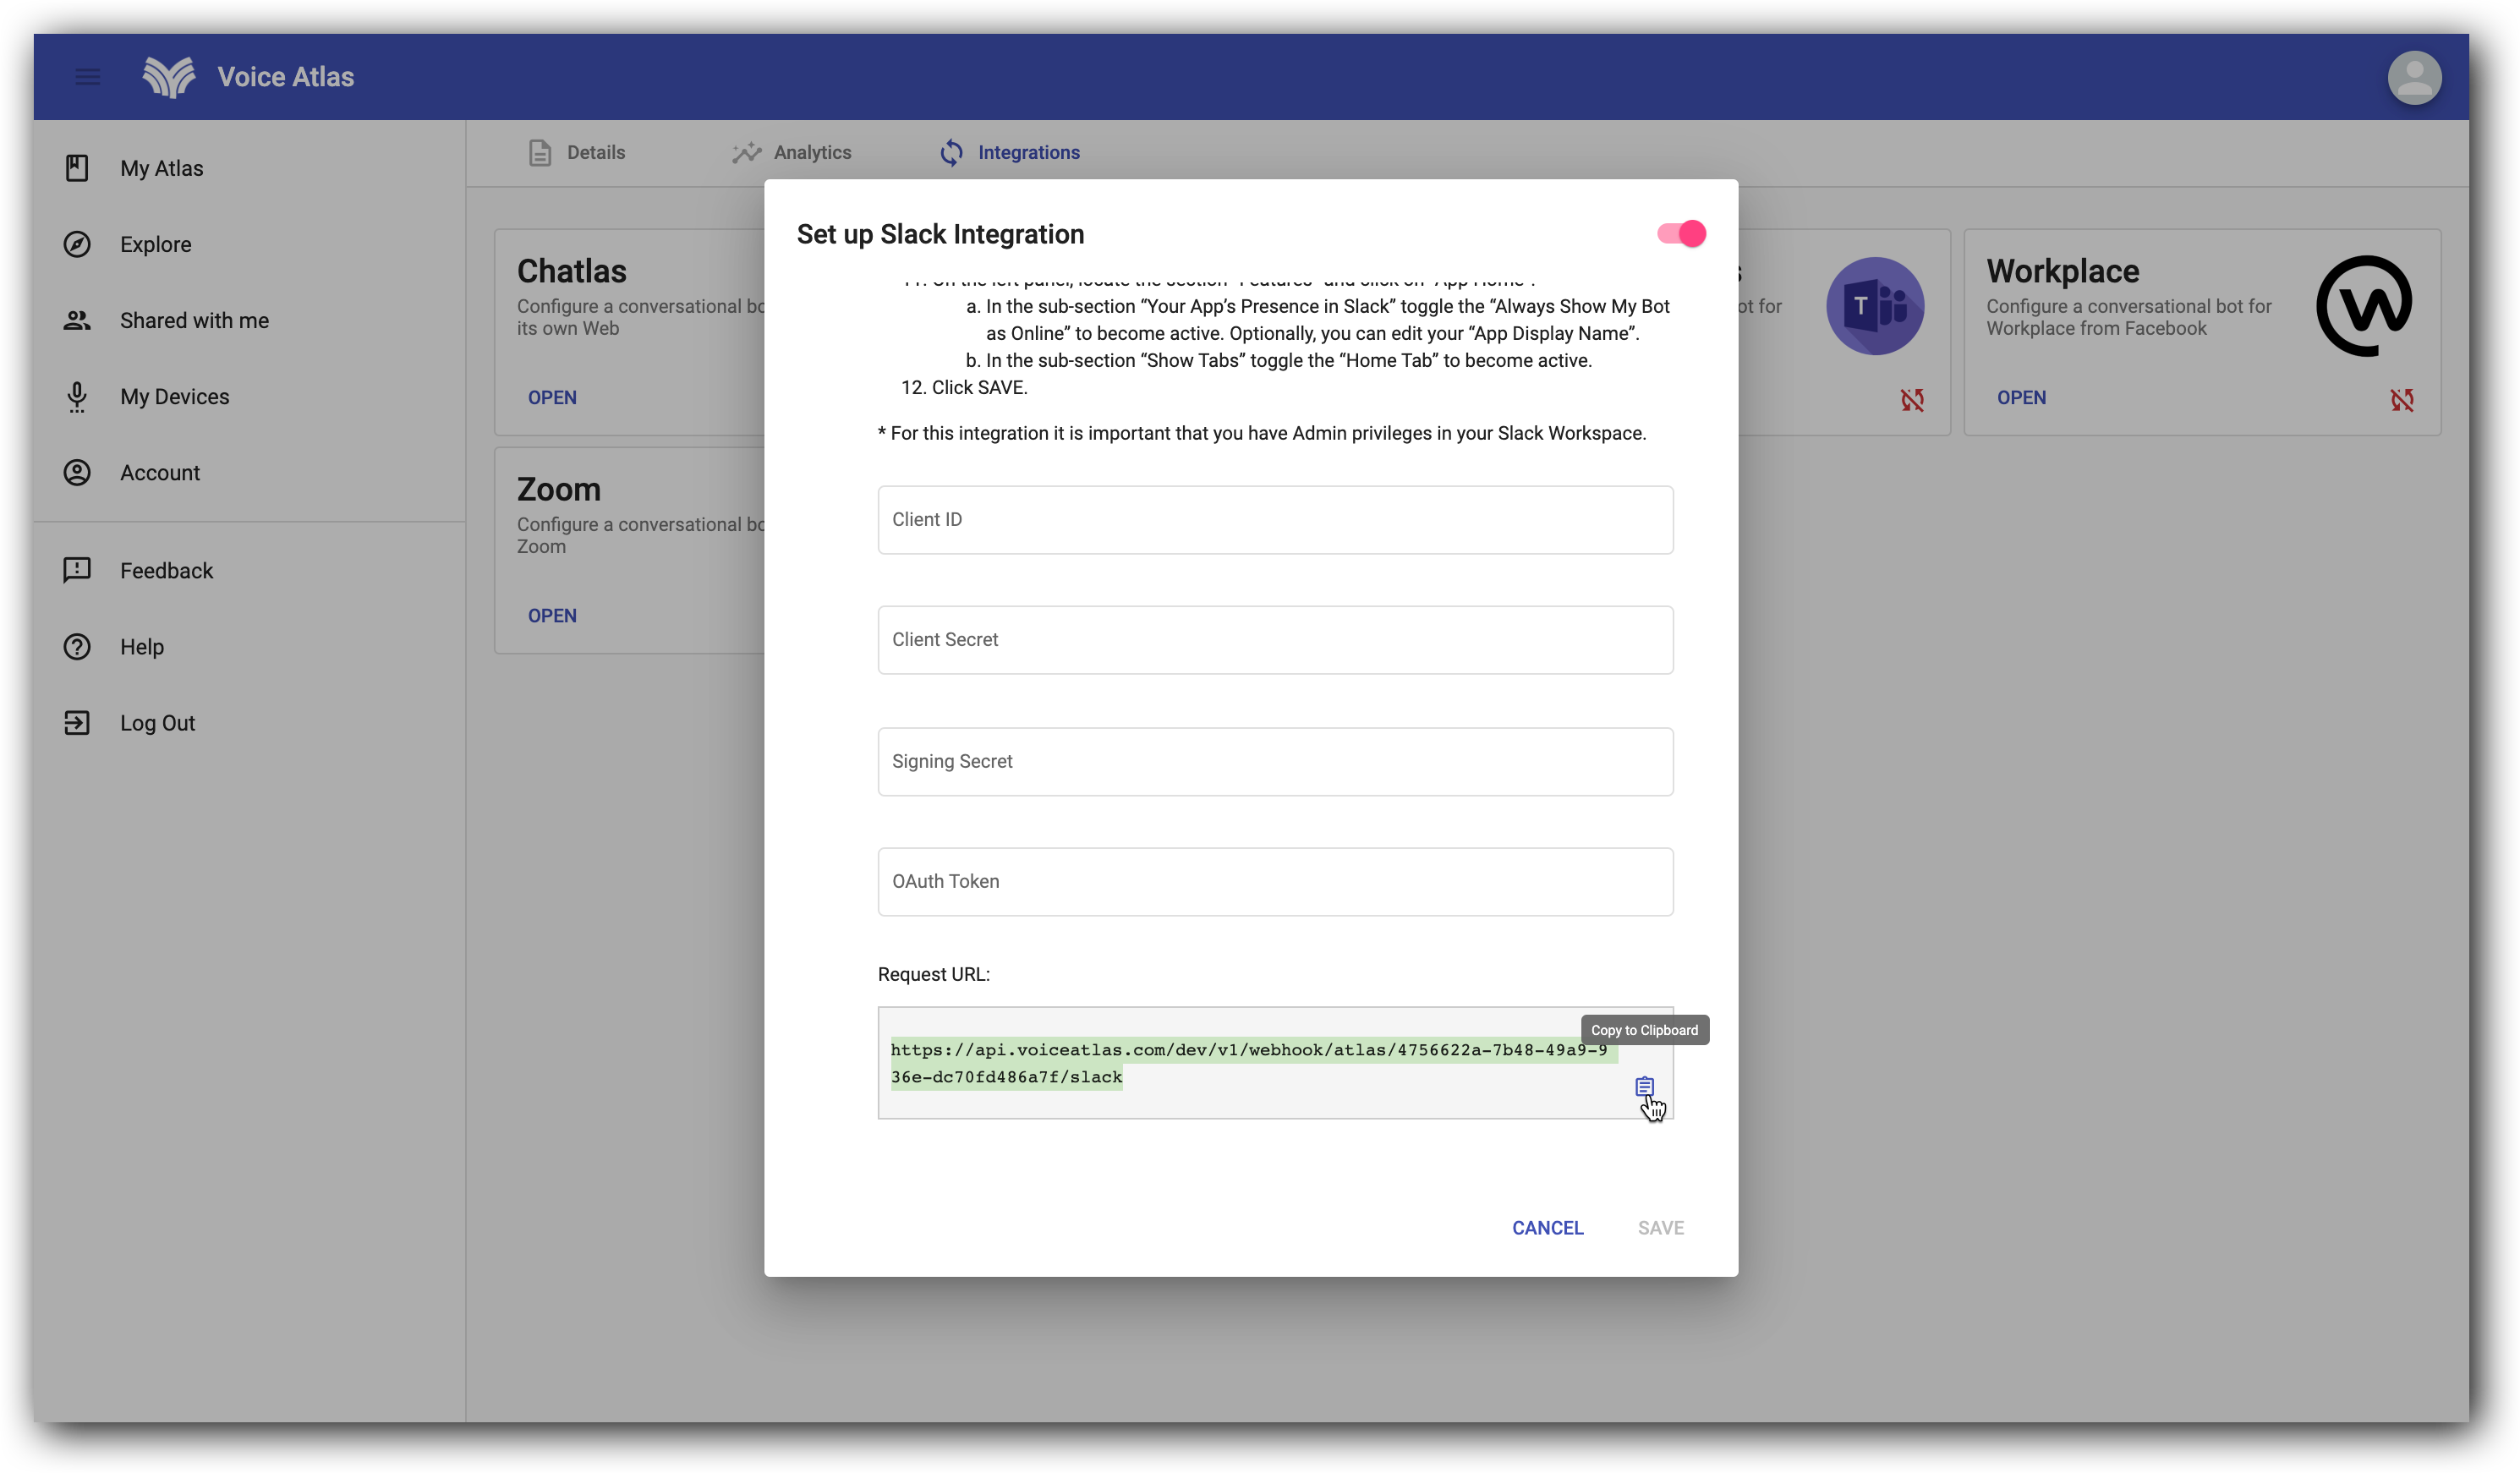
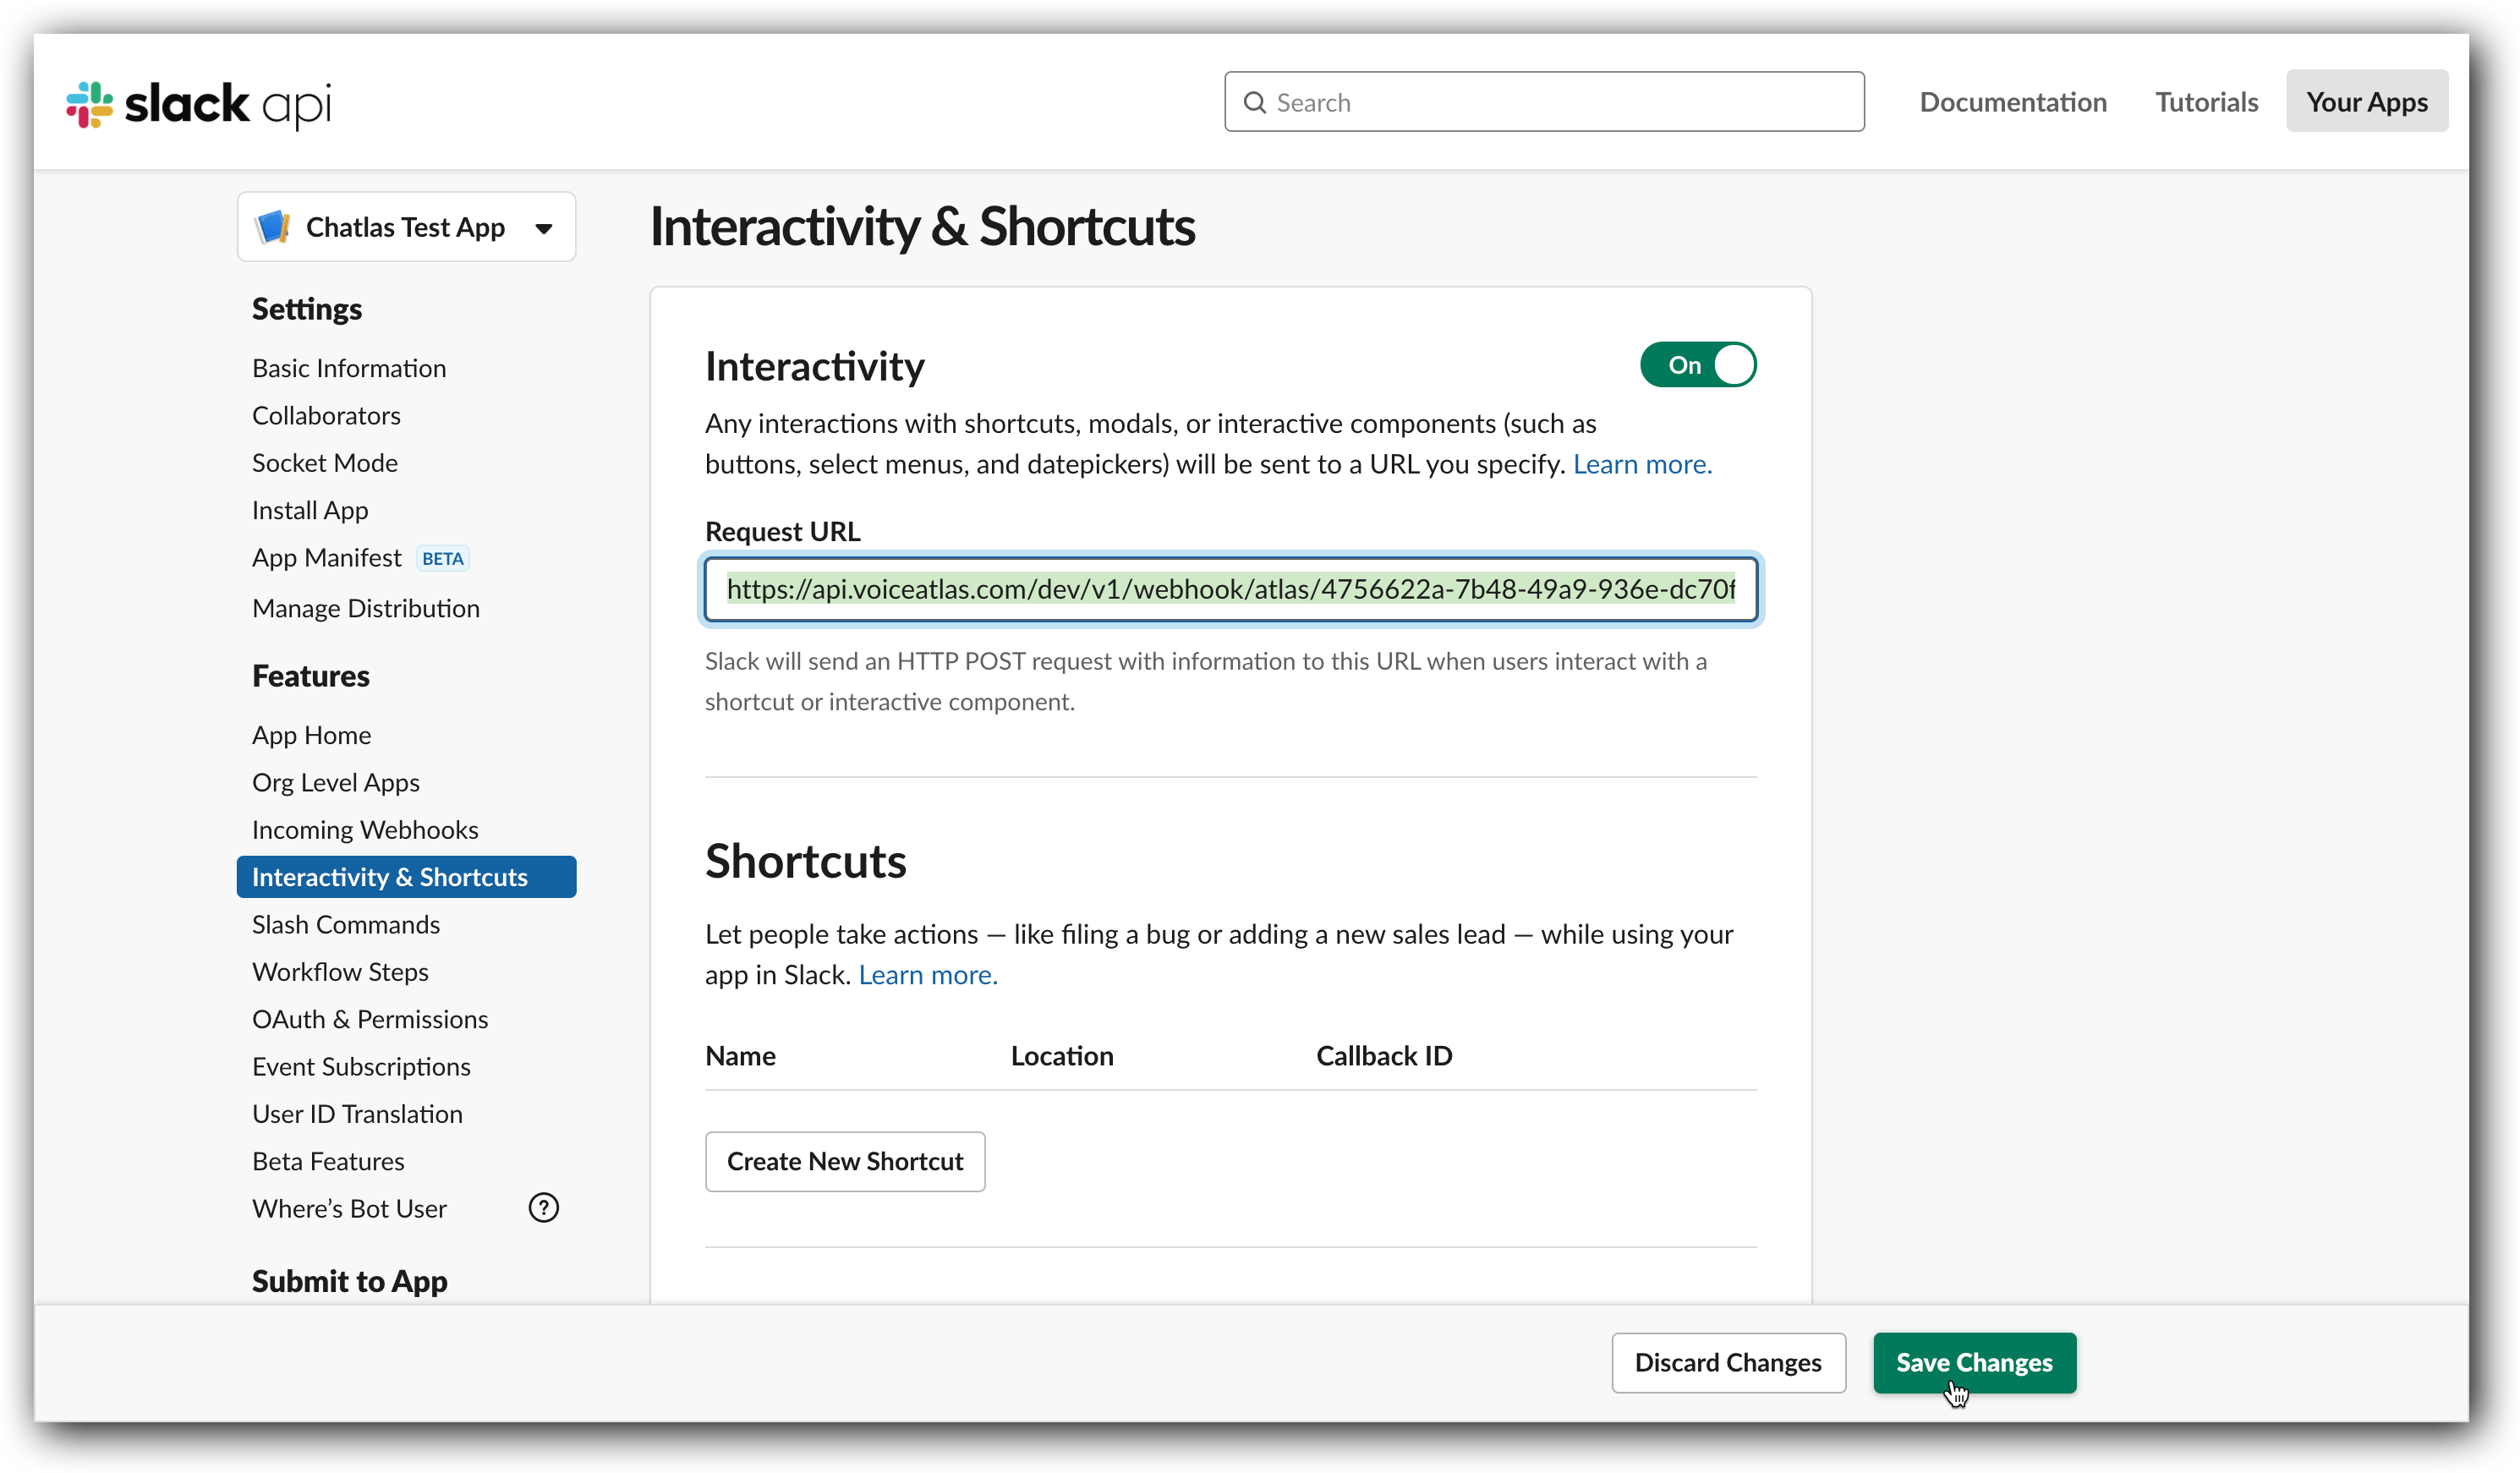
Step 5: On the left panel, locate the section “Features” and click on “Interactivity and Shortcuts”. In the sub-section “Interactivity” click on the toggle in the top, right hand-corner to become active. Then copy the Request URL in the Voice Atlas Slack Integration Set-up.
Paste the copied URL in “Request URL” box available in the Slack App API and click "SAVE CHANGES".
Step 6: On the left panel, locate the section “Features” and click on “OAuth & Permissions” and copy the Bot User QAuth Token.
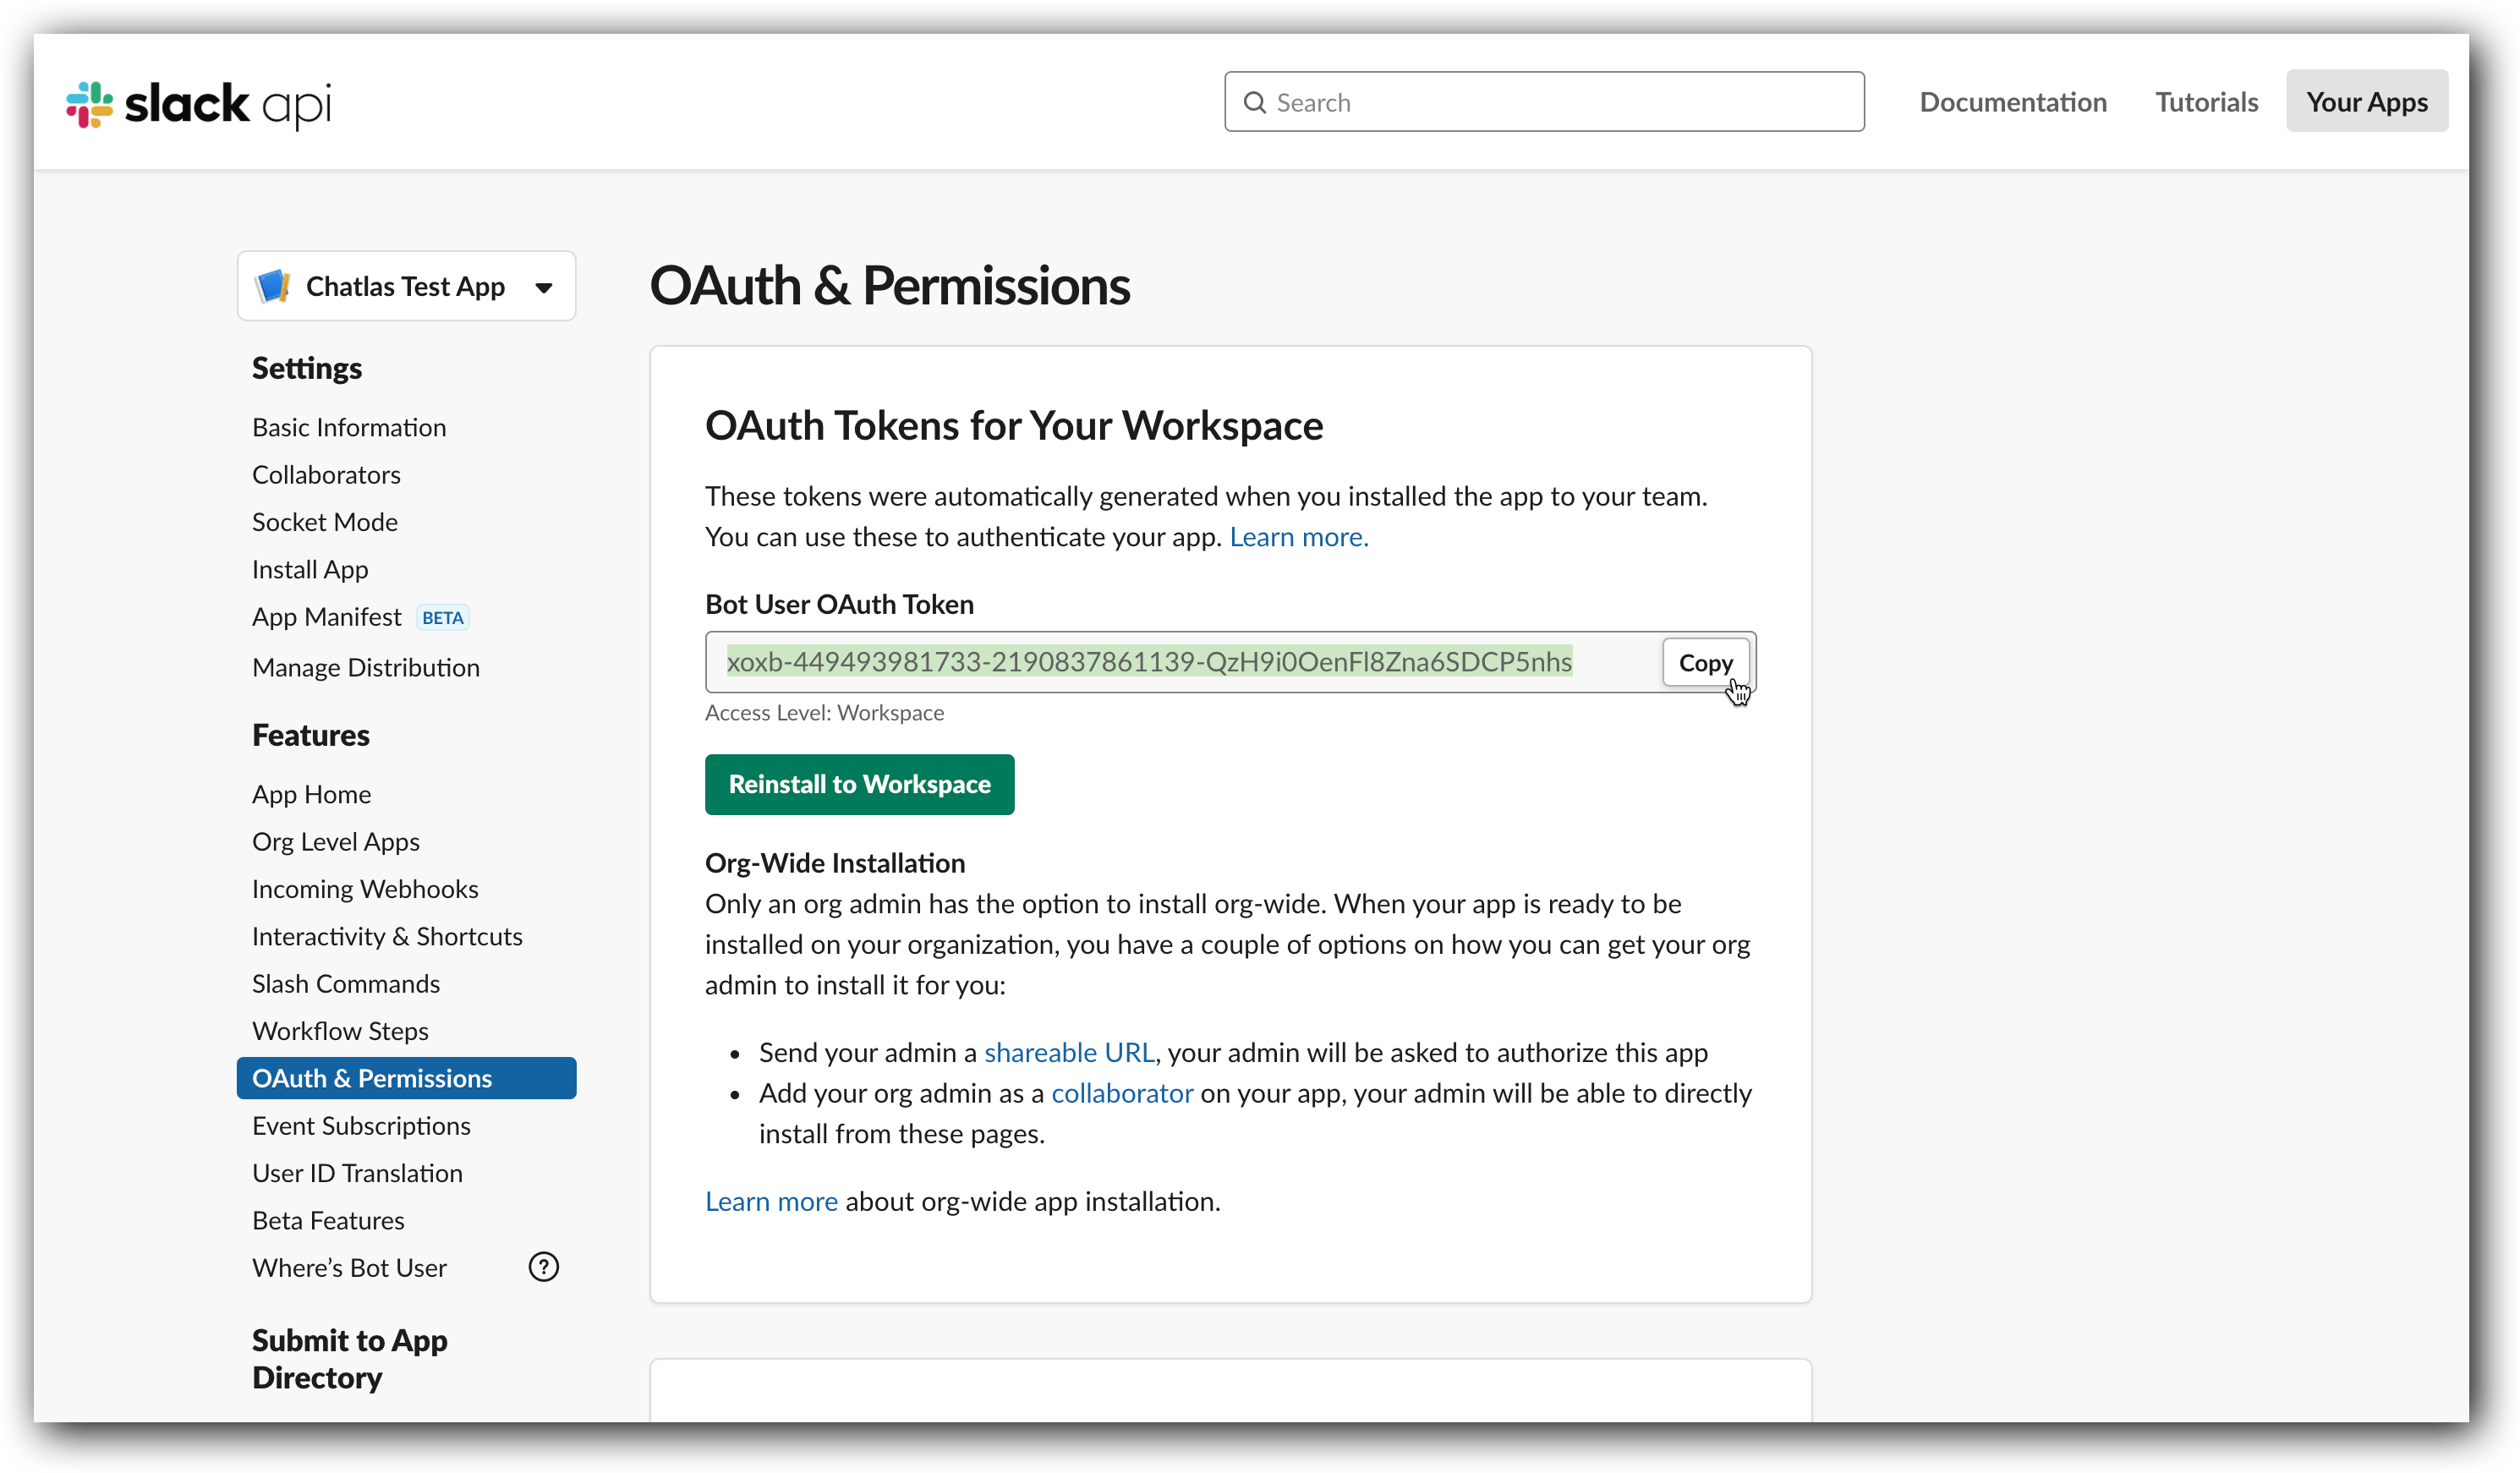
Then paste the Bot User QAuth Token in the Slack Integration Set up on the Voice Atlas web app.
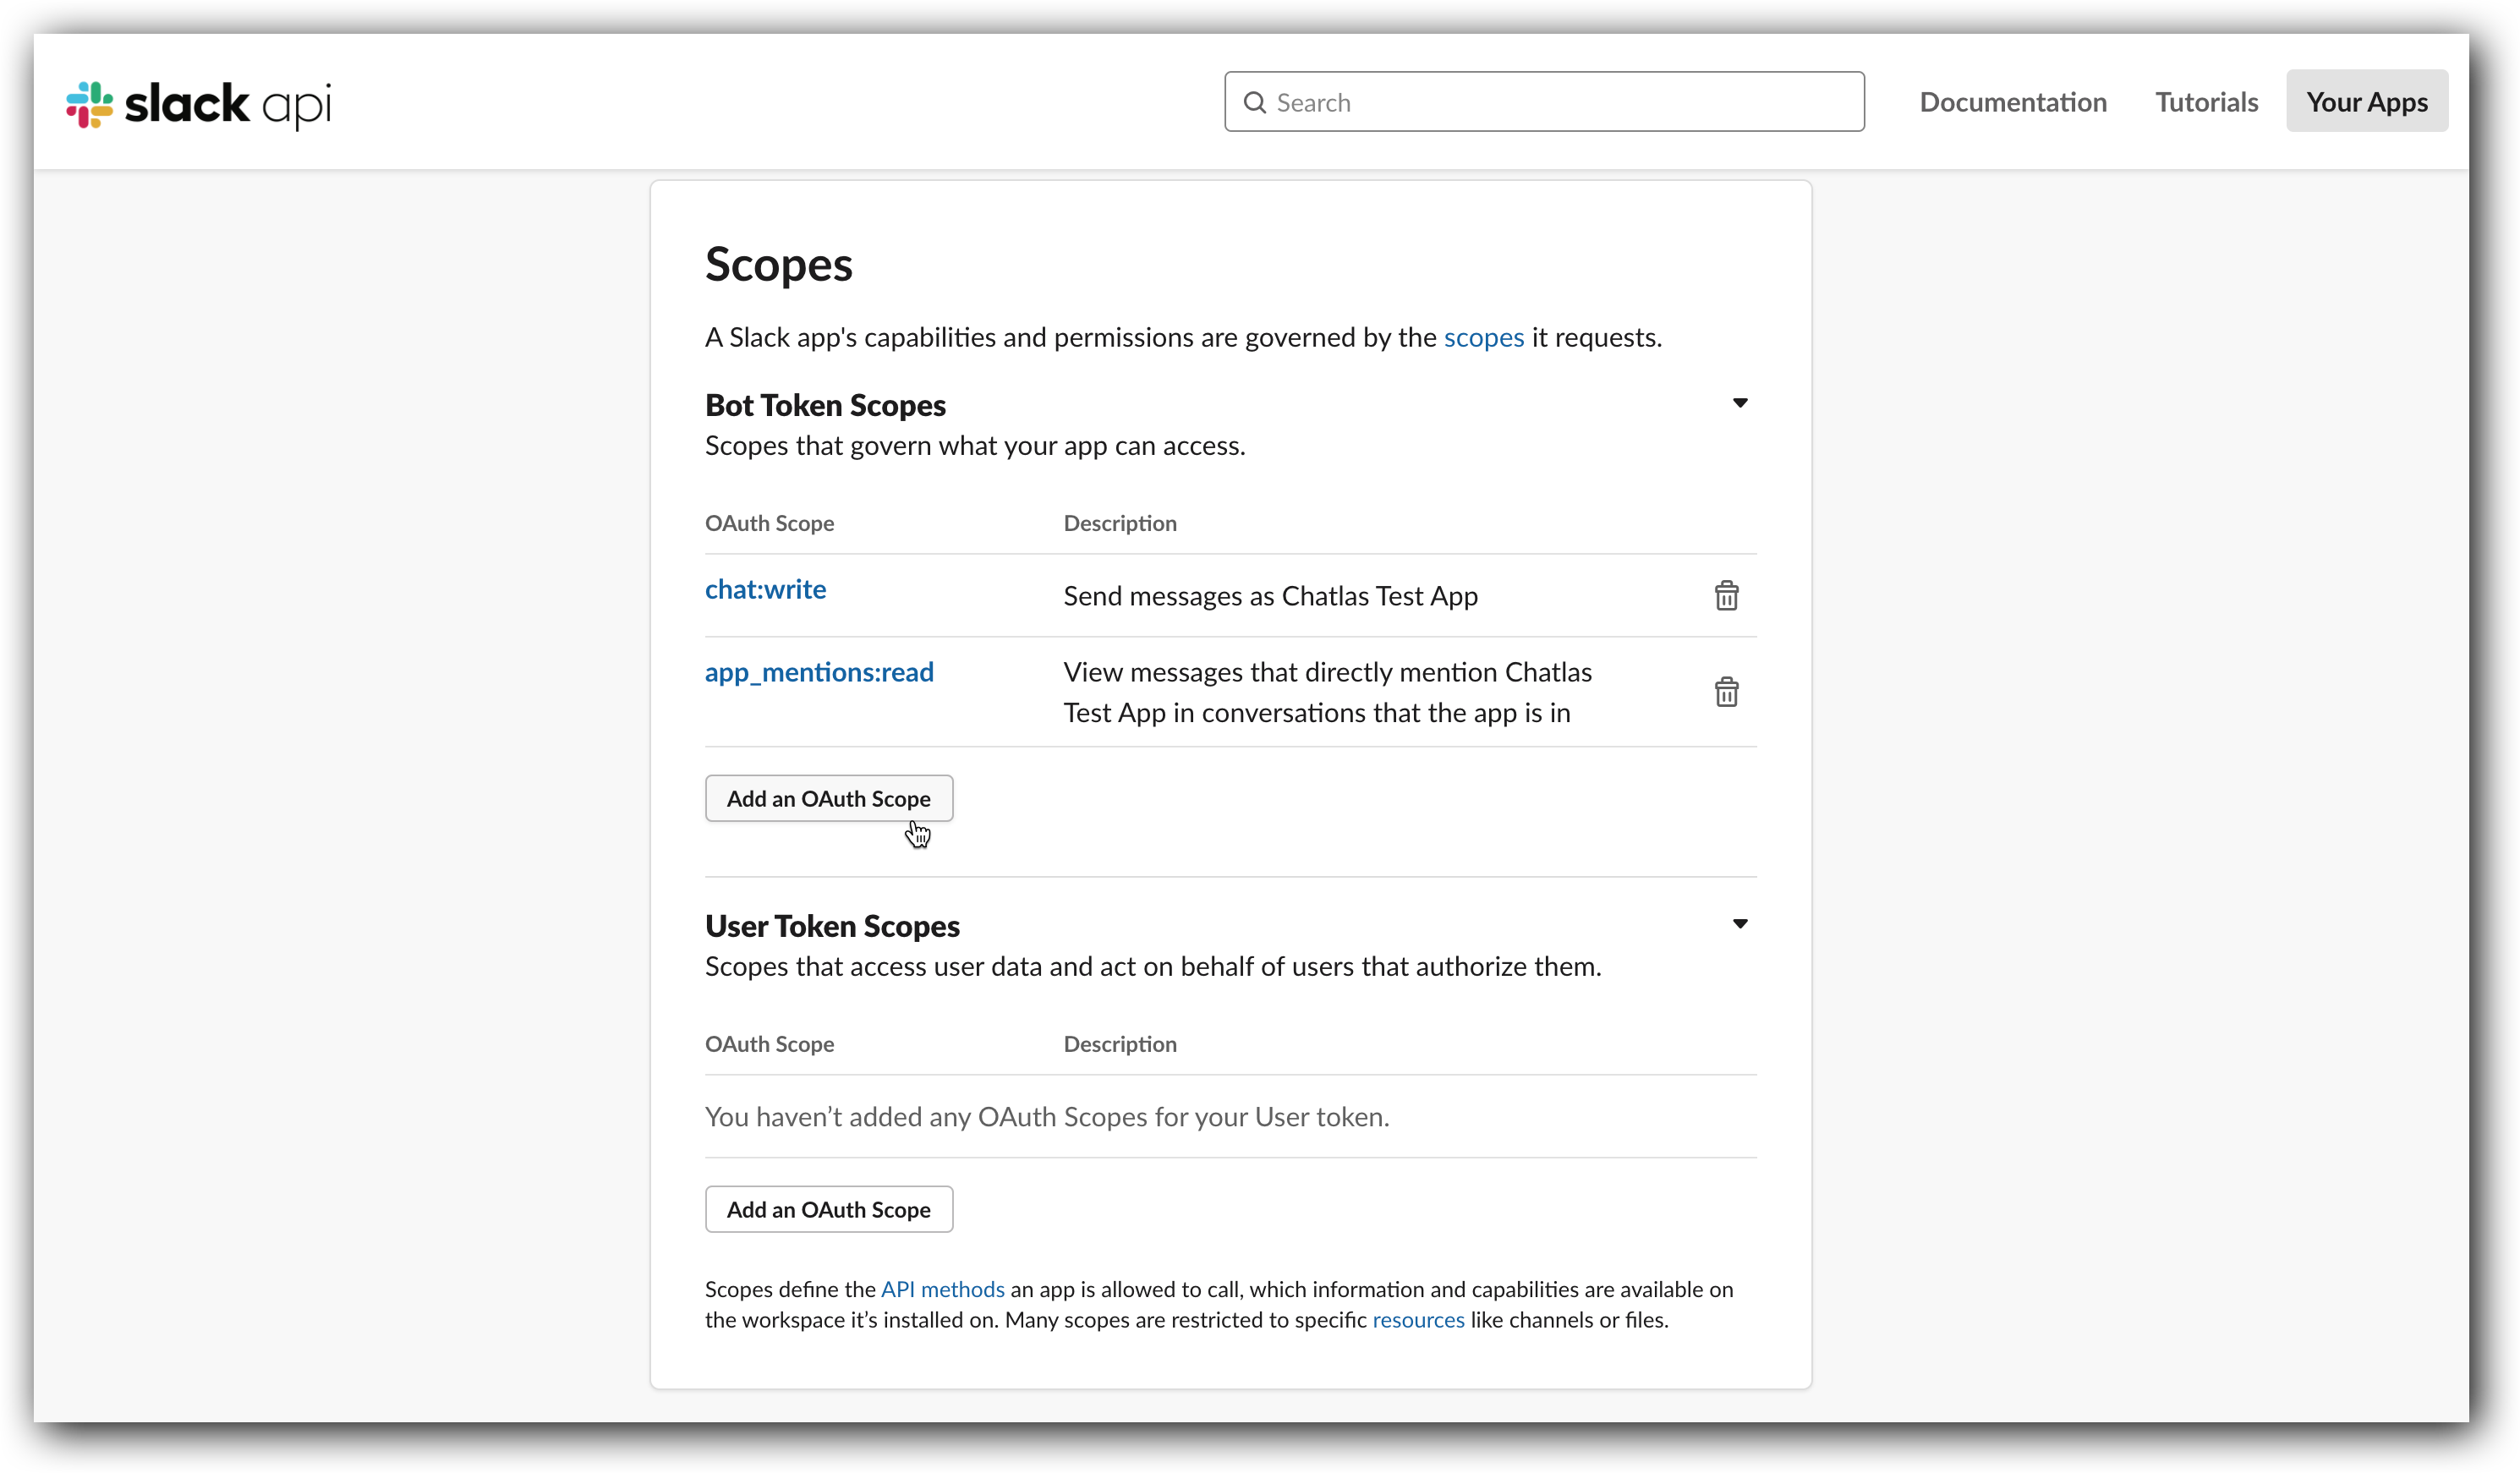
Next, in the sub-section “Scopes” under “Bot Token Scopes”, click on “Add an OAuth Scope” and add the following:
- app_mentions:read
- chat:write
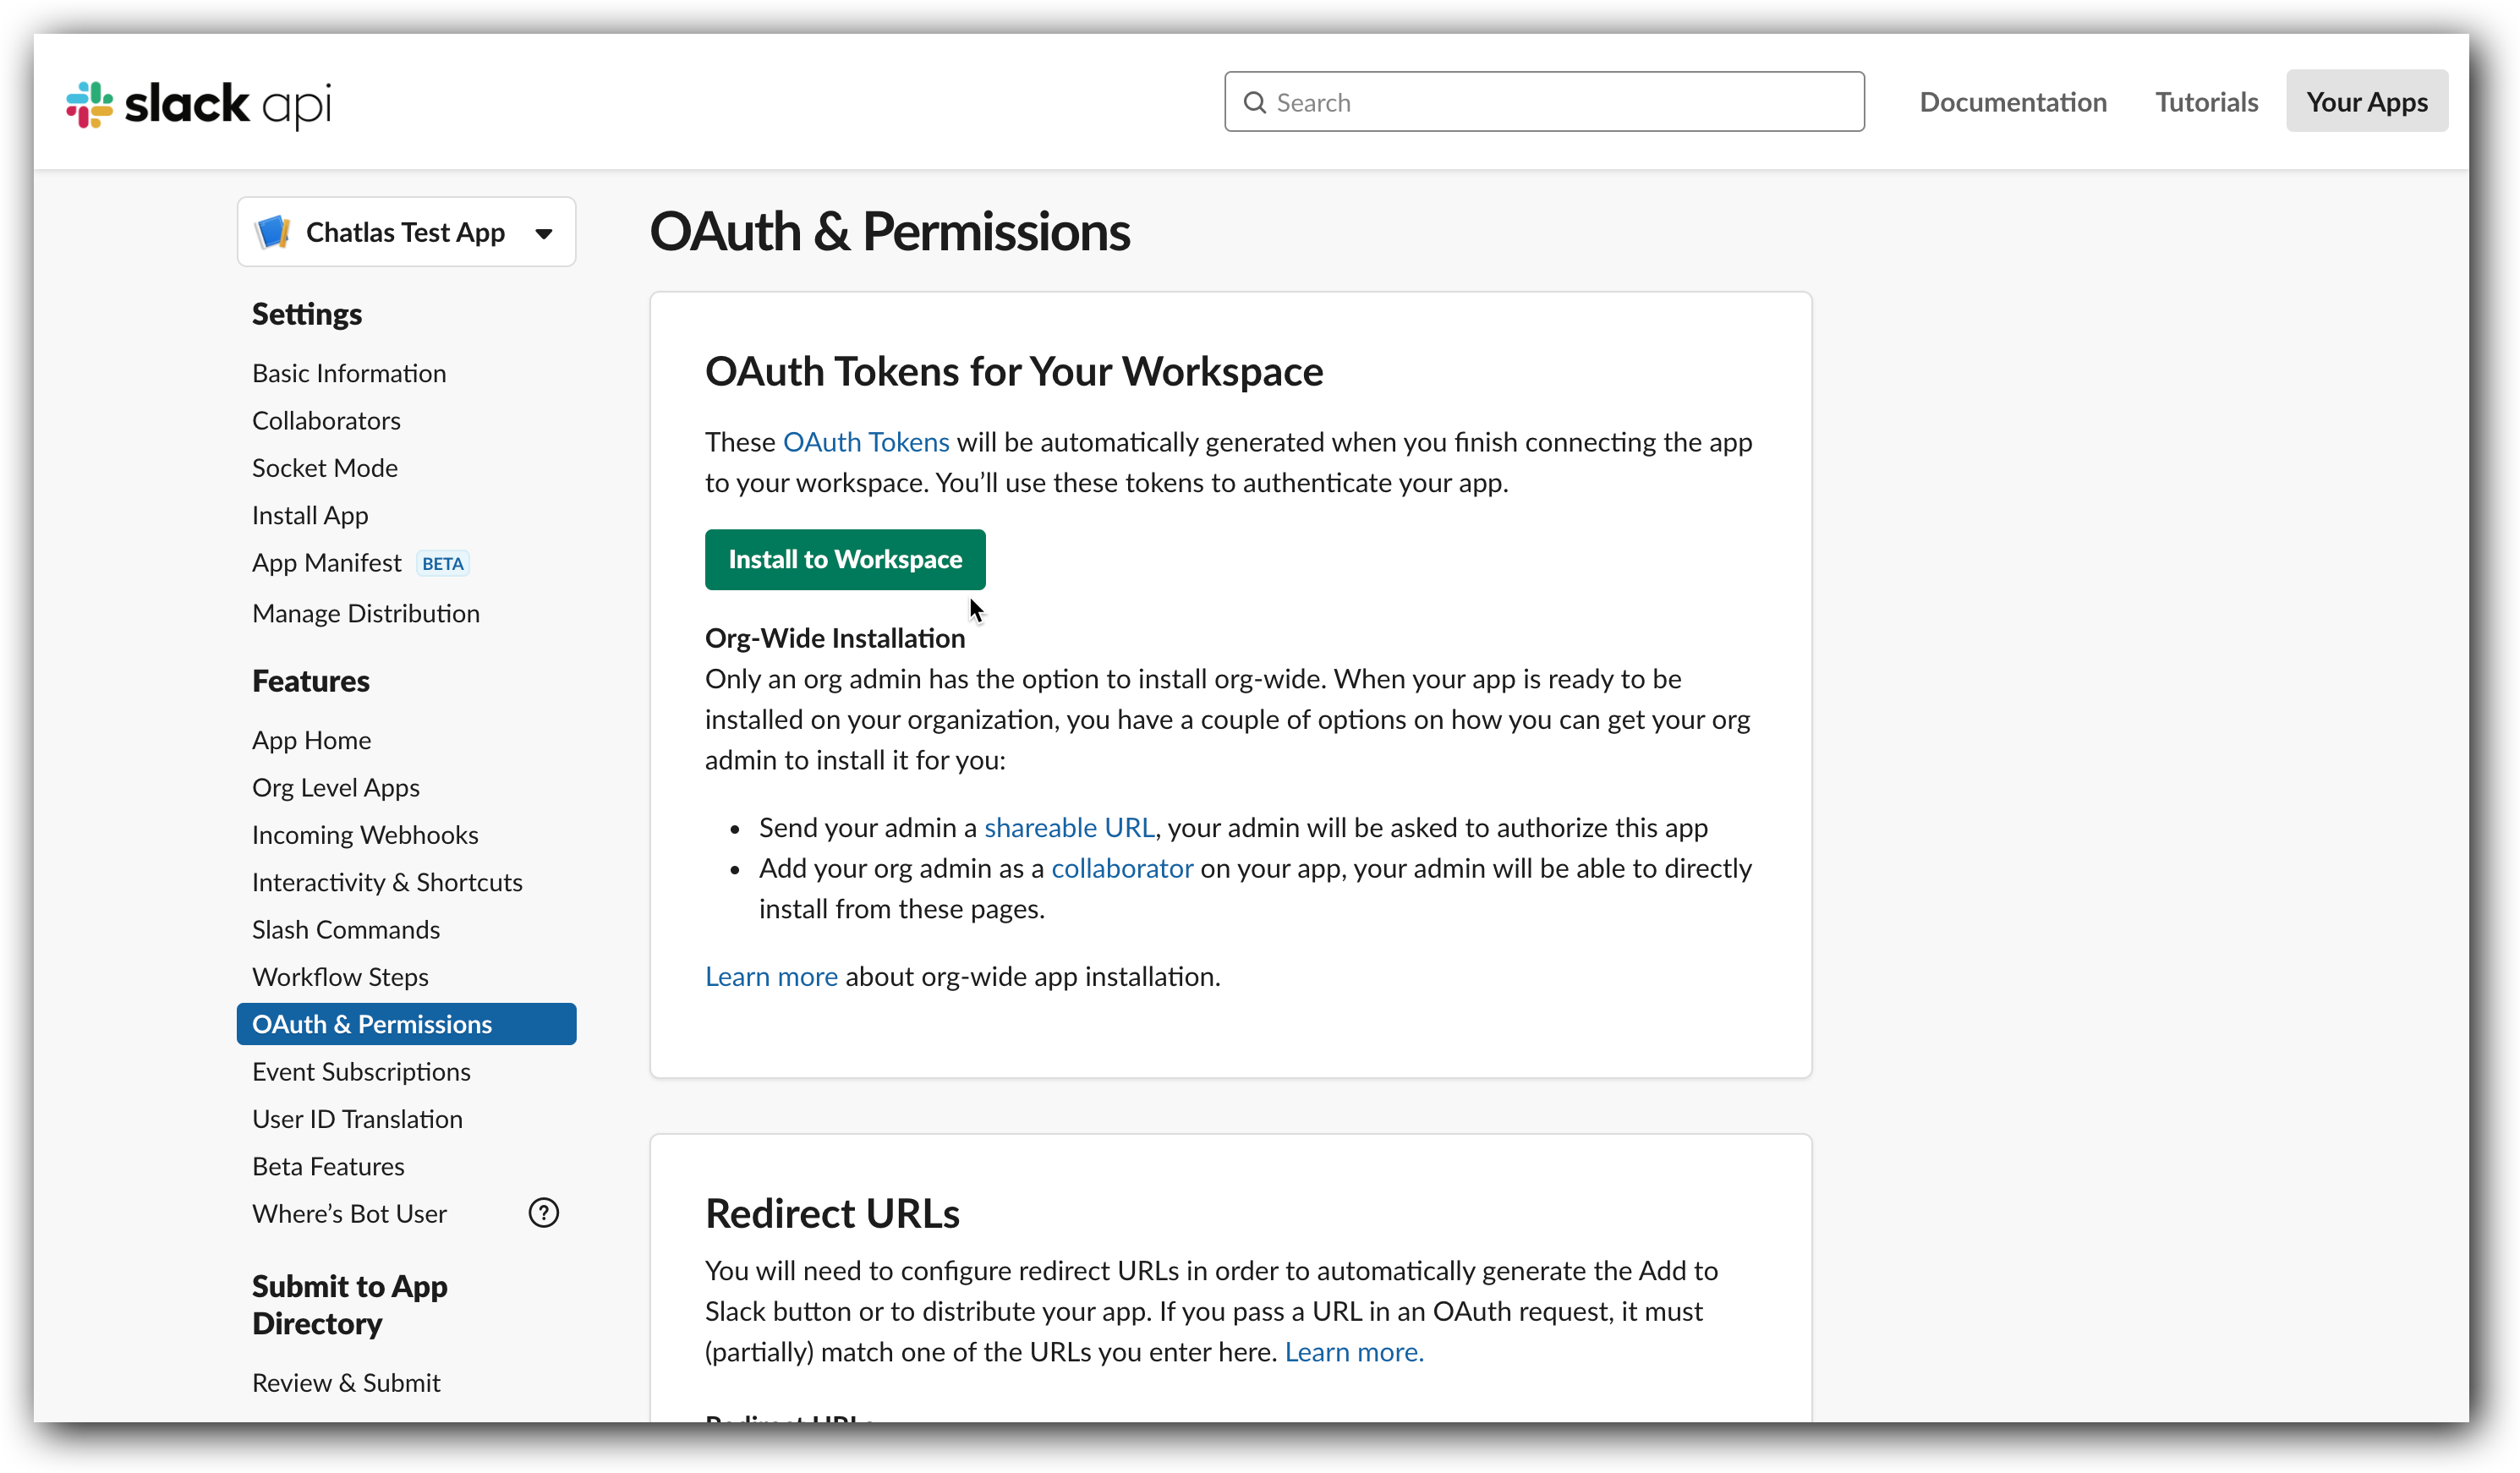
Finally, return to the top of the page and click "Install to Workplace". You will be redirected to the Installation App page and will be requested to allow or deny the app the scopes or permissions setup above. Click on “Allow”.
Step 7: On the left panel, locate the section “Features” and click on “Event Subscriptions”. In the sub-section “Enable Events” click on the toggle in the top, right hand-corner to become active. Then, copy the Request URL from the Slack Set Up integration on Voice Atlas and paste it in “Request URL”. Right next to the “Request URL” you should see Verified ✓ indicating the verification was done successfully.
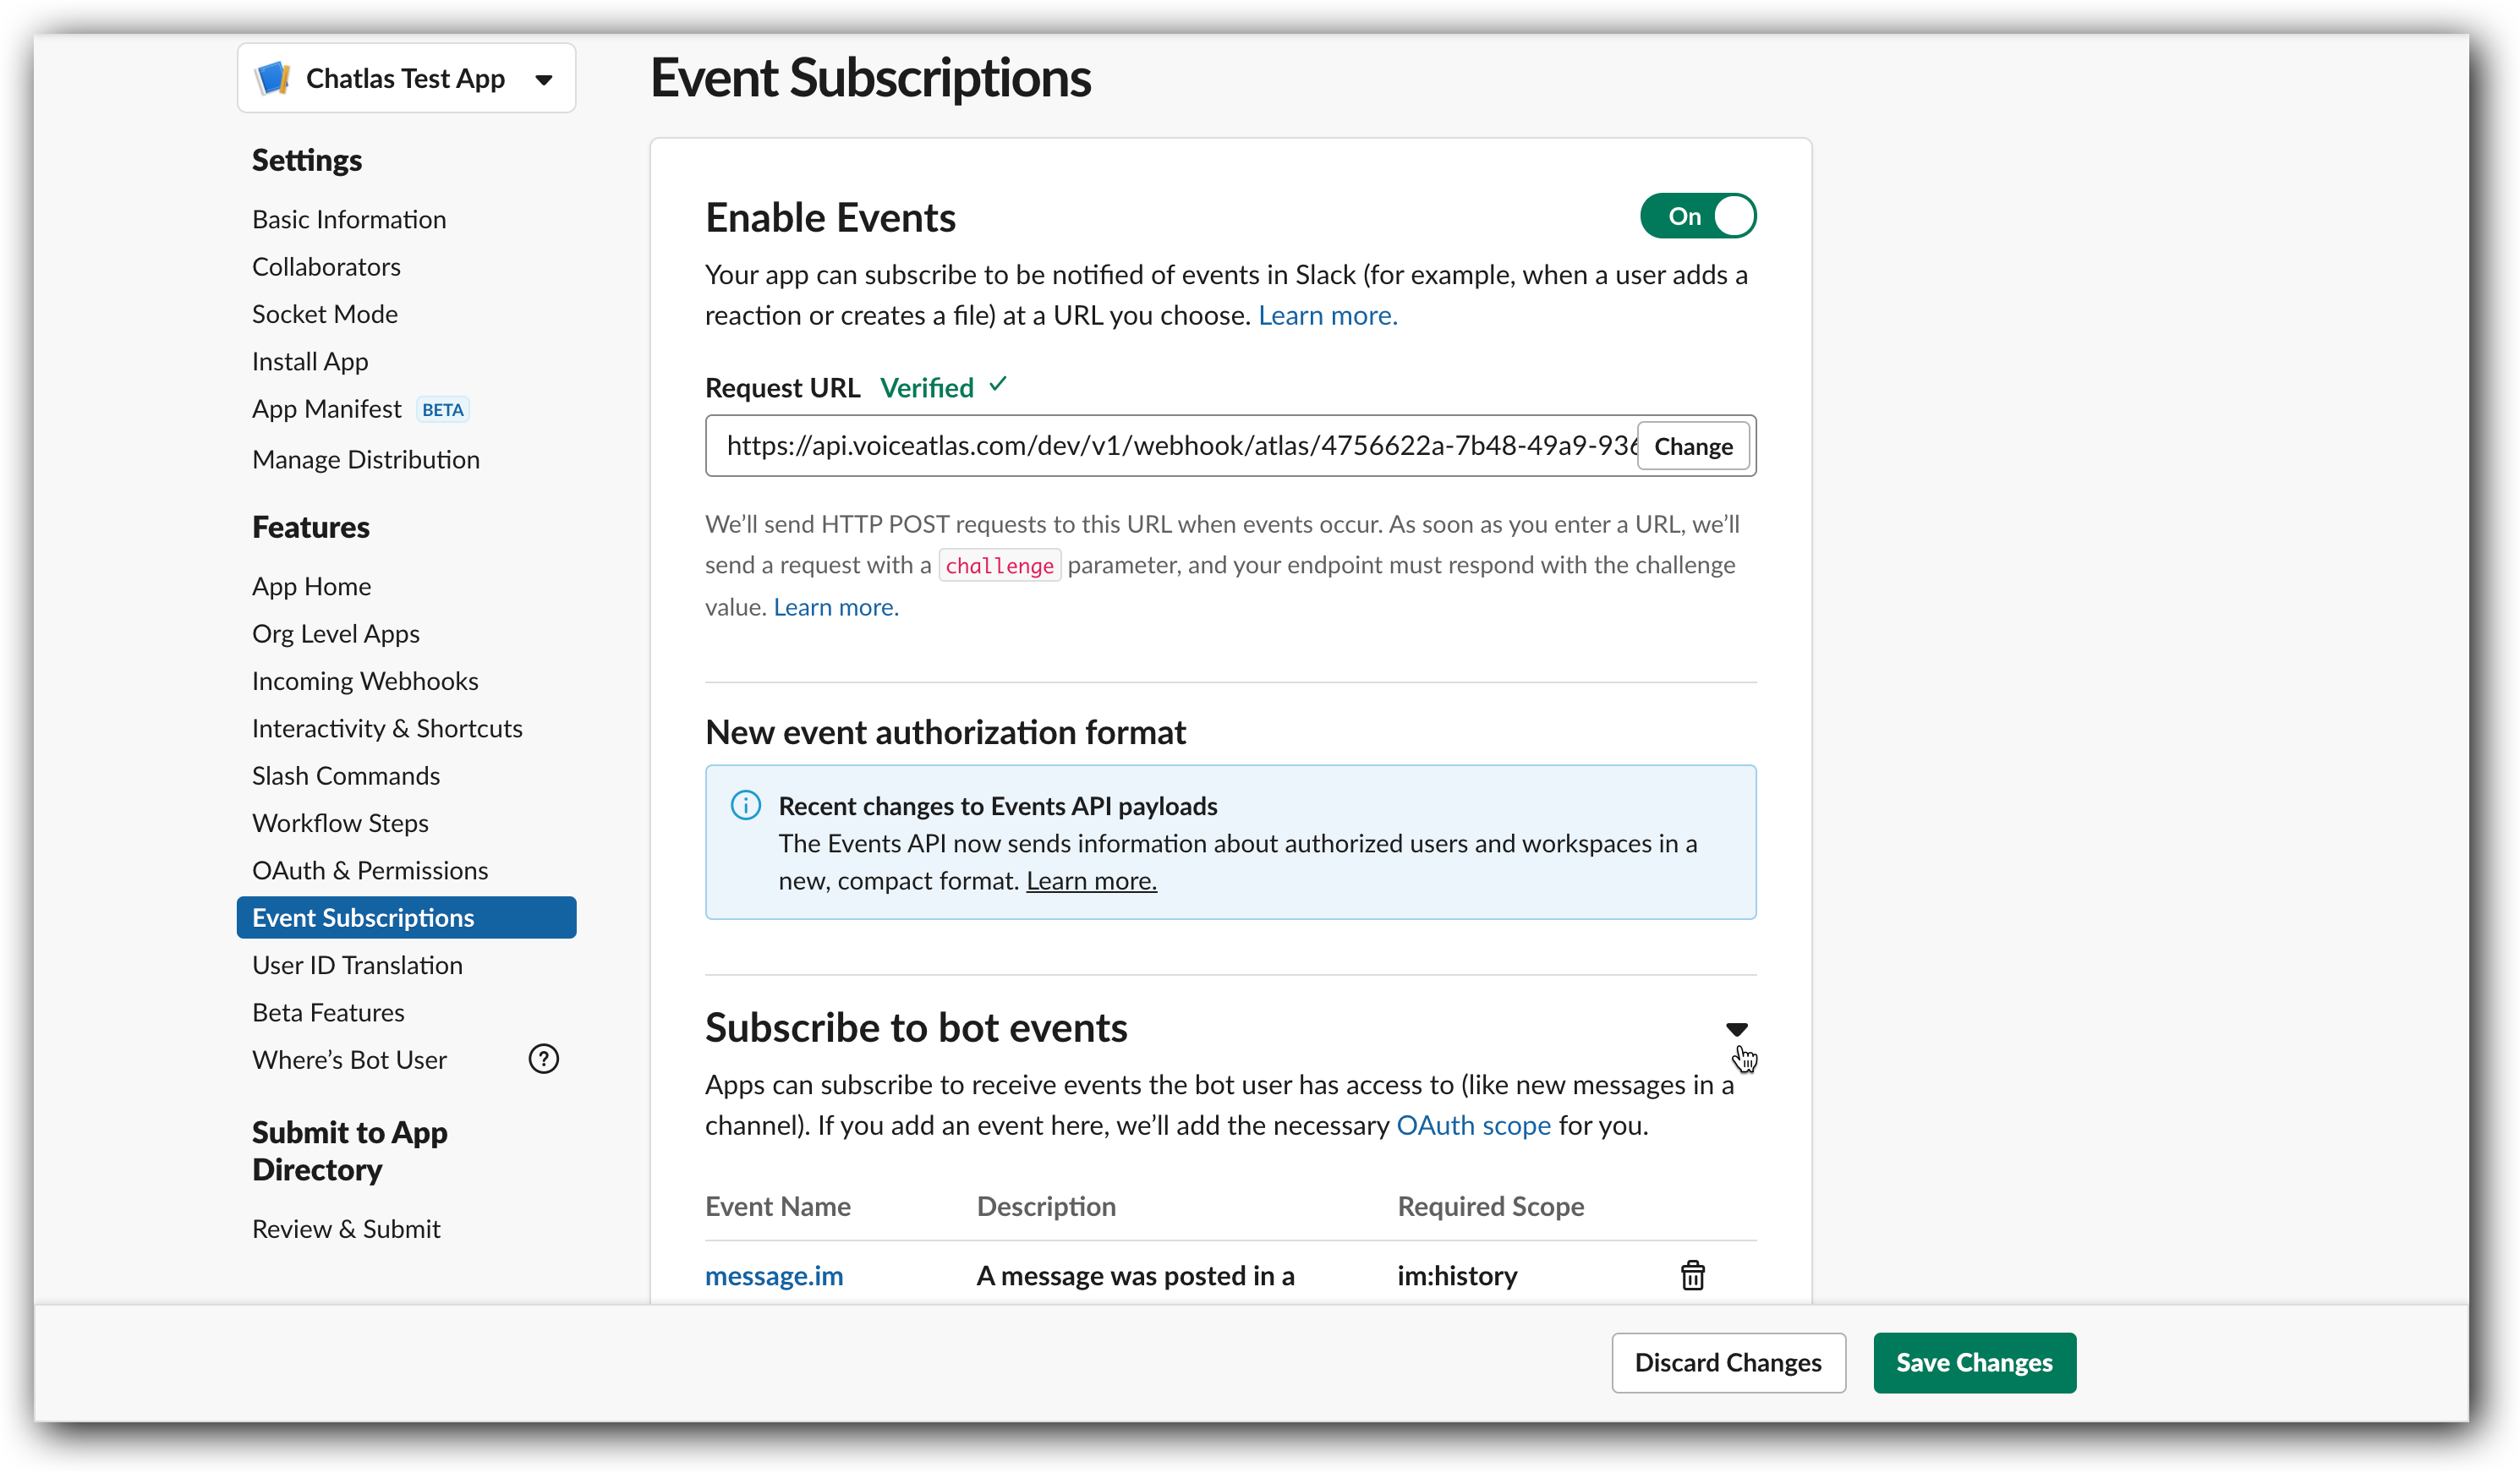
Then, right below in the “Subscribe to bot events” area, click on “Add Bot User Event” and add the following:
- app_home_opened
- app_mention
- message.im
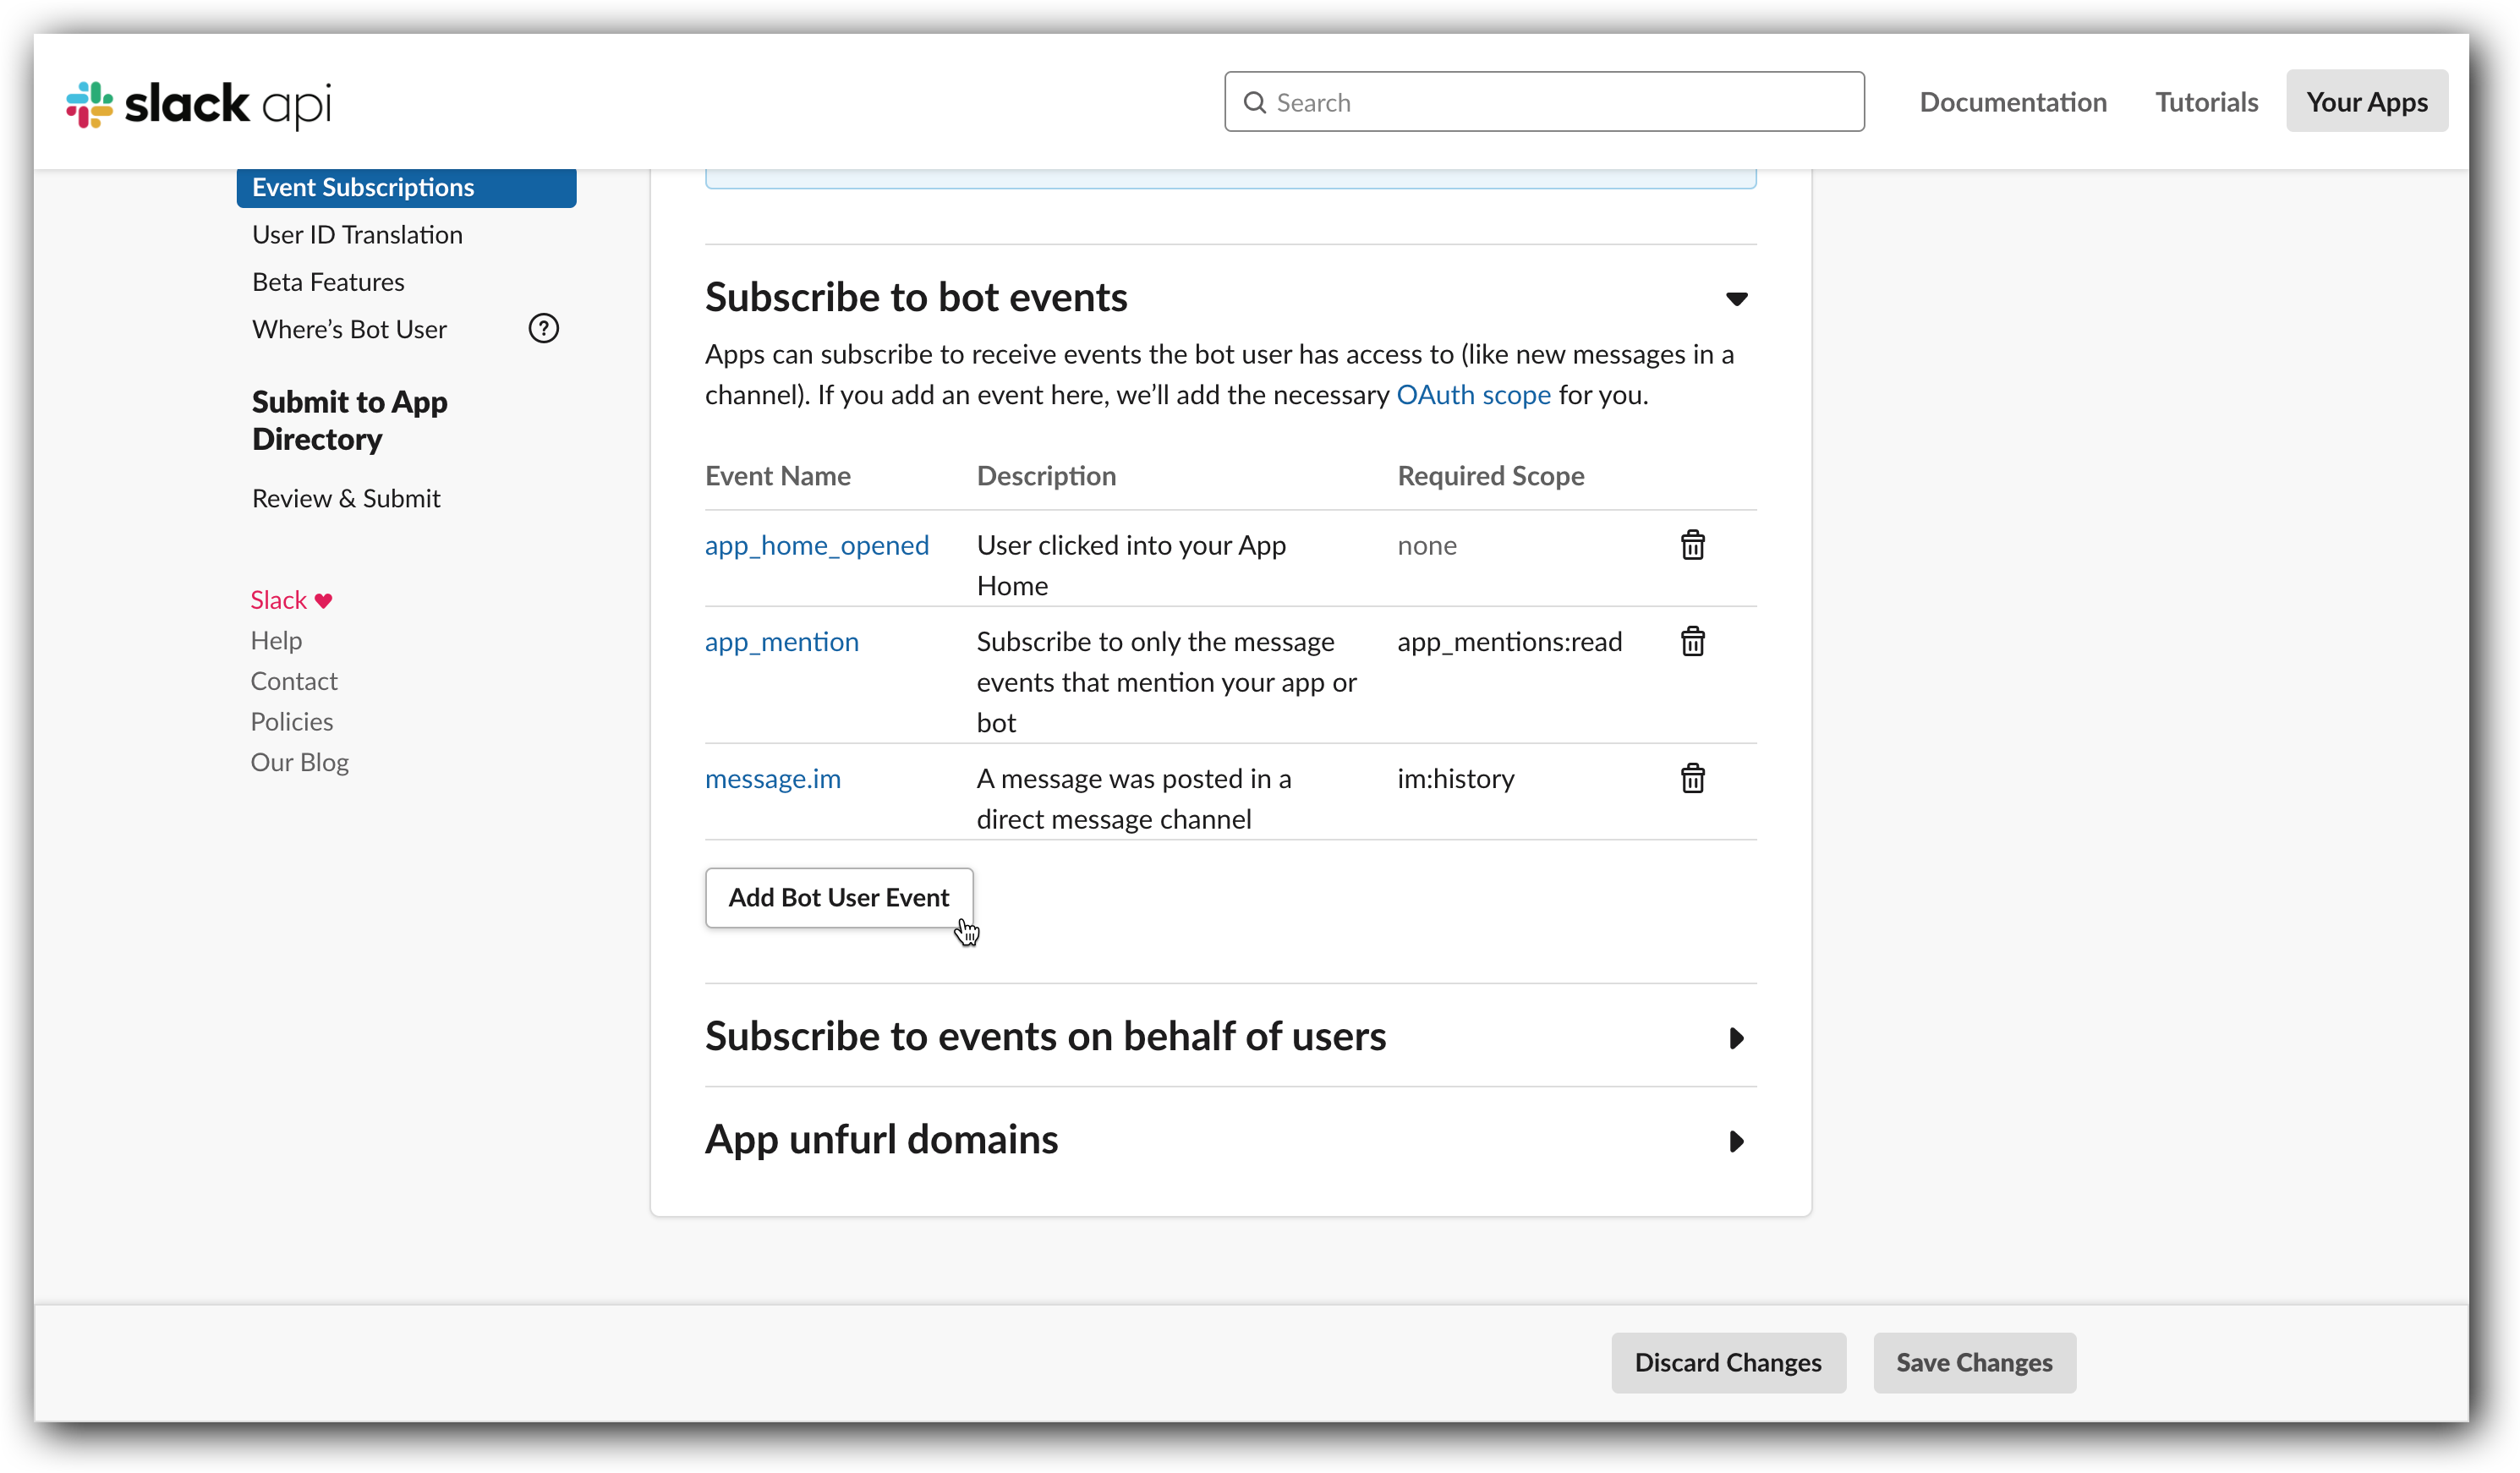
Click on “Save Changes”.
Step 8: On the left panel, locate the section “Features” and click on “App Home”. In the sub-section “Your App’s Presence in Slack” toggle the “Always Show My Bot as Online” to become active.
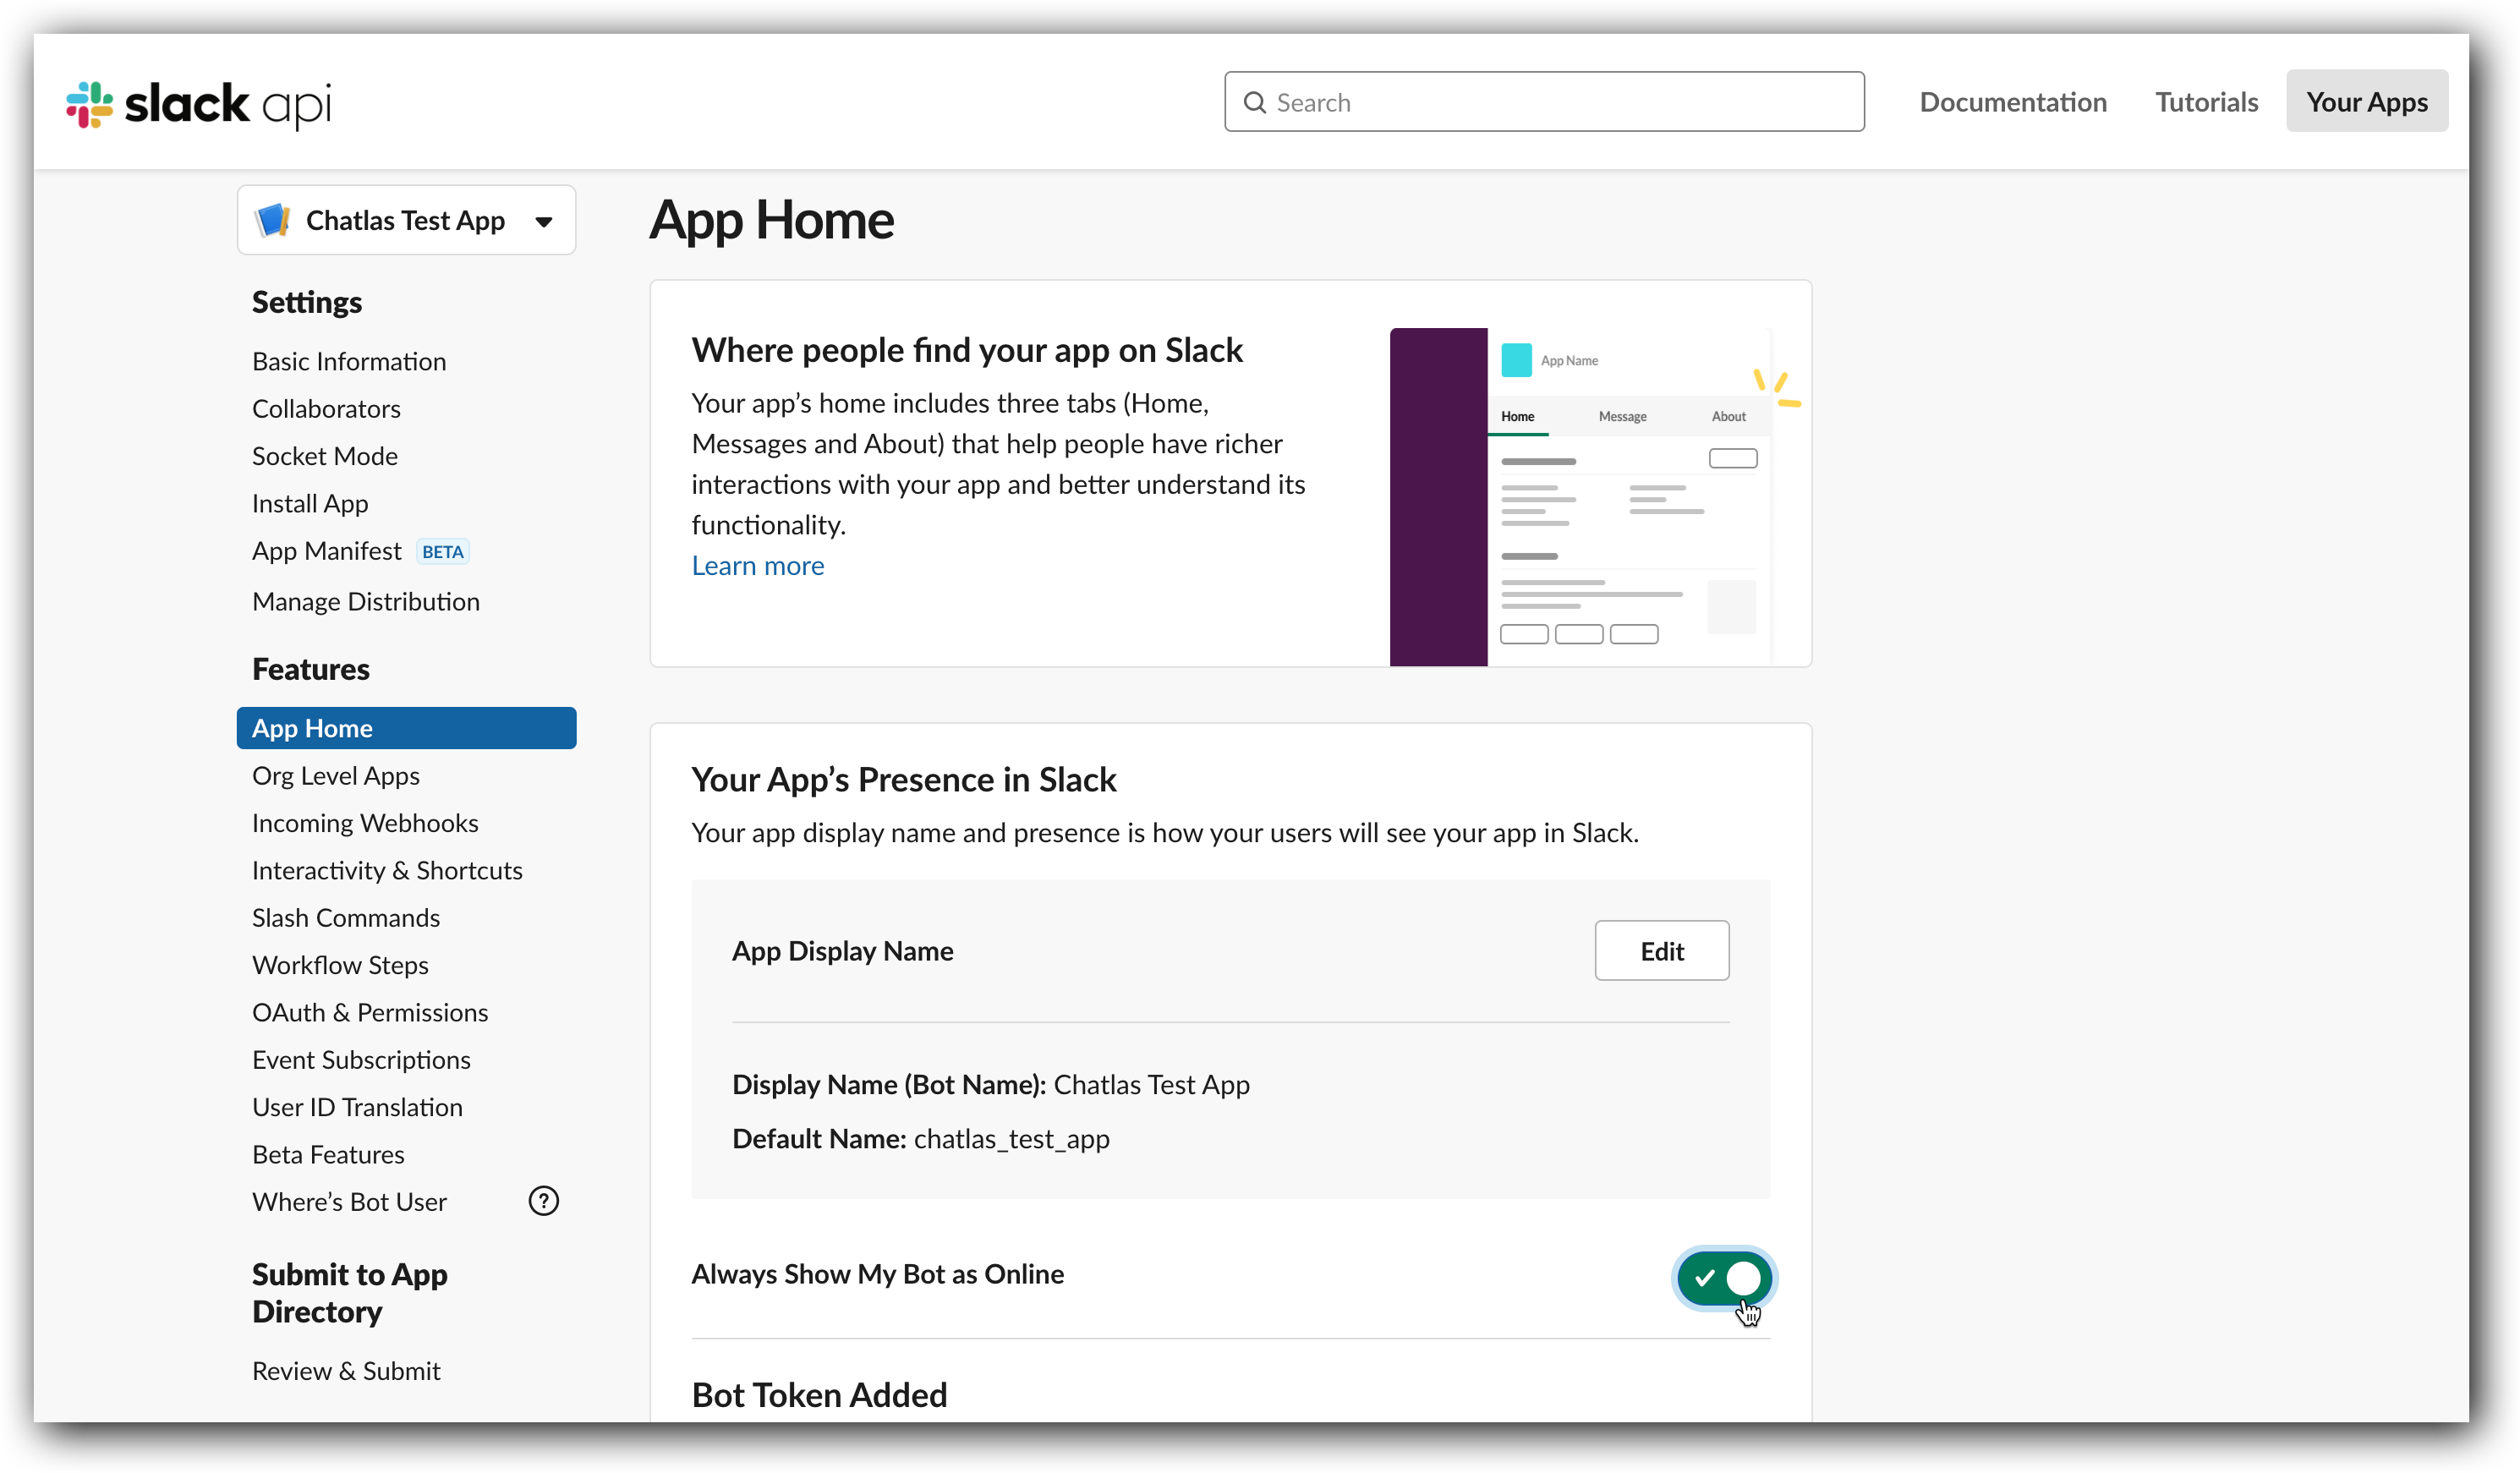
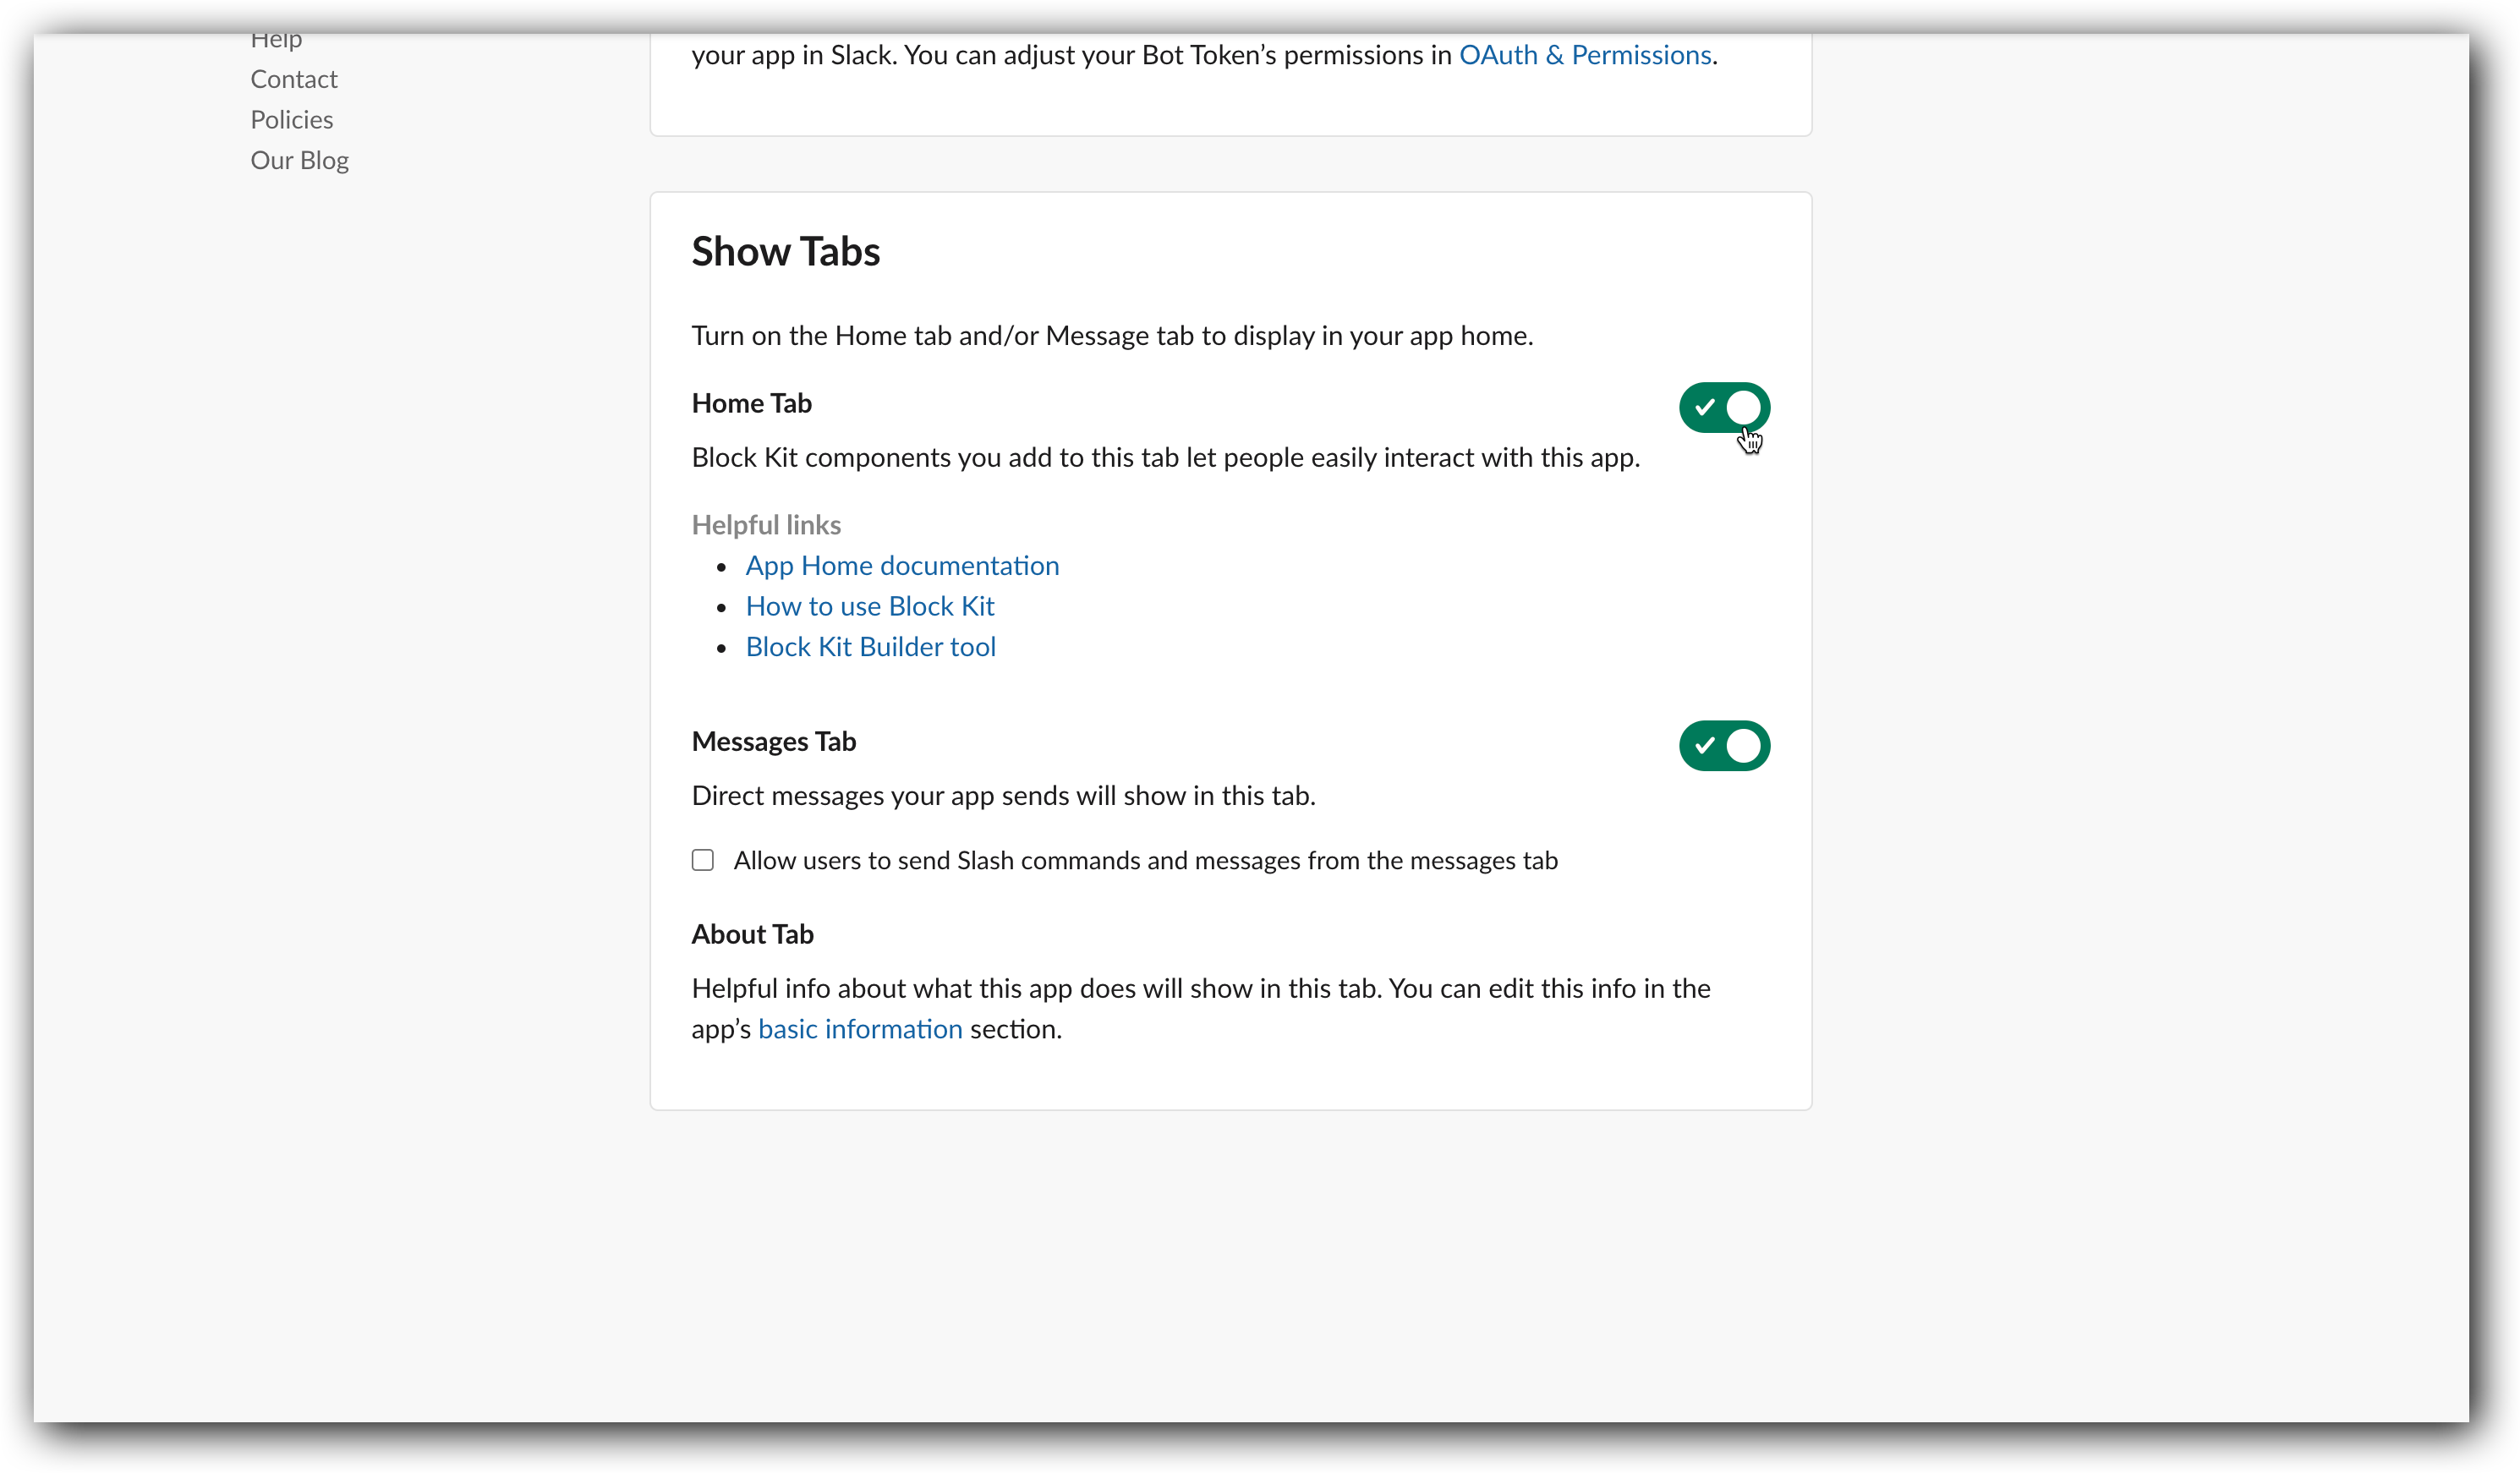
Optionally, you can edit your “App Display Name”. Then, in the sub-section “Show Tabs” toggle the “Home Tab” to become active.
Step 9: Save ALL changes on both the Slack Integration Set Up on the Voice Atlas Web App and the Slack API and start using your chatbot right away!