Zoom
Voice Atlas can be found on the Zoom App Marketplace allowing you to seamlessly integrate your Atlas content with the Zoom platform. Here you will find step by step instructions on how to install and use the Voice Atlas application found in the Zoom App Marketplace.
Before you are able to integrate your Atlas content, you must first Create an Atlas. For a detailed explanation of your Atlas and how to add Atlas content, please refer to our Quickstart Guide.
Zoom Integration Video Tutorial
This is an overview of the Voice Atlas Zoom integration in video format.
Activate the Zoom integration in your Voice Atlas account
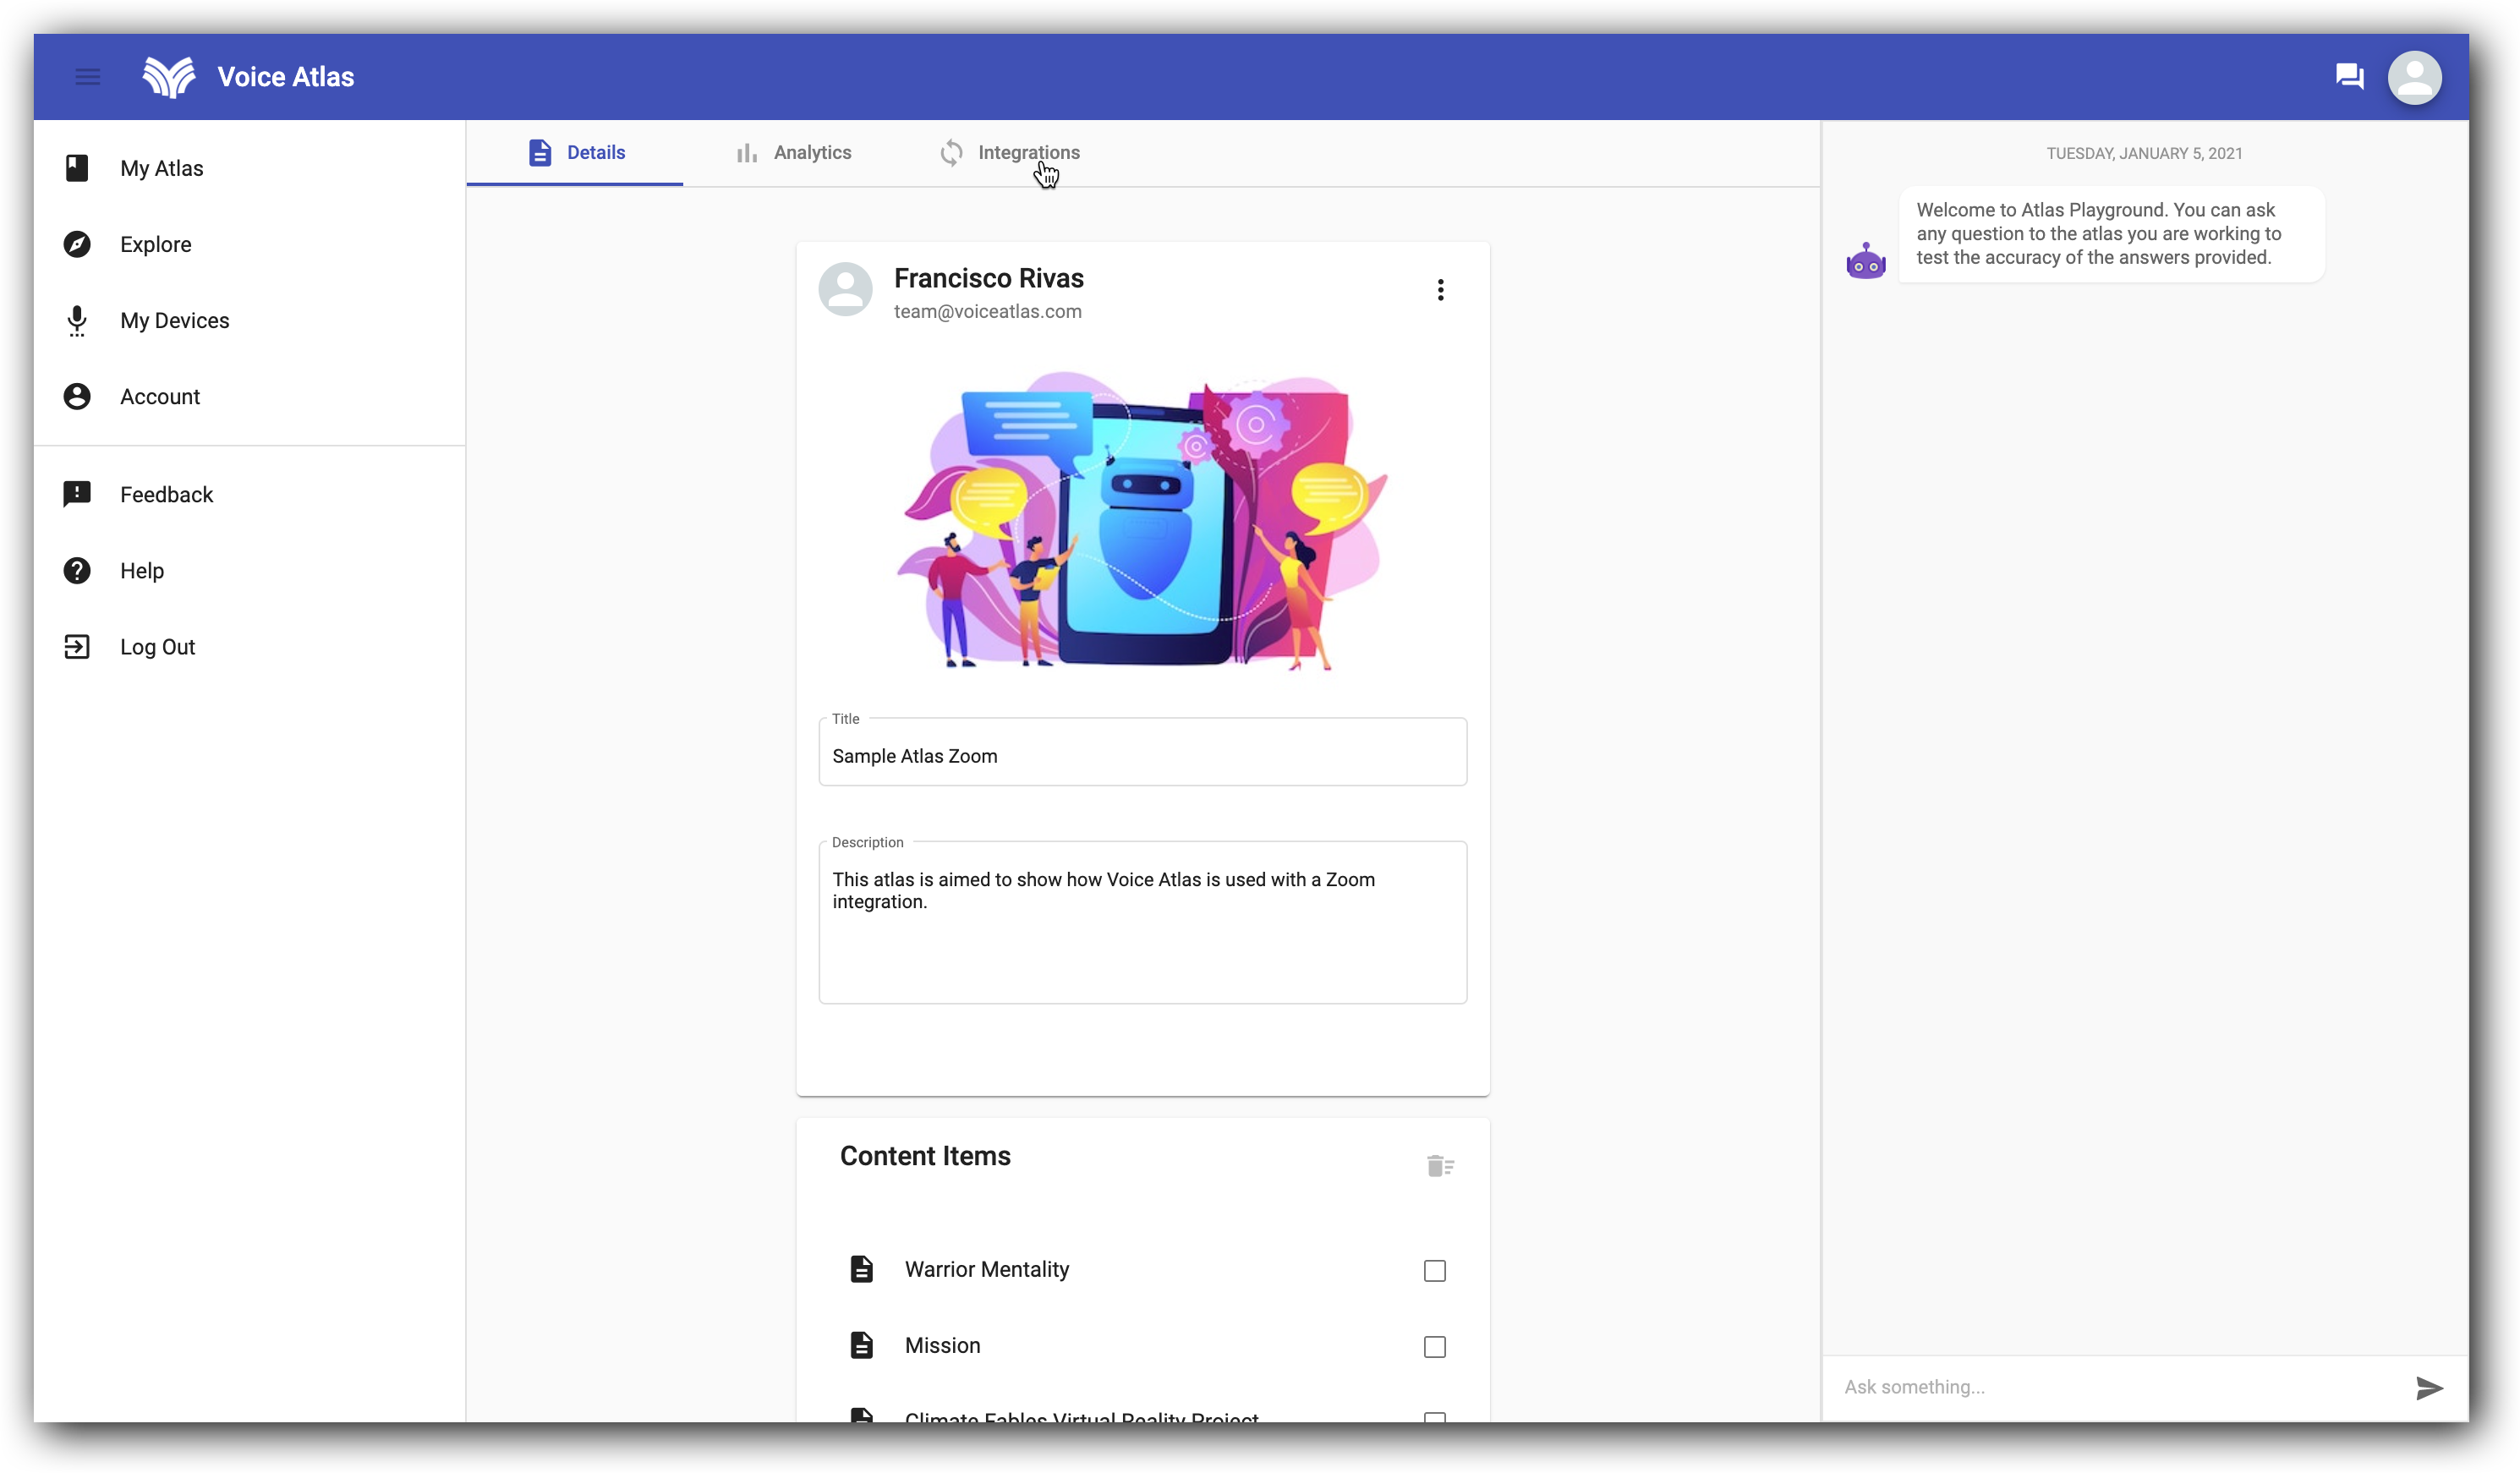
STEP 1: After logging into your Voice Atlas account through the Voice Atlas Web App, open your atlas and click "INTEGRATIONS".
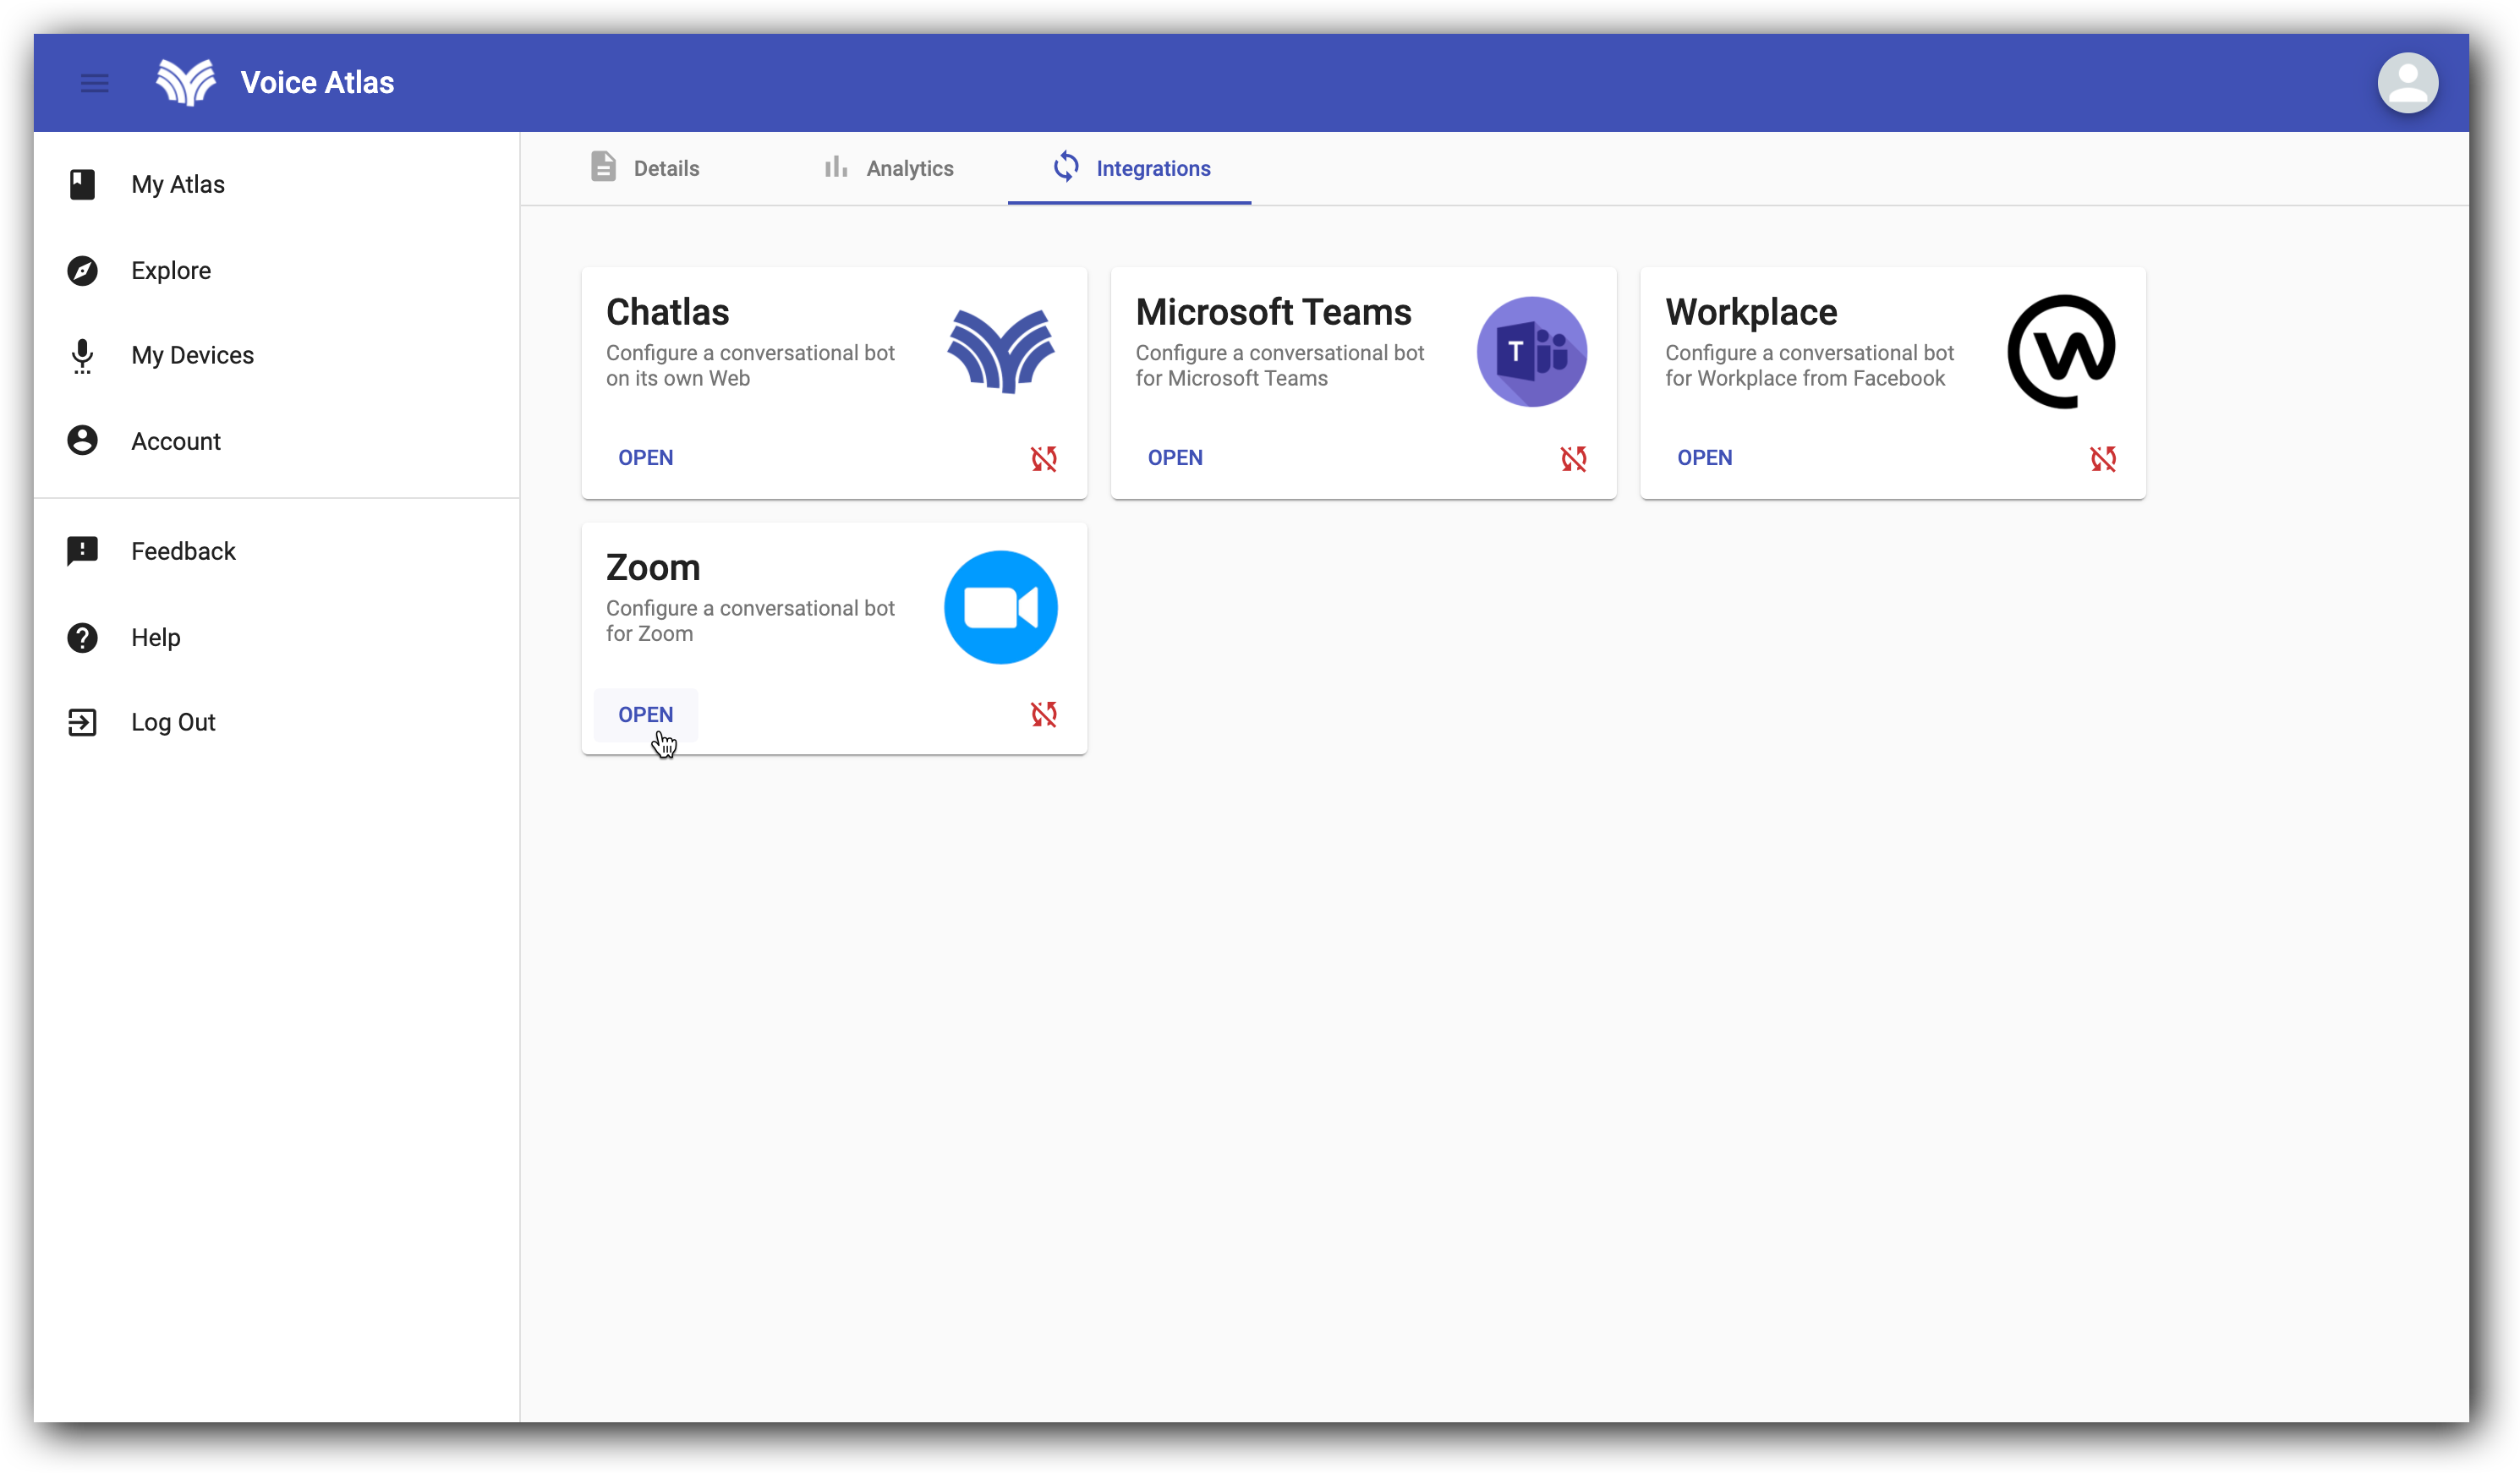
STEP 2: Under "INTEGRATIONS", look for the Zoom integration and click "OPEN".
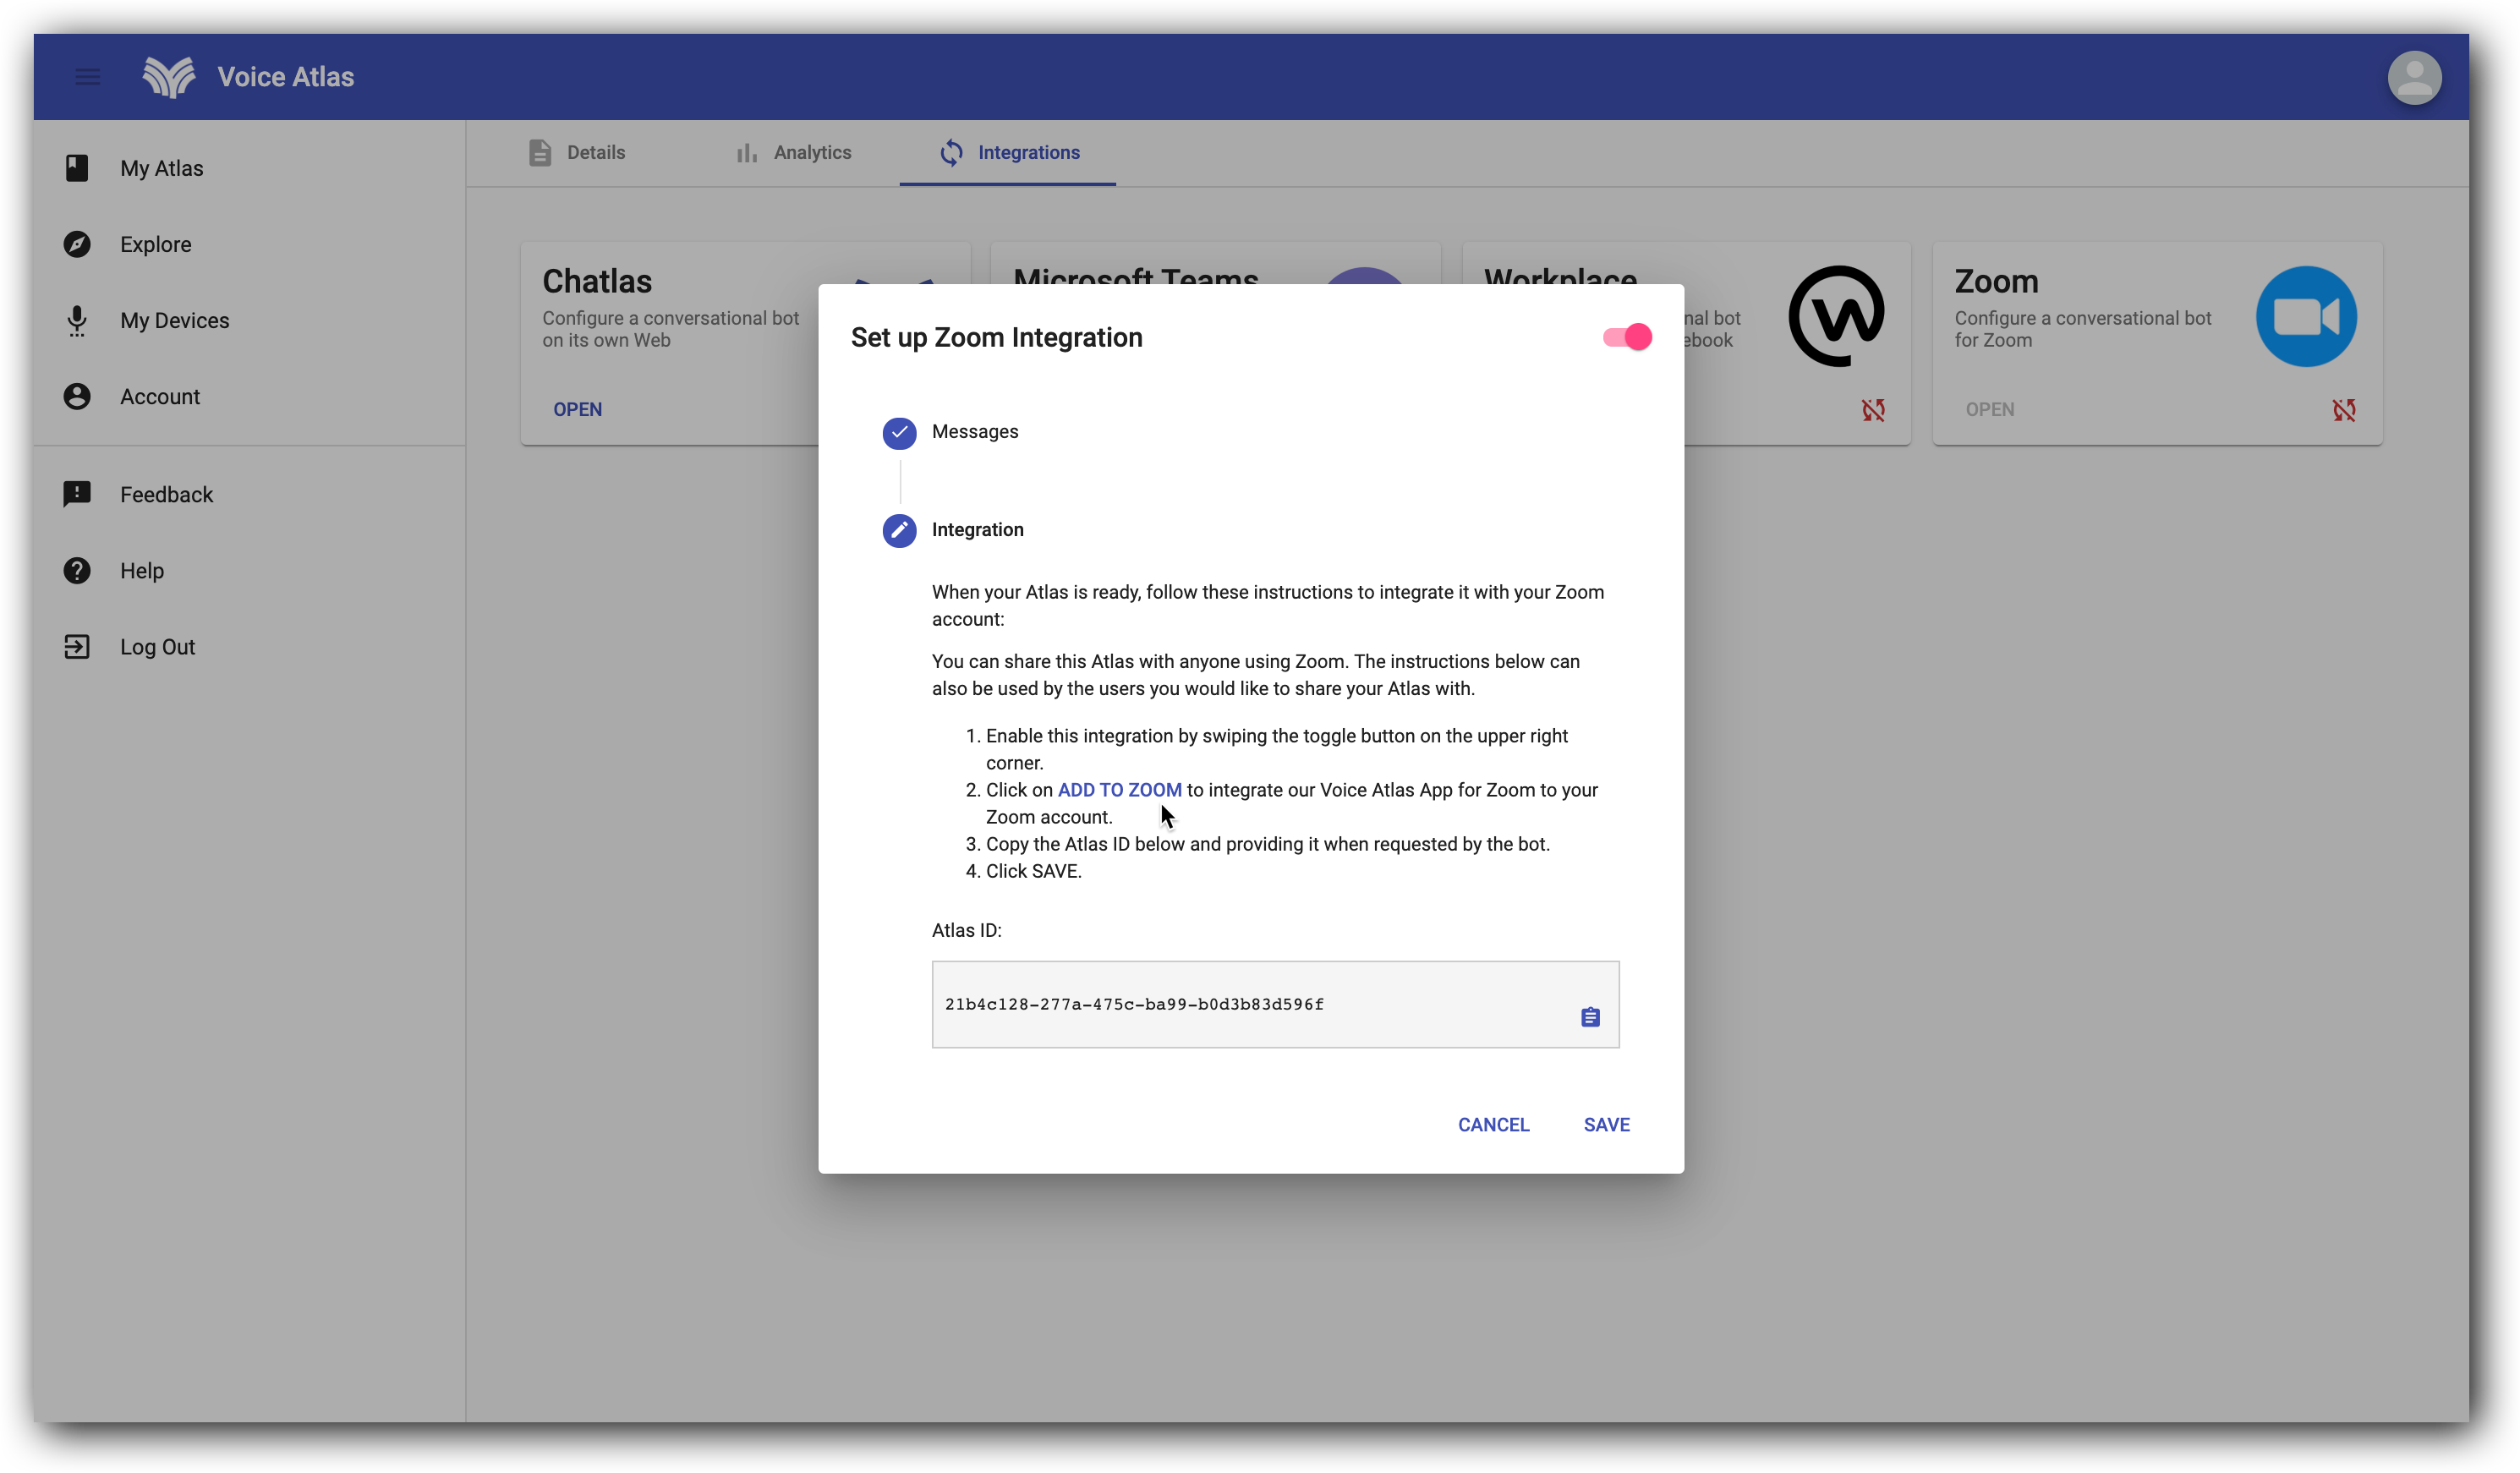
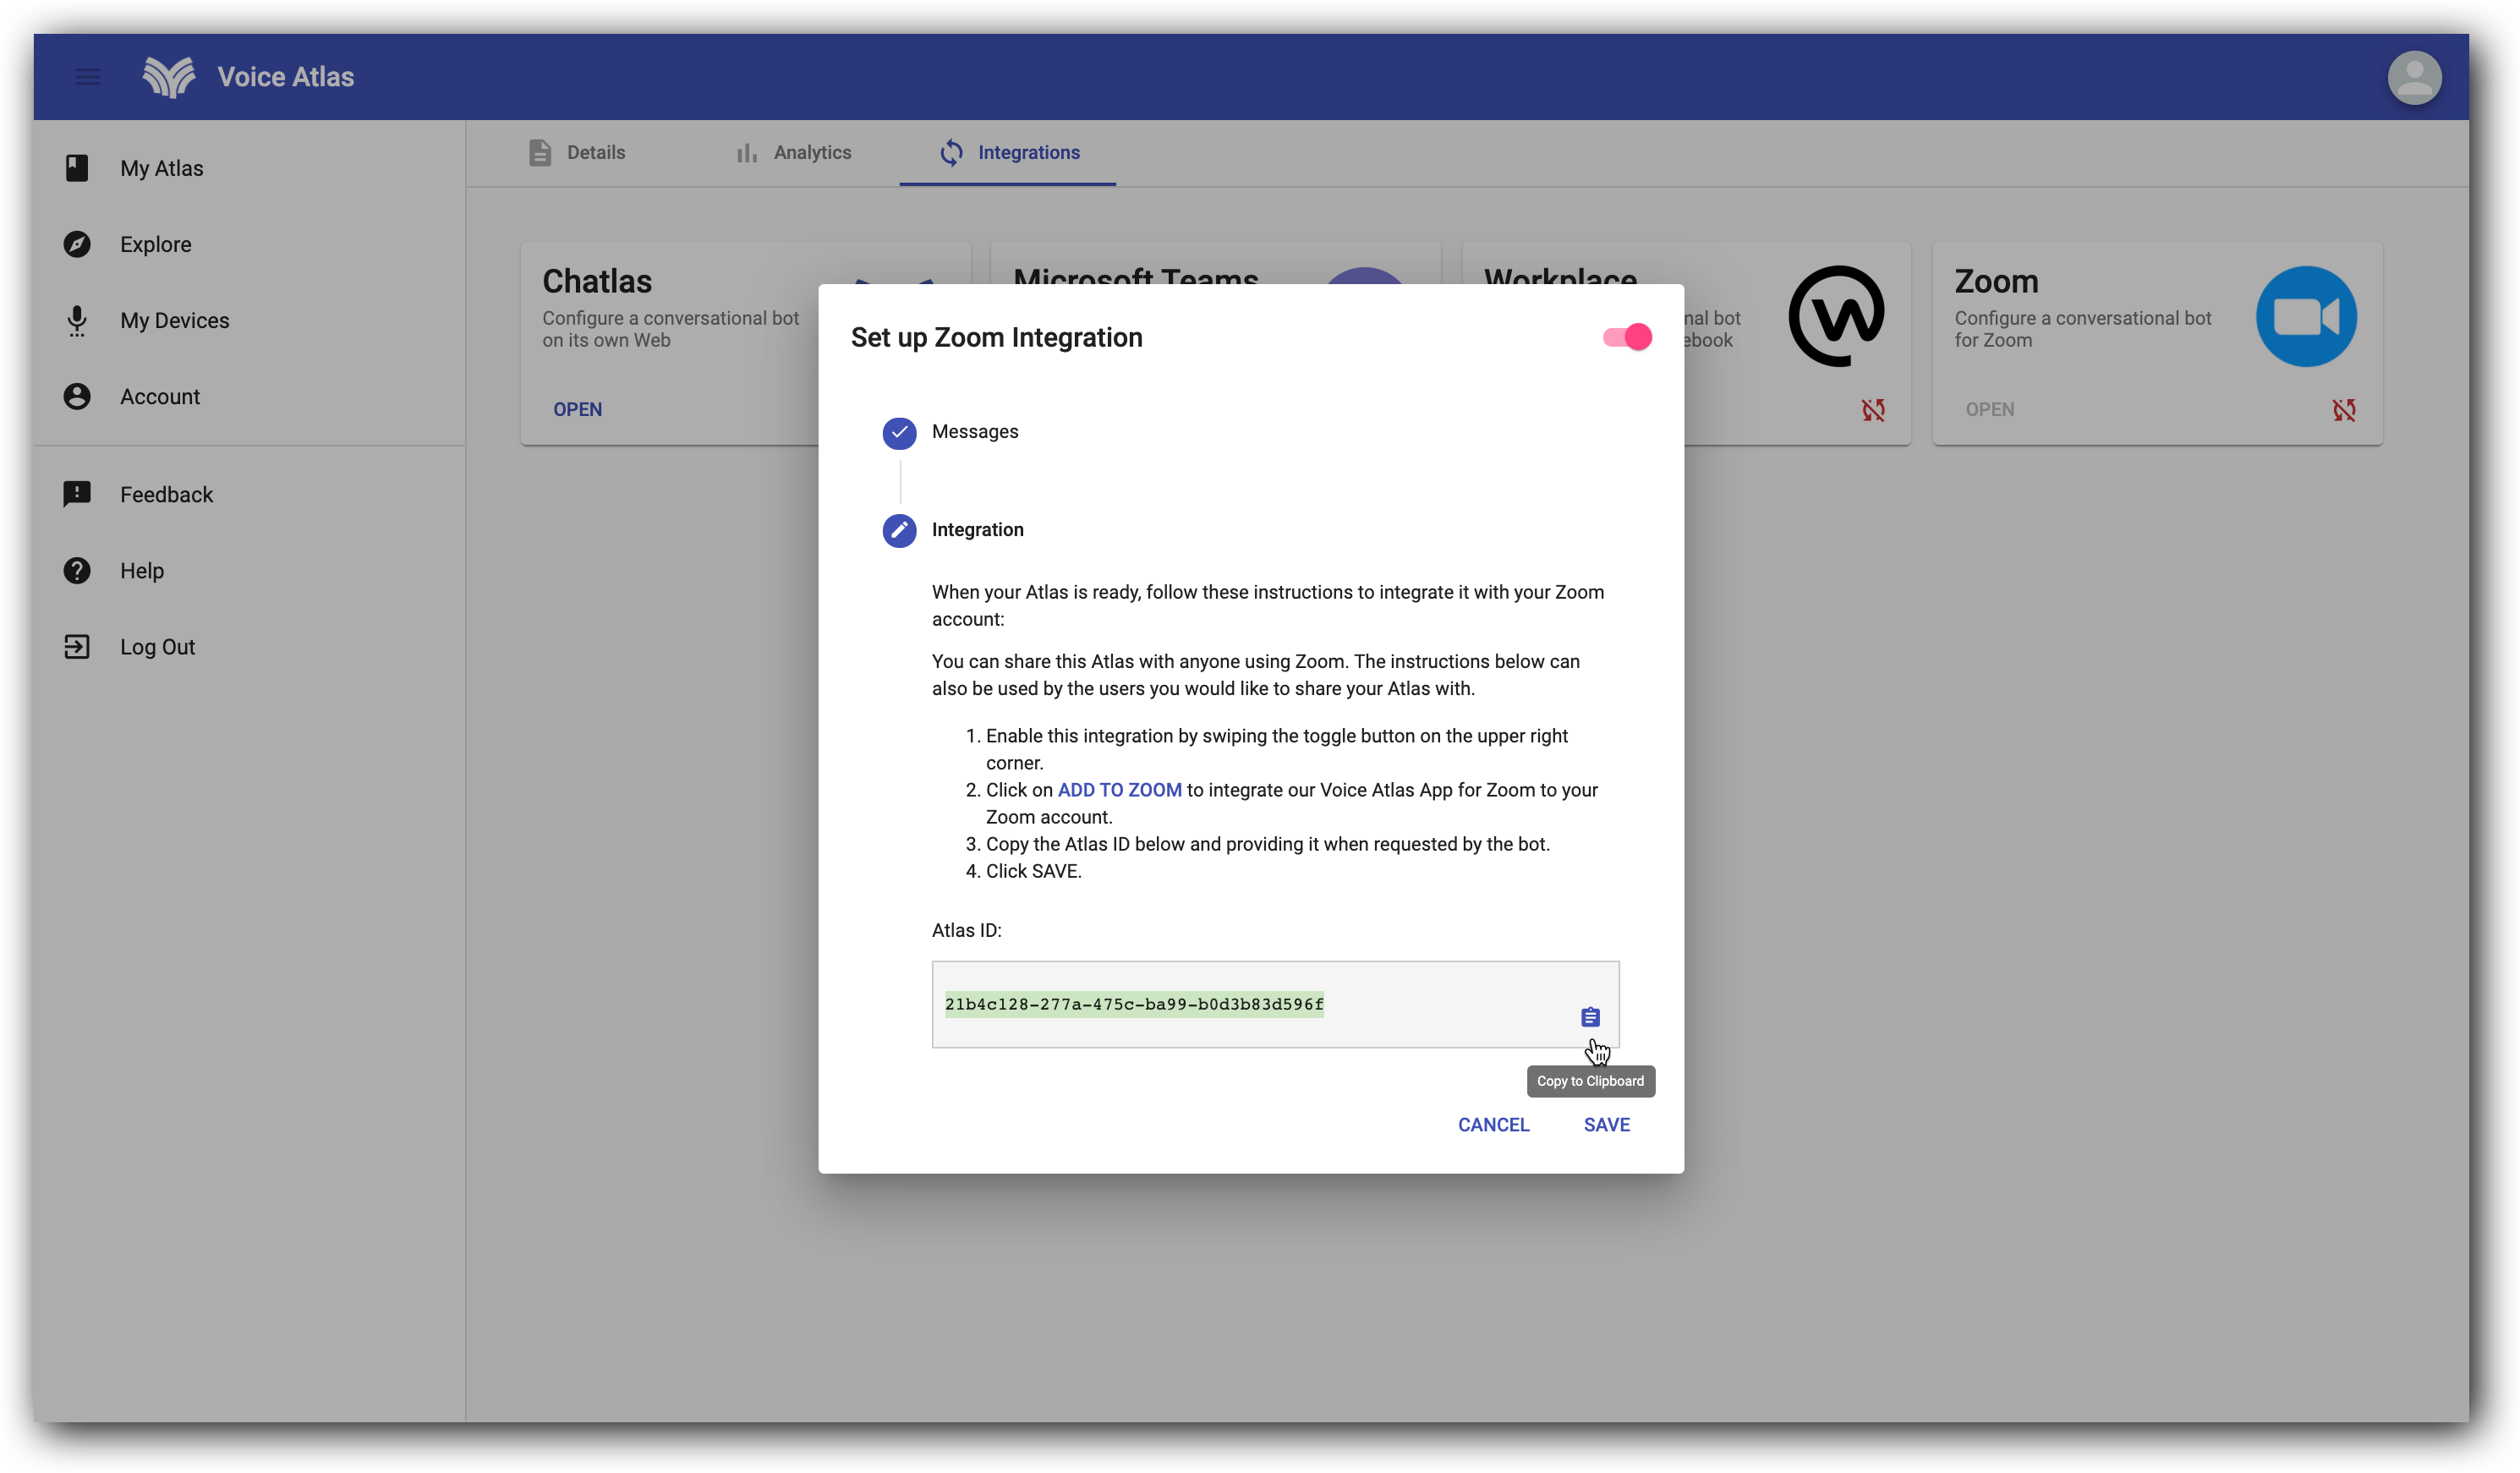
STEP 3: Click the “TOGGLE” in the top, right hand-corner to activate the Zoom integration.

How to install the Voice Atlas Zoom App
STEP 1: After activating the Zoom integration in your Voice Atlas account, continue under "Integration" where you will click on ADD TO ZOOM to enable our Voice Atlas chatbot in your Zoom application.
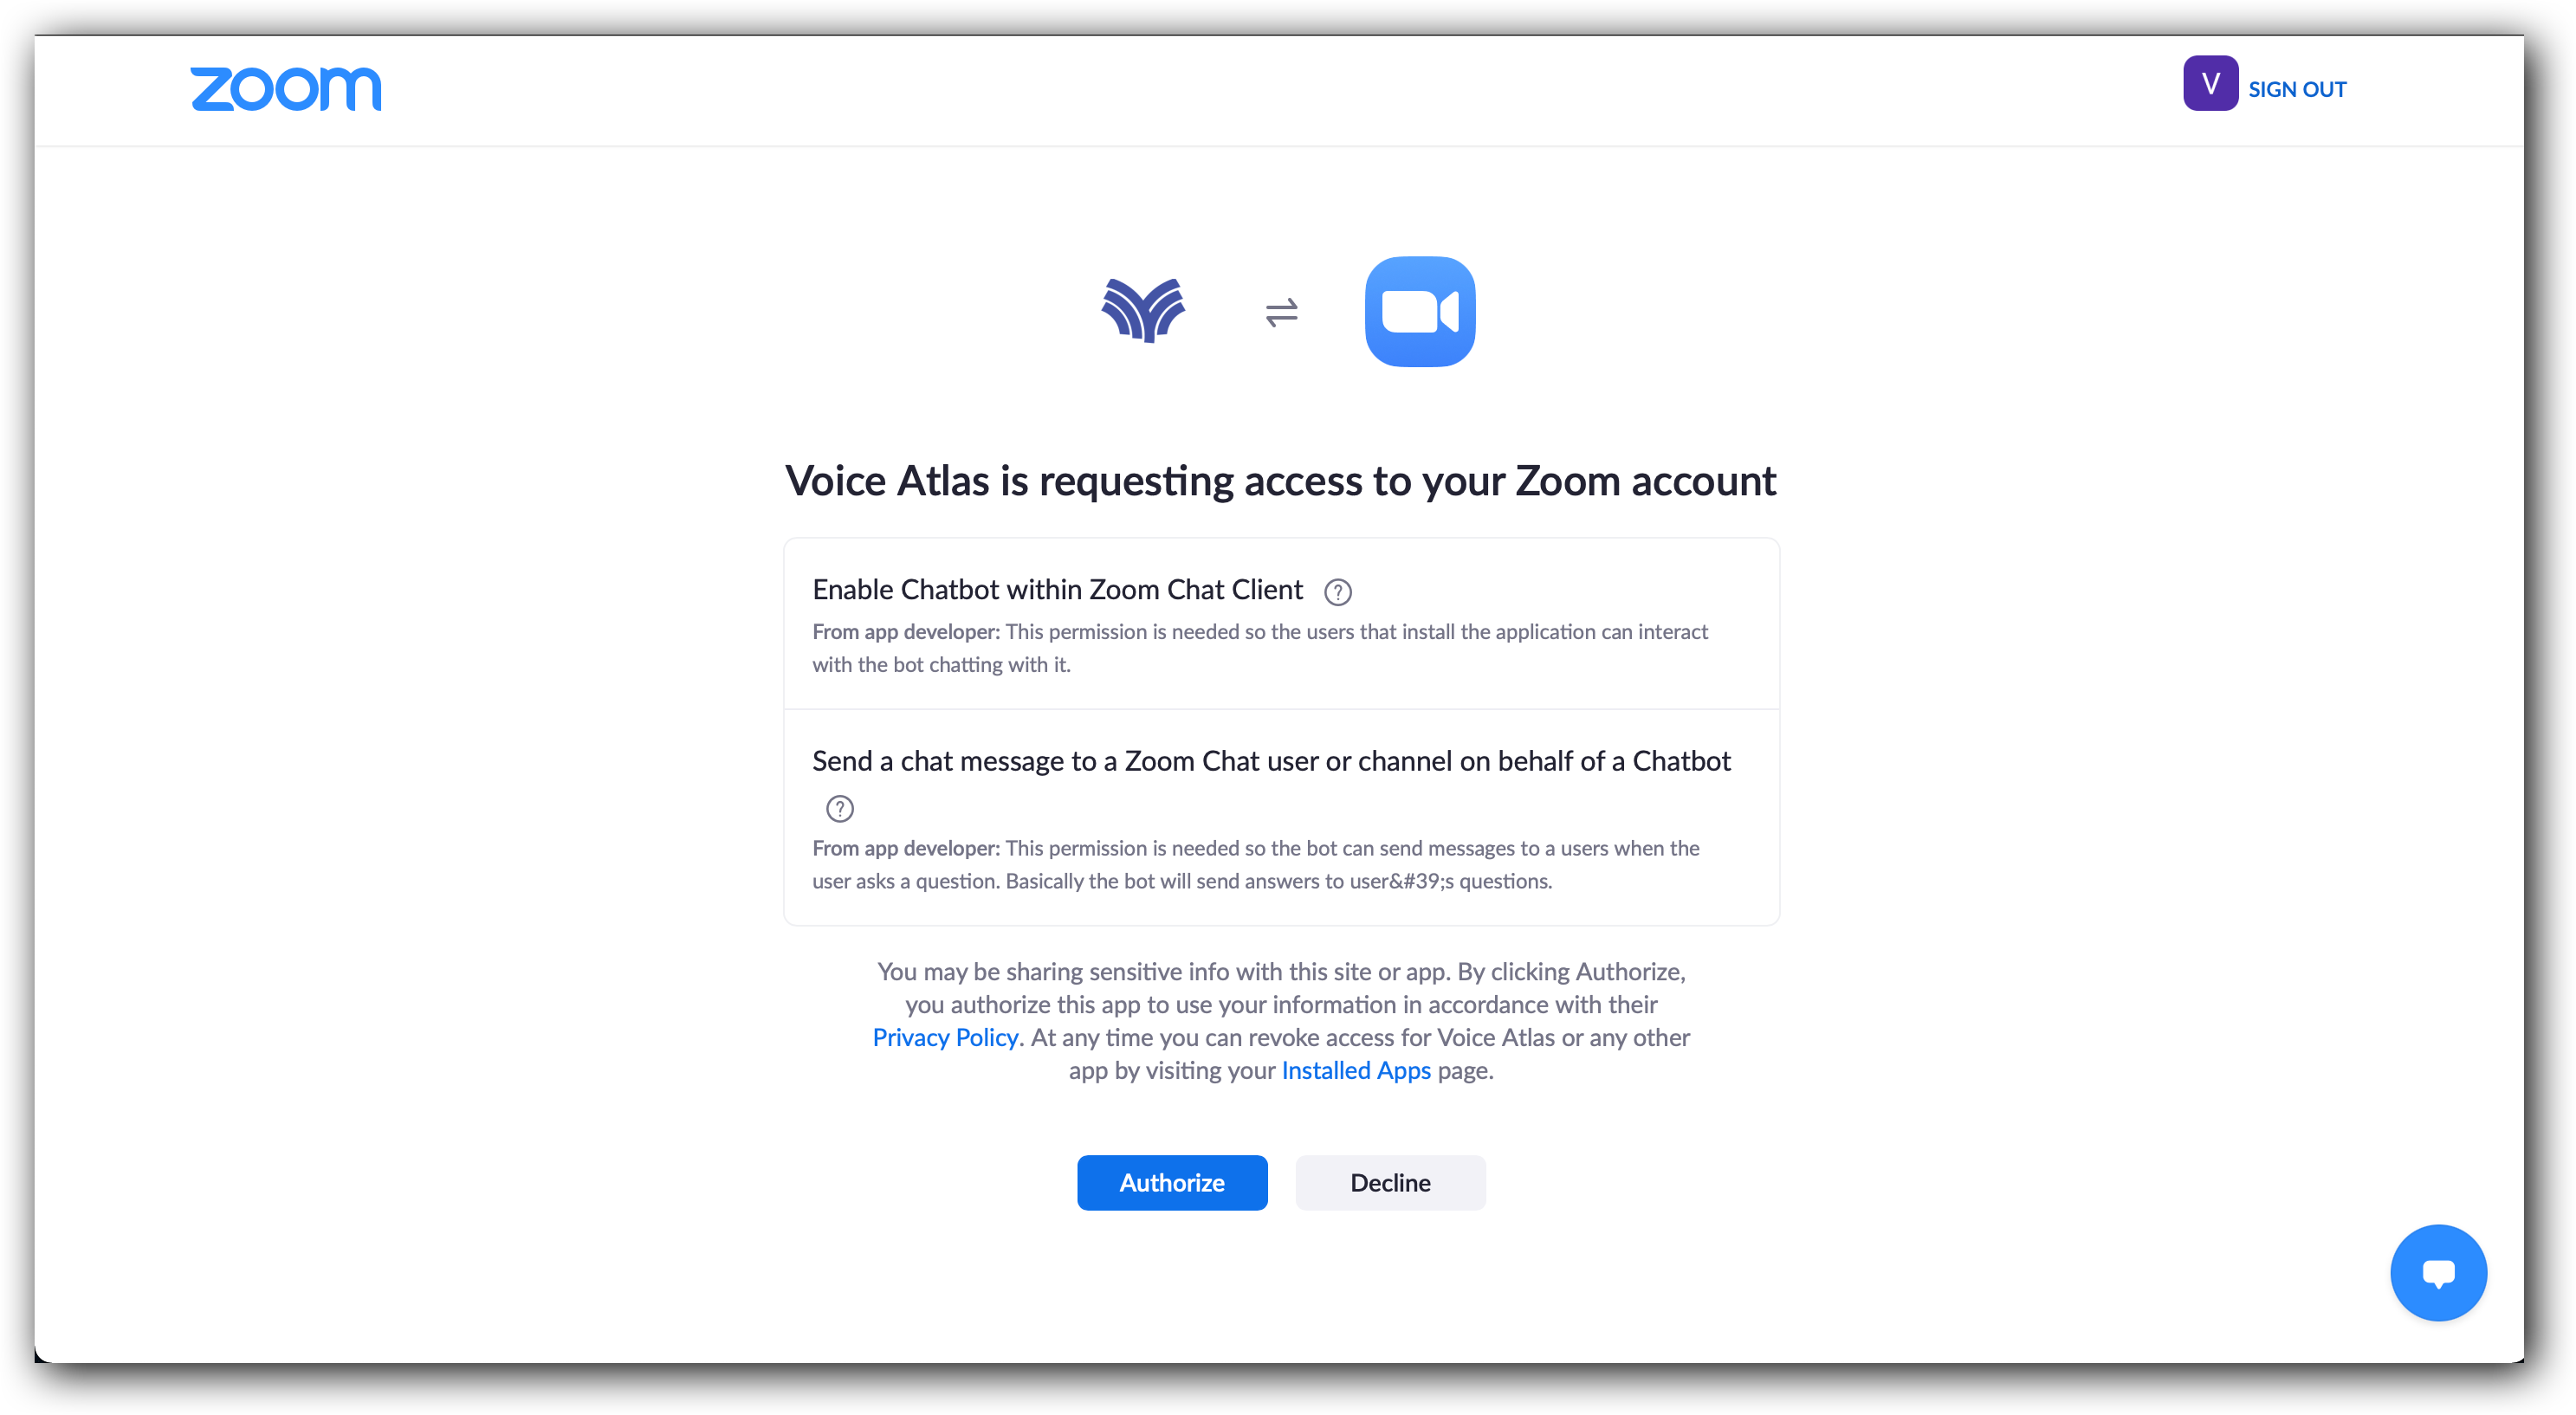
STEP 2: Log in to your Zoom account using your Zoom username and password, and click "Authorize" to enable the Voice Atlas chatbot.
STEP 3: After allowing the required permissions, your Zoom application will automatically install the chatbot and refresh the chat with a new message from your Voice Atlas chatbot asking for the Atlas ID.
![]()
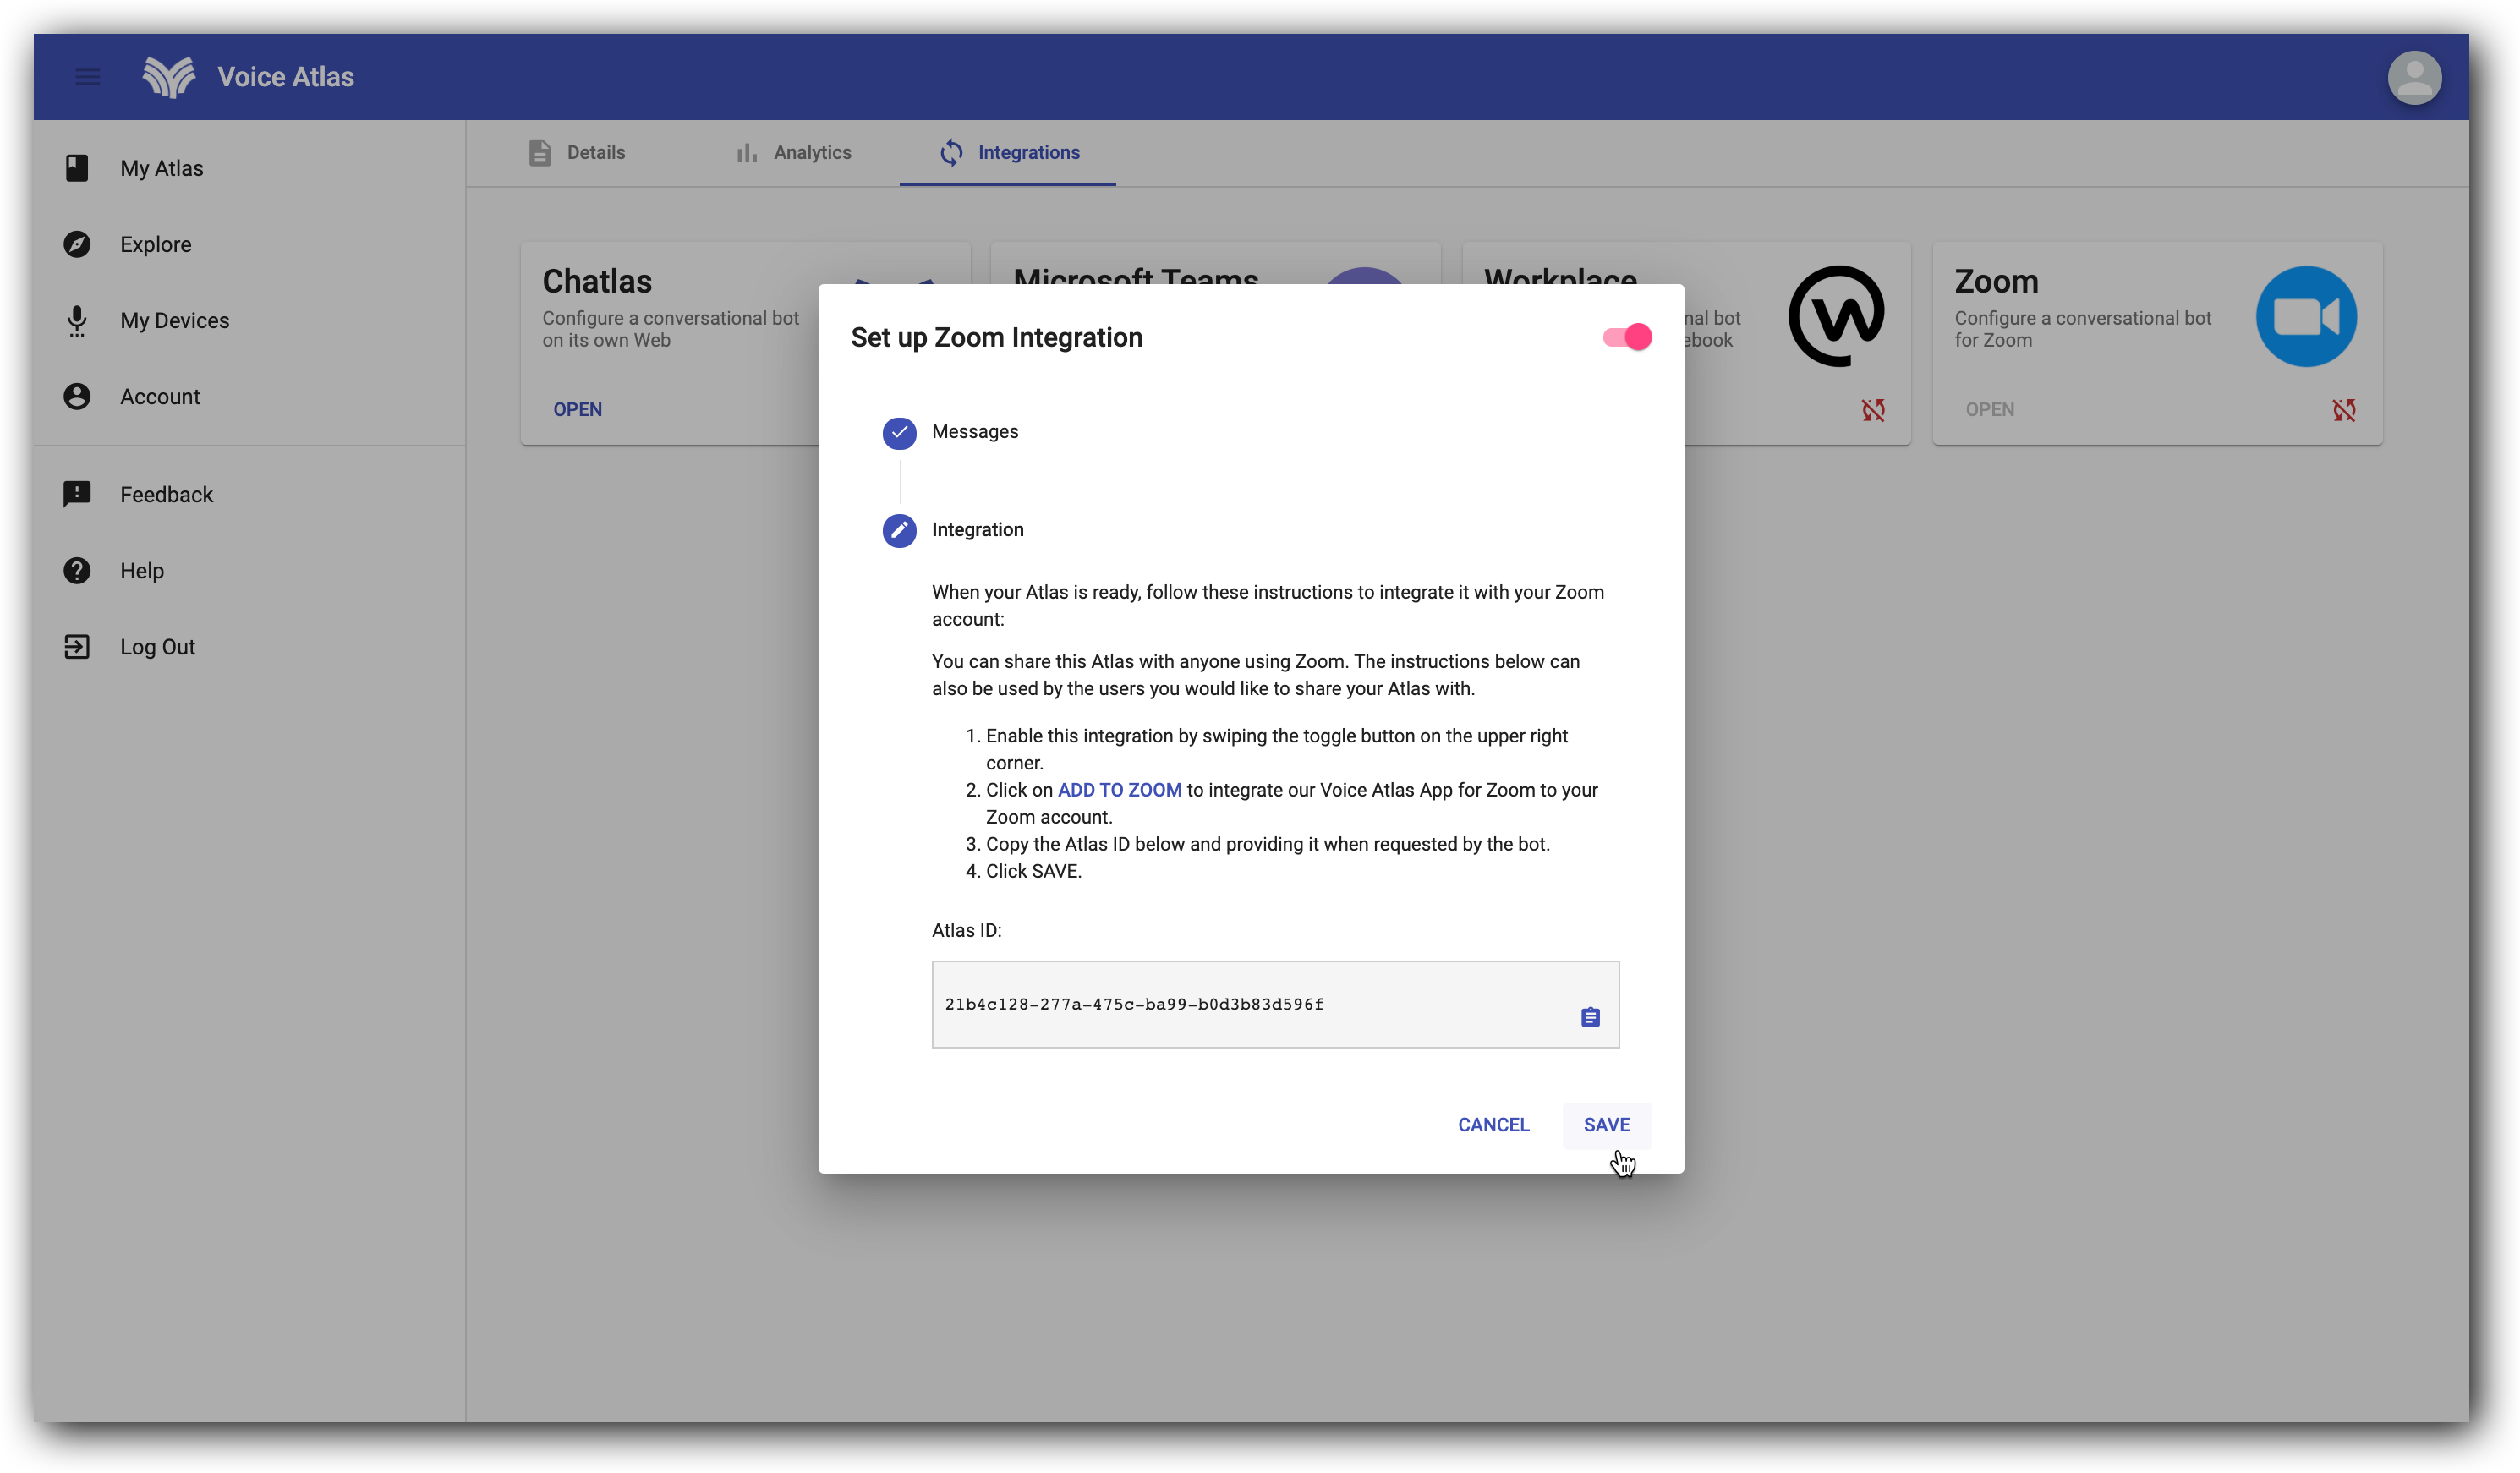
STEP 4: In the Voice Atlas web app under the Zoom integration, copy the Atlas ID provided.
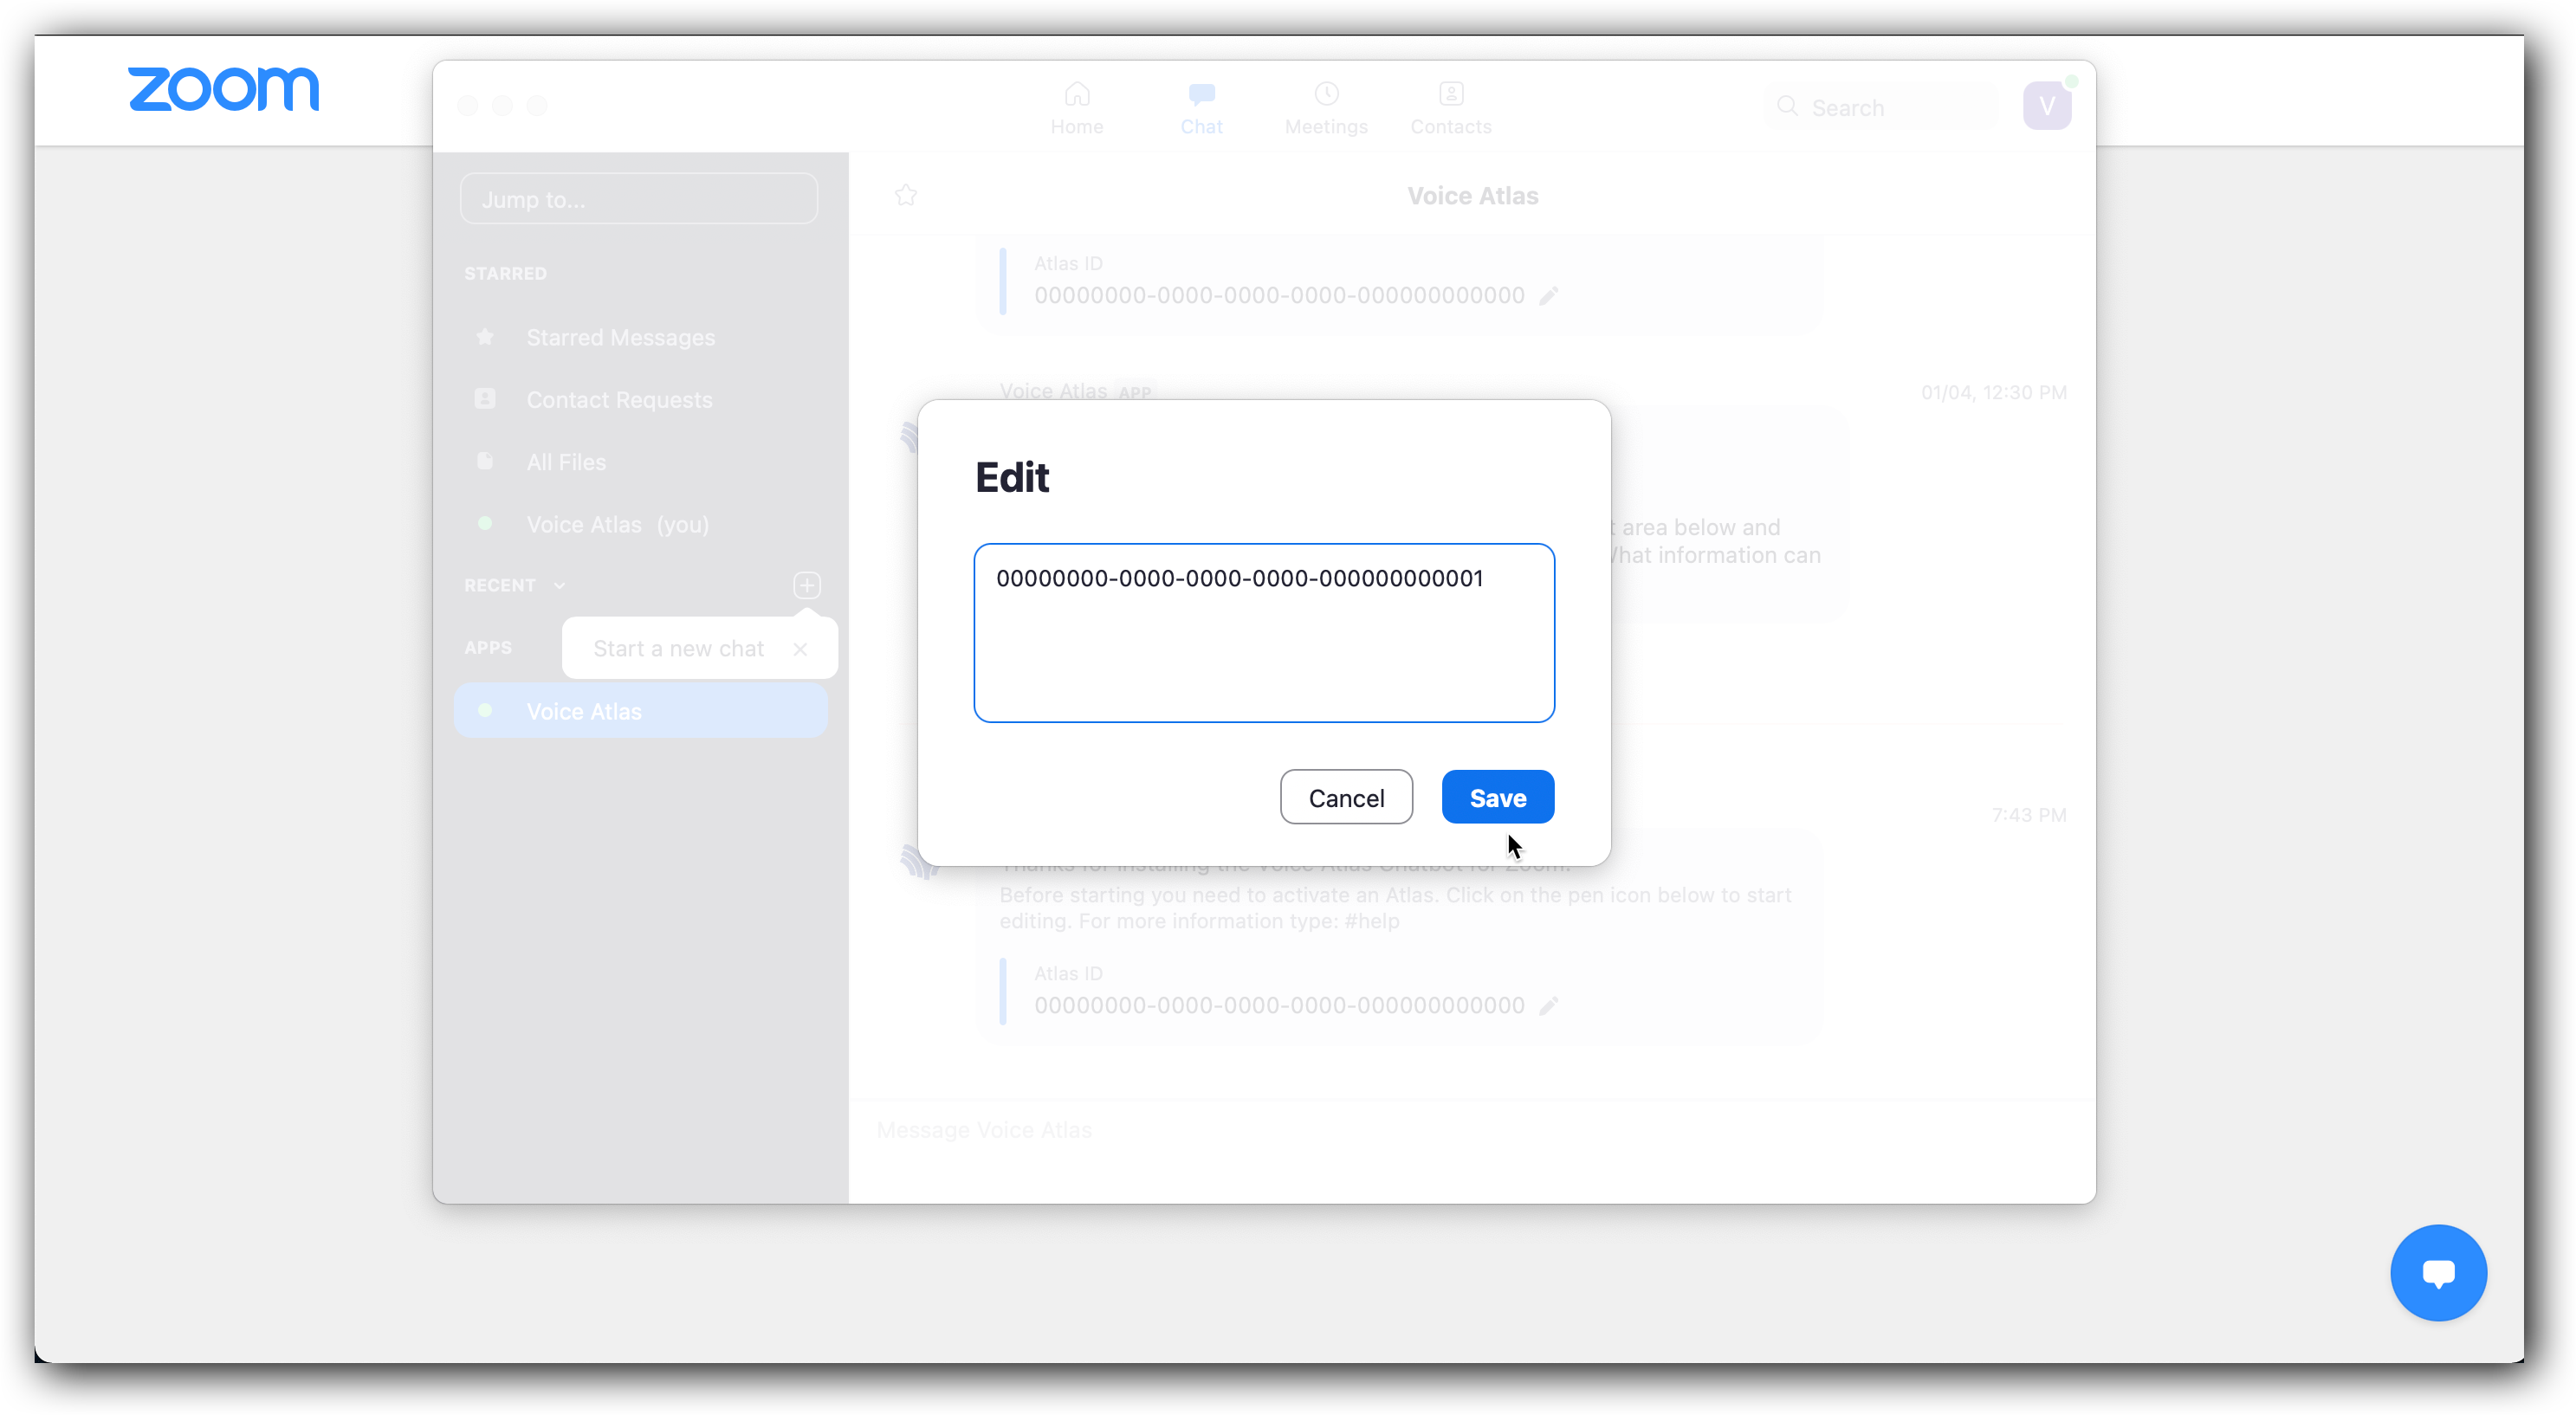
STEP 5: Return to the Zoom chat, click the "PENCIL ICON" and paste the Atlas ID directly into box, then SAVE.
STEP 6: Return to the Voice Atlas web application and click “SAVE”. Your integration is now complete.
How to use Voice Atlas chatbot
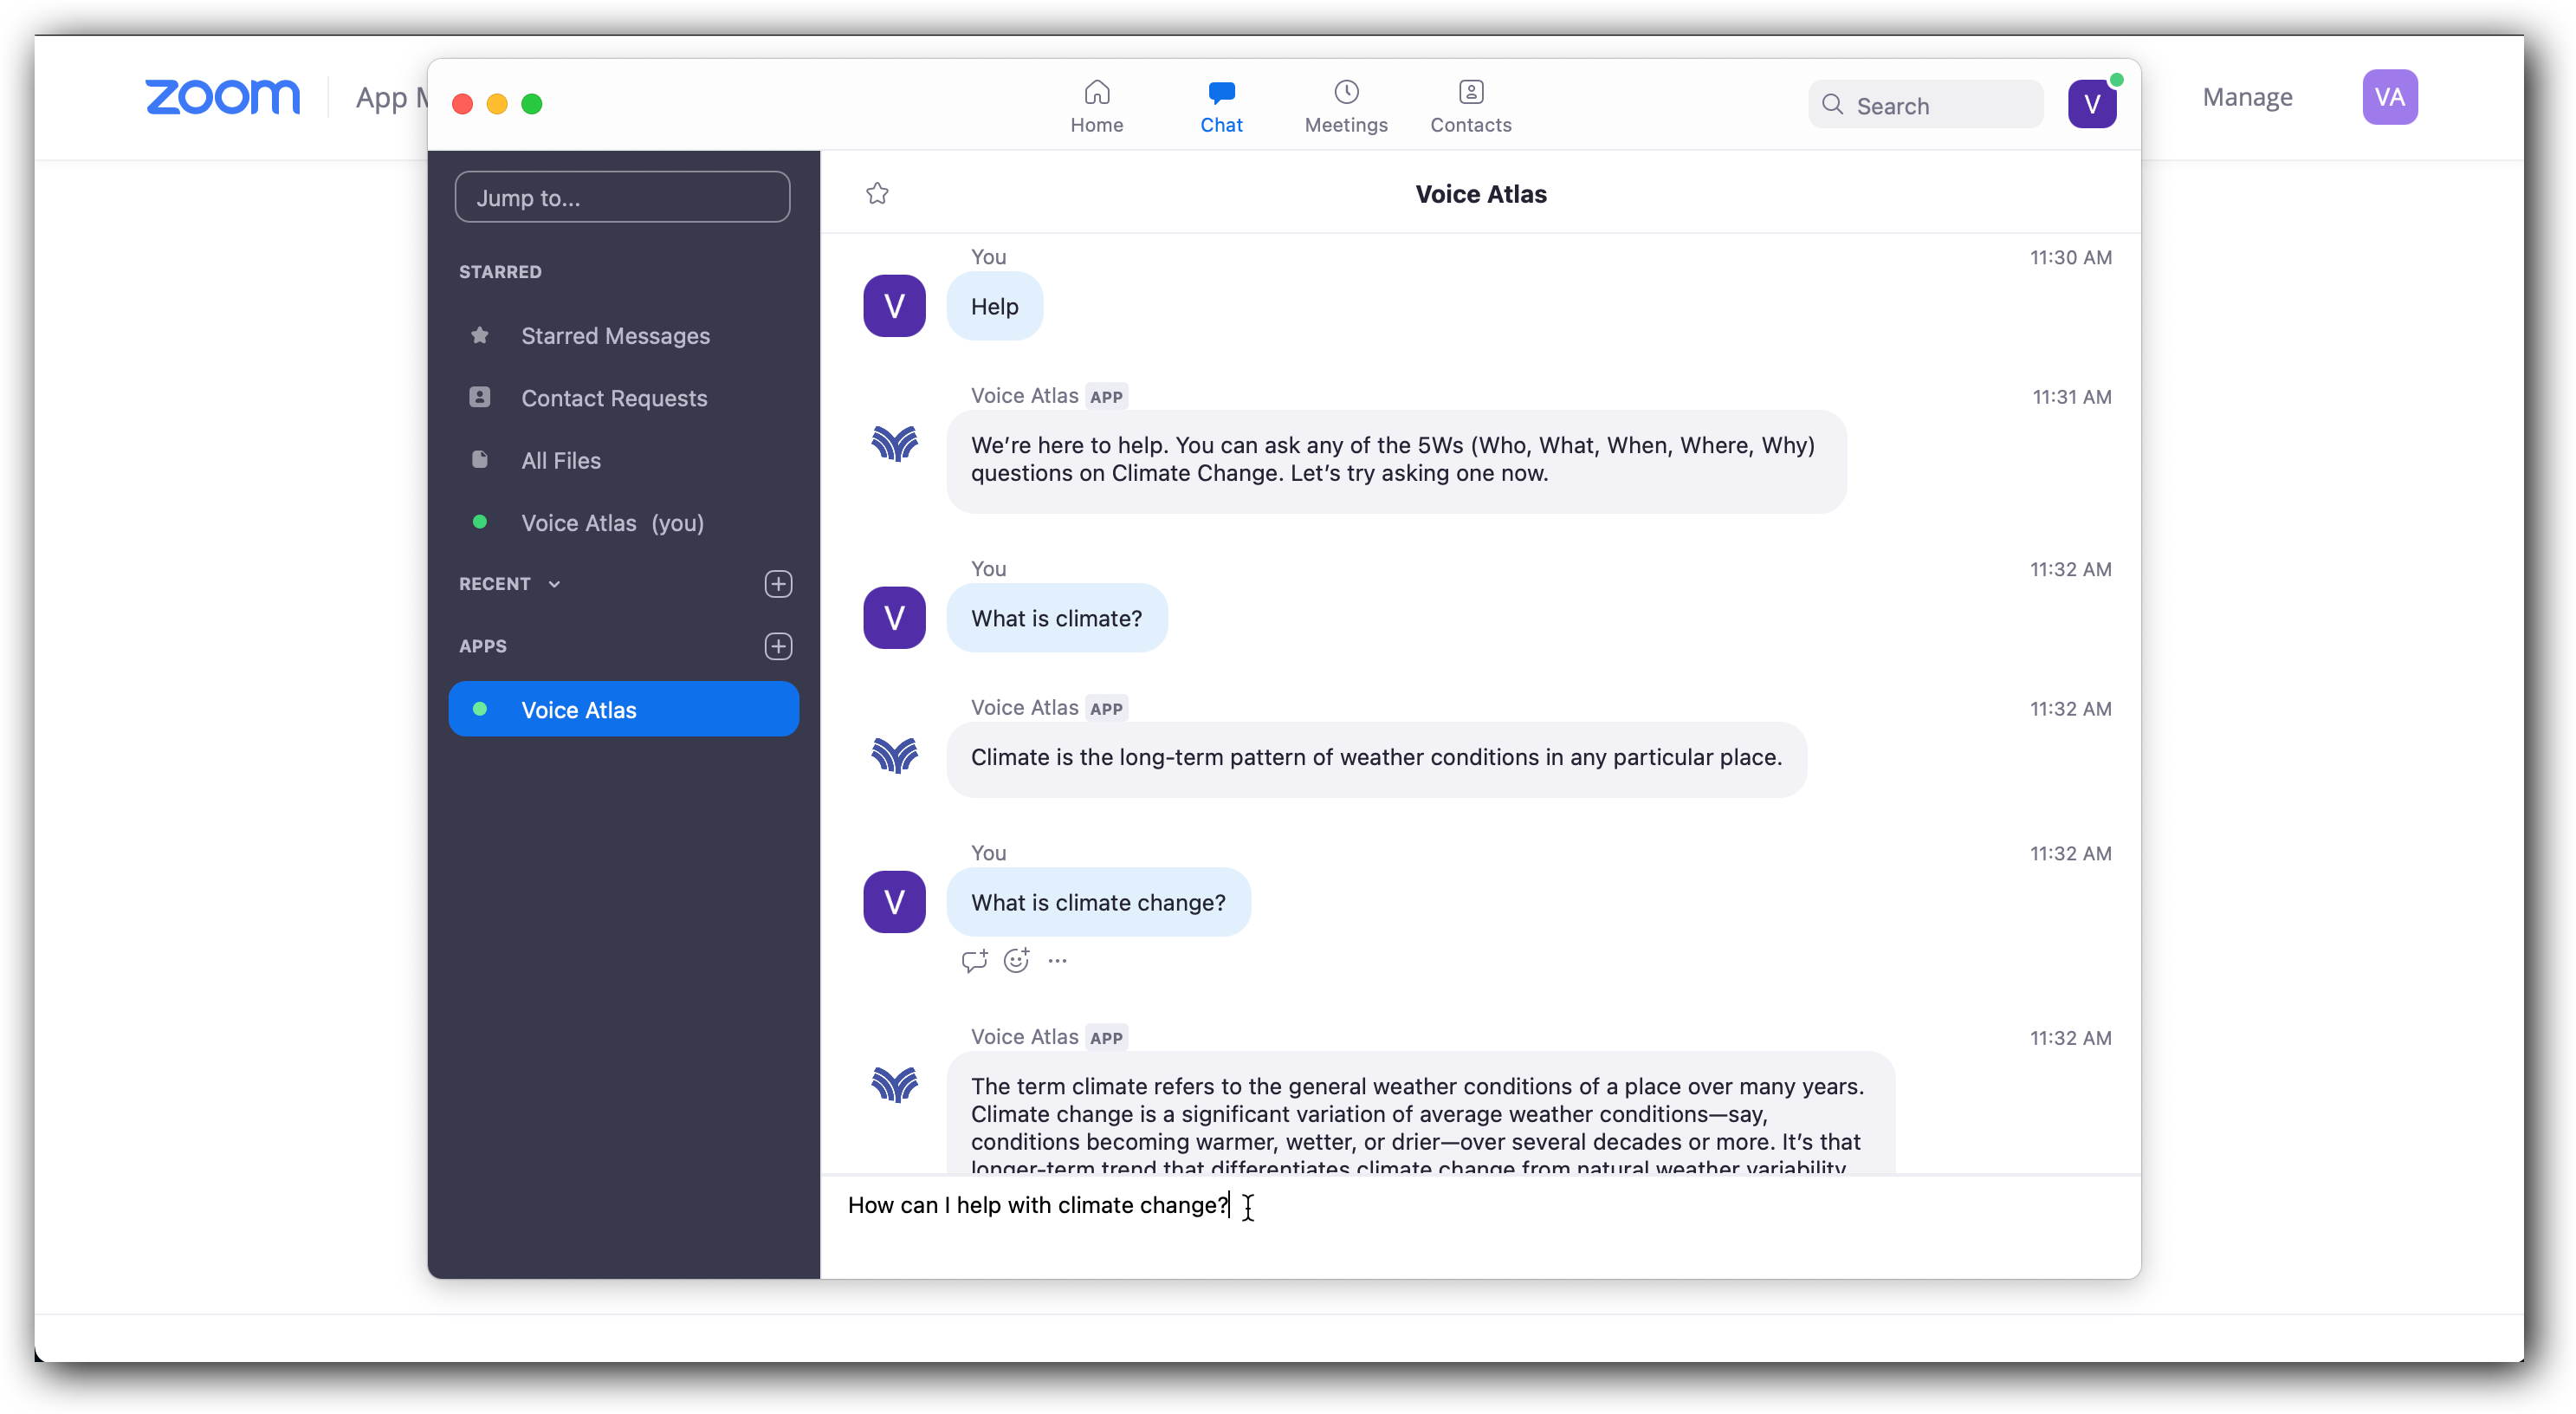
Once setup has been complete, your Voice Atlas chatbot works seamlessly within the Zoom chat client. Simply type any question related to your Atlas content in the chat and you will receive an answer from the chatbot.
Share Atlas content with other users on Zoom
Your Atlas content can be easily be shared with other users on Zoom. All they need to do is simply search for "Voice Atlas" in the Zoom App Marketplace and enable the application in their Zoom account.

You will share your Atlas ID found in the Zoom integration set up on the Voice Atlas web app and once the users enter and save the Atlas ID, set up is complete.
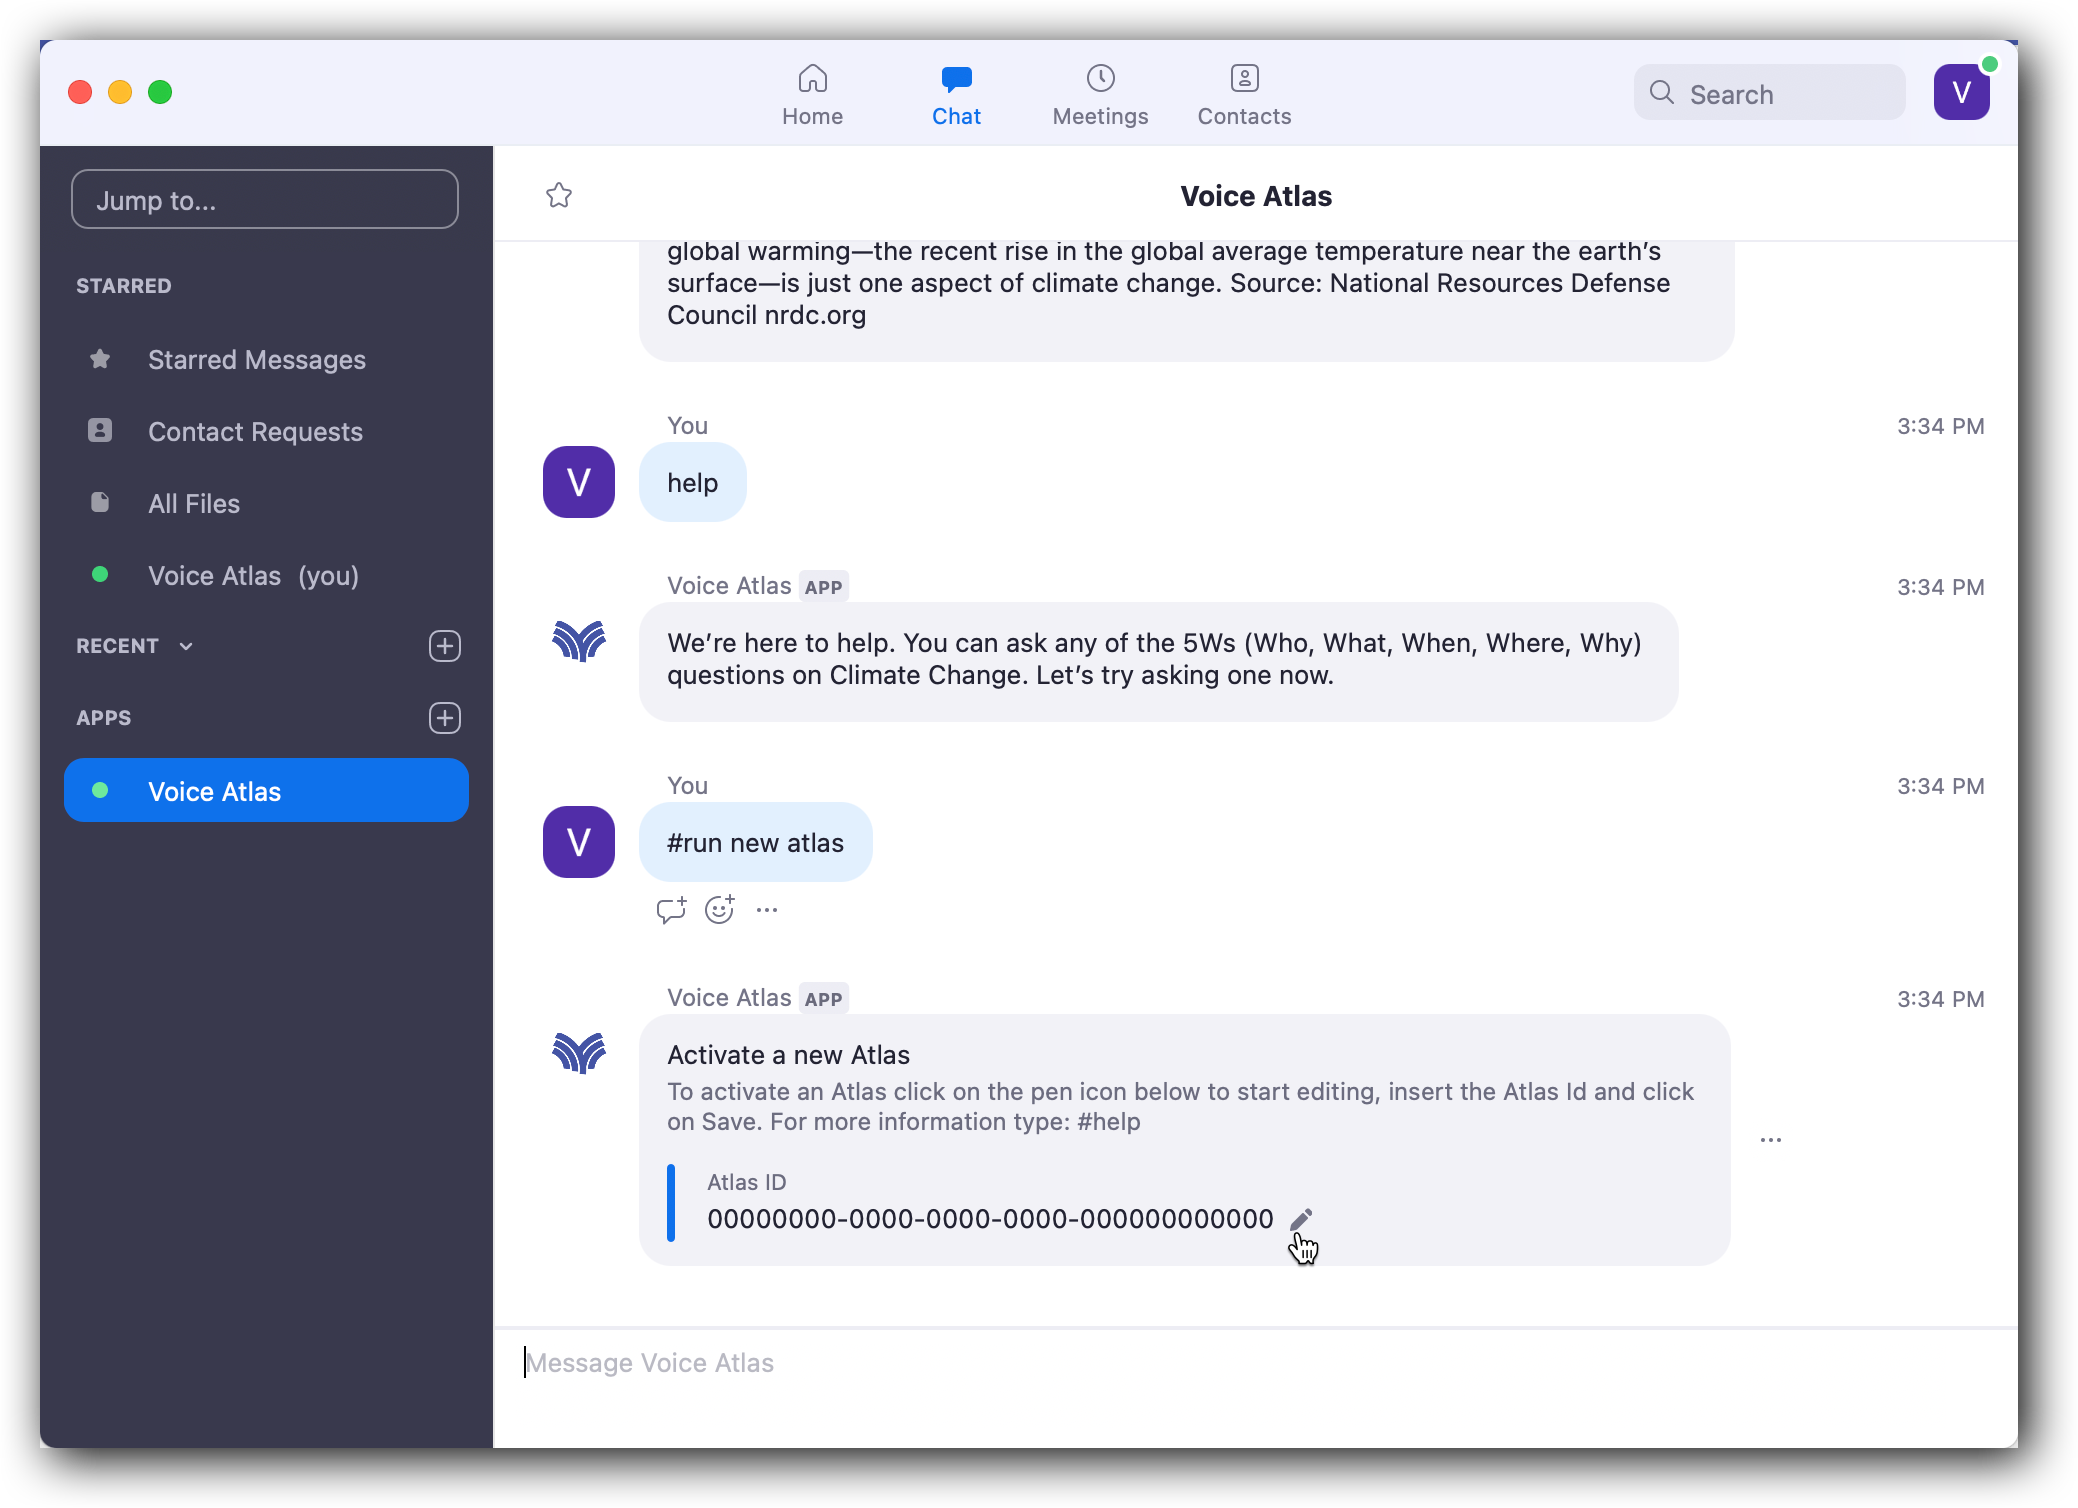
Edit Atlas ID on Zoom
The Atlas ID can be changed in the Zoom application as many times as you'd like in order to access different Atlas content. To Activate a new Atlas ID, type '#run new atlas' as a message to the Voice Atlas bot and hit enter. A message will appear from the bot with the instructions. Click the "Pencil Icon" to edit Atlas ID and be sure to "SAVE" your changes.
Uninstalling the Voice Atlas chatbot on Zoom
- Login to your Zoom account and navigate to the Zoom App Marketplace.
- Click Manage > Installed Apps or search for the Voice Atlas app.
- Click the Voice Atlas app.
- Click "Uninstall".
Deactivating the Zoom Integration on Voice Atlas
Go to the Voice Atlas Web App.
Introduce your email and password into the form.
Click “OPEN” on the Atlas for which you would like to disable a chatbot.
Click the “Integrations” tab.
Under Zoom click “OPEN”.
Click the “TOGGLE” in the top, right hand-corner - it will turn from PINK (active) to GRAY (inactive).
Click “SAVE”.
Once you finish using the system go to the "Logout" option in the main menu.